All Images
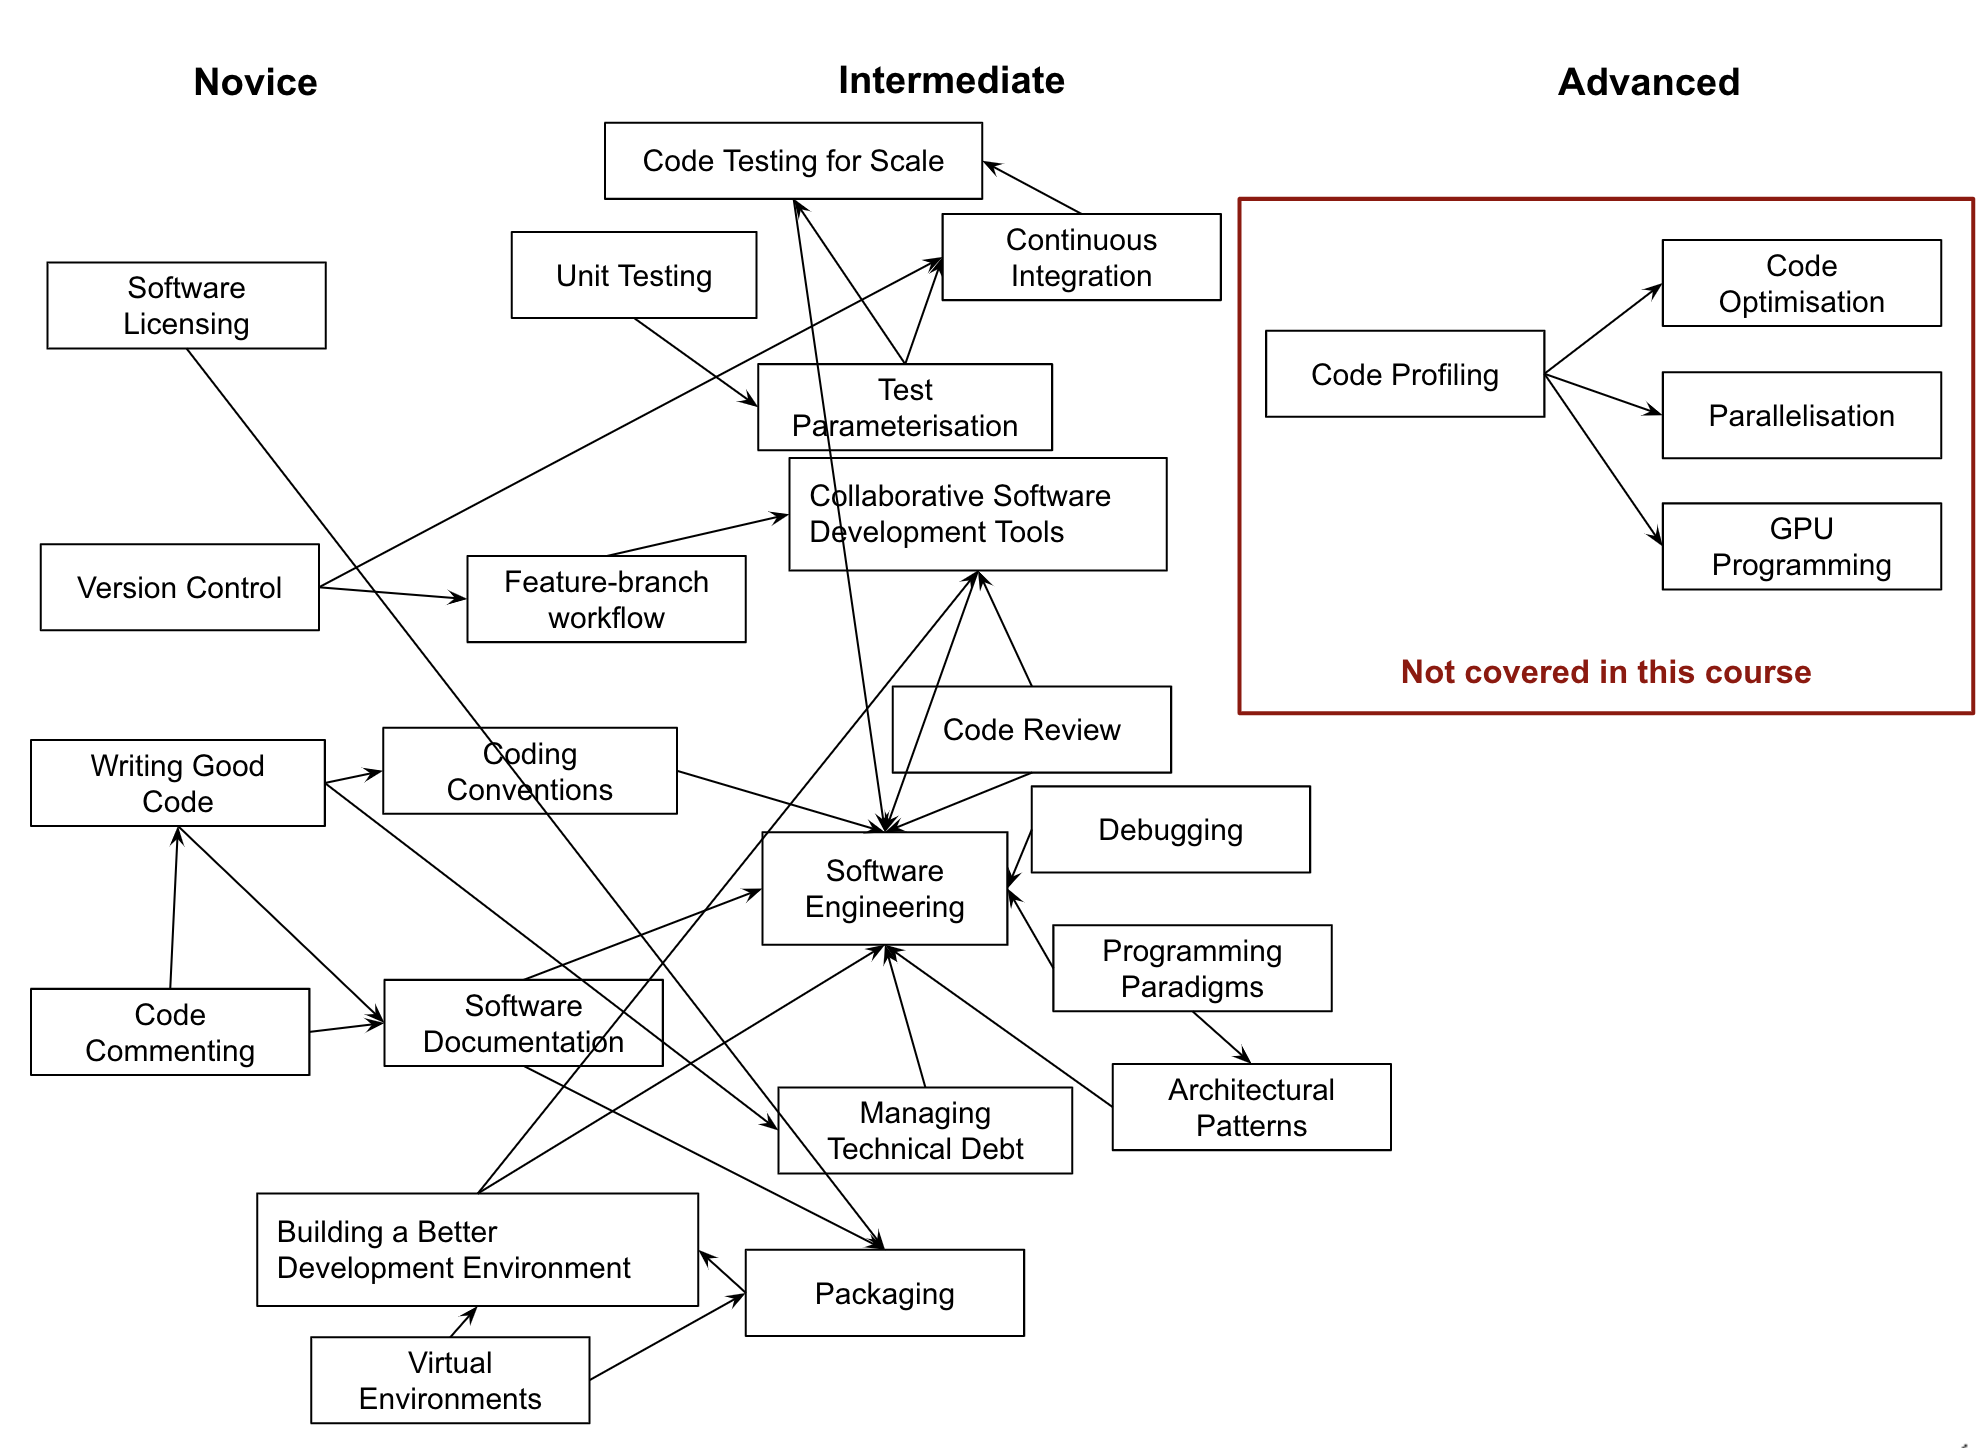
Setting the Scene
Figure 1

Section 1: Setting Up Environment For Collaborative Code Development
Figure 1

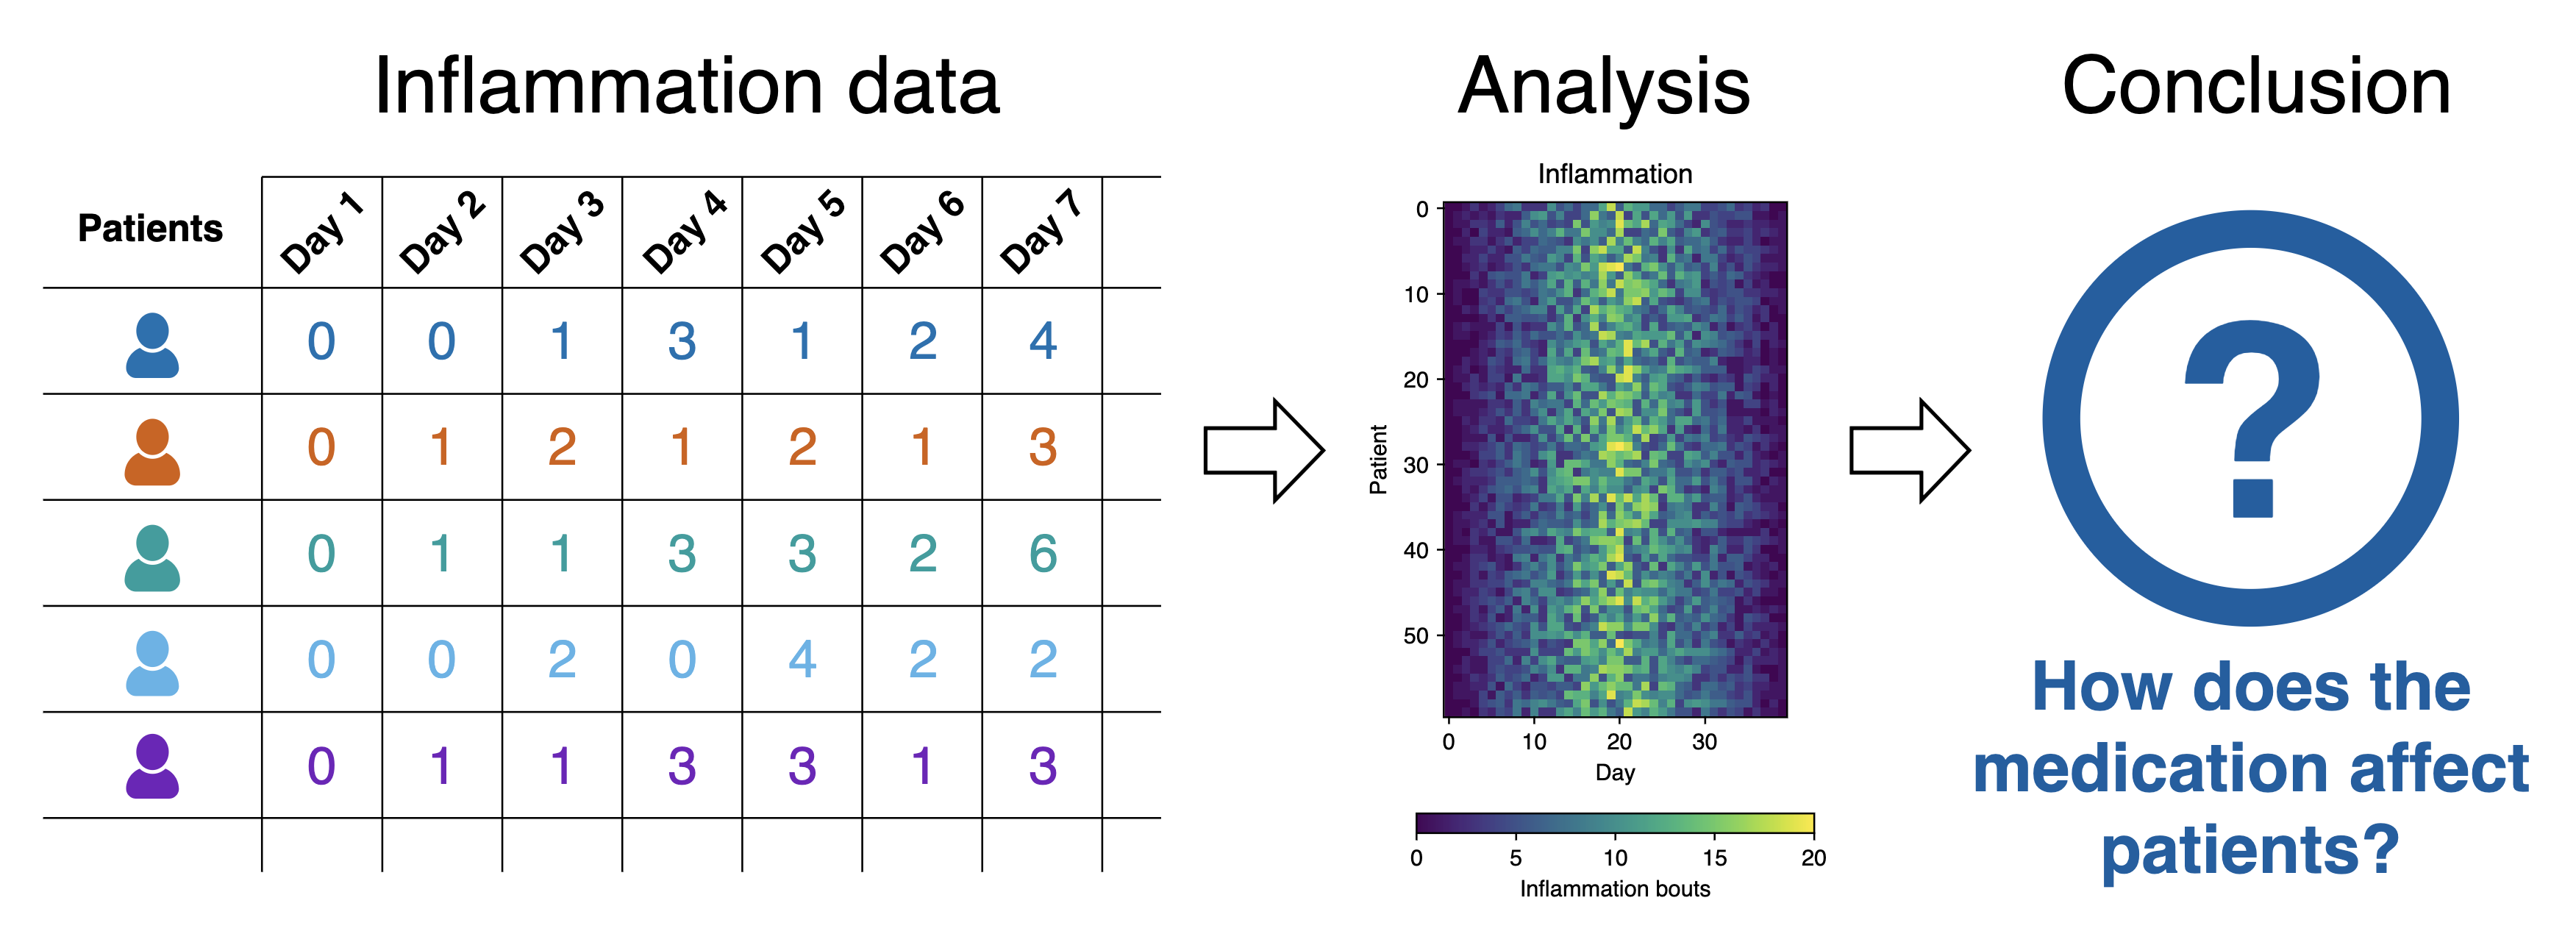
1.1 Introduction to Our Software Project
Figure 1
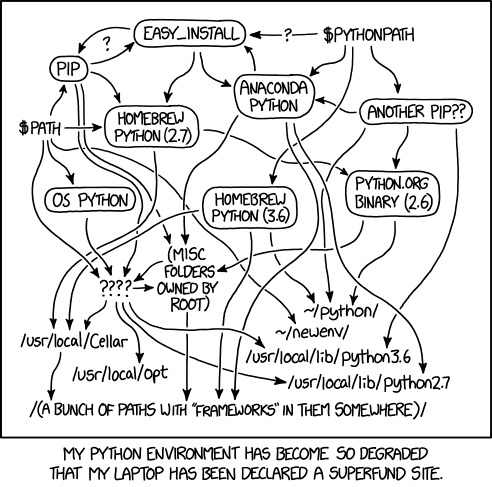
1.2 Virtual Environments For Software Development
Figure 1
1.3 Integrated Software Development Environments
Figure 1
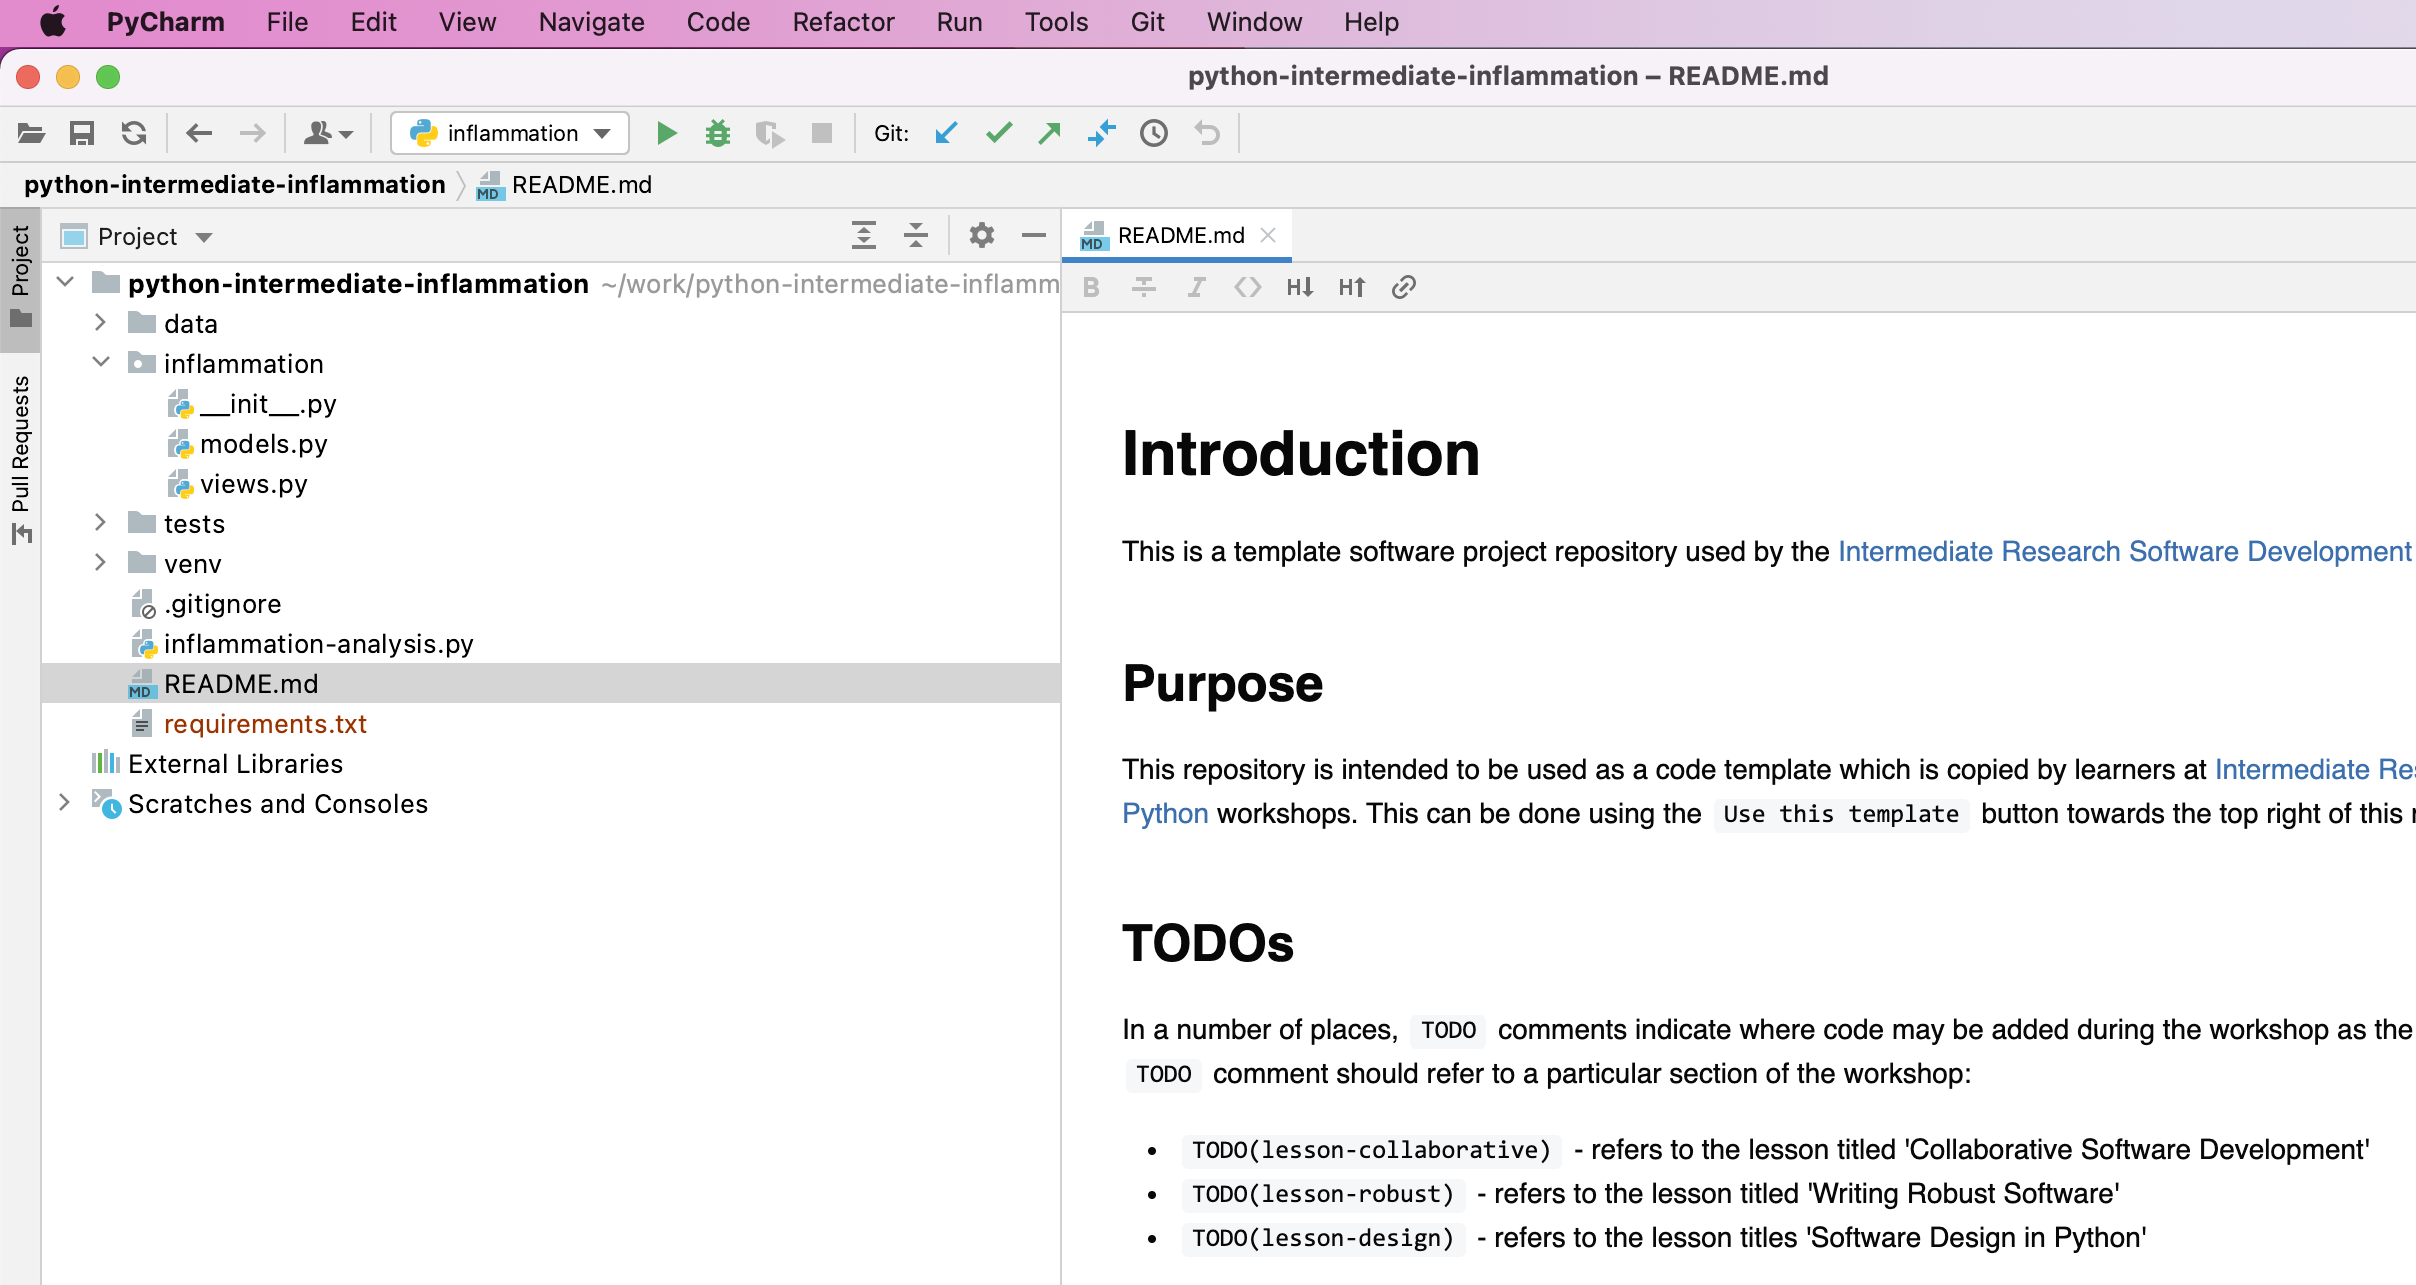
Figure 2

Figure 3
Virtualenv Environment from the list on the left
and ensure that Existing environment checkbox is selected
within the popup window. In the Interpreter field point to
the Python 3 executable inside your virtual environment’s
bin directory (make sure you navigate to it and select it
from the file browser rather than just accept the default offered by
PyCharm). Note that there is also an option to create a new virtual
environment, but we are not using that option as we want to reuse the
one we created from the command line in the previous episode. 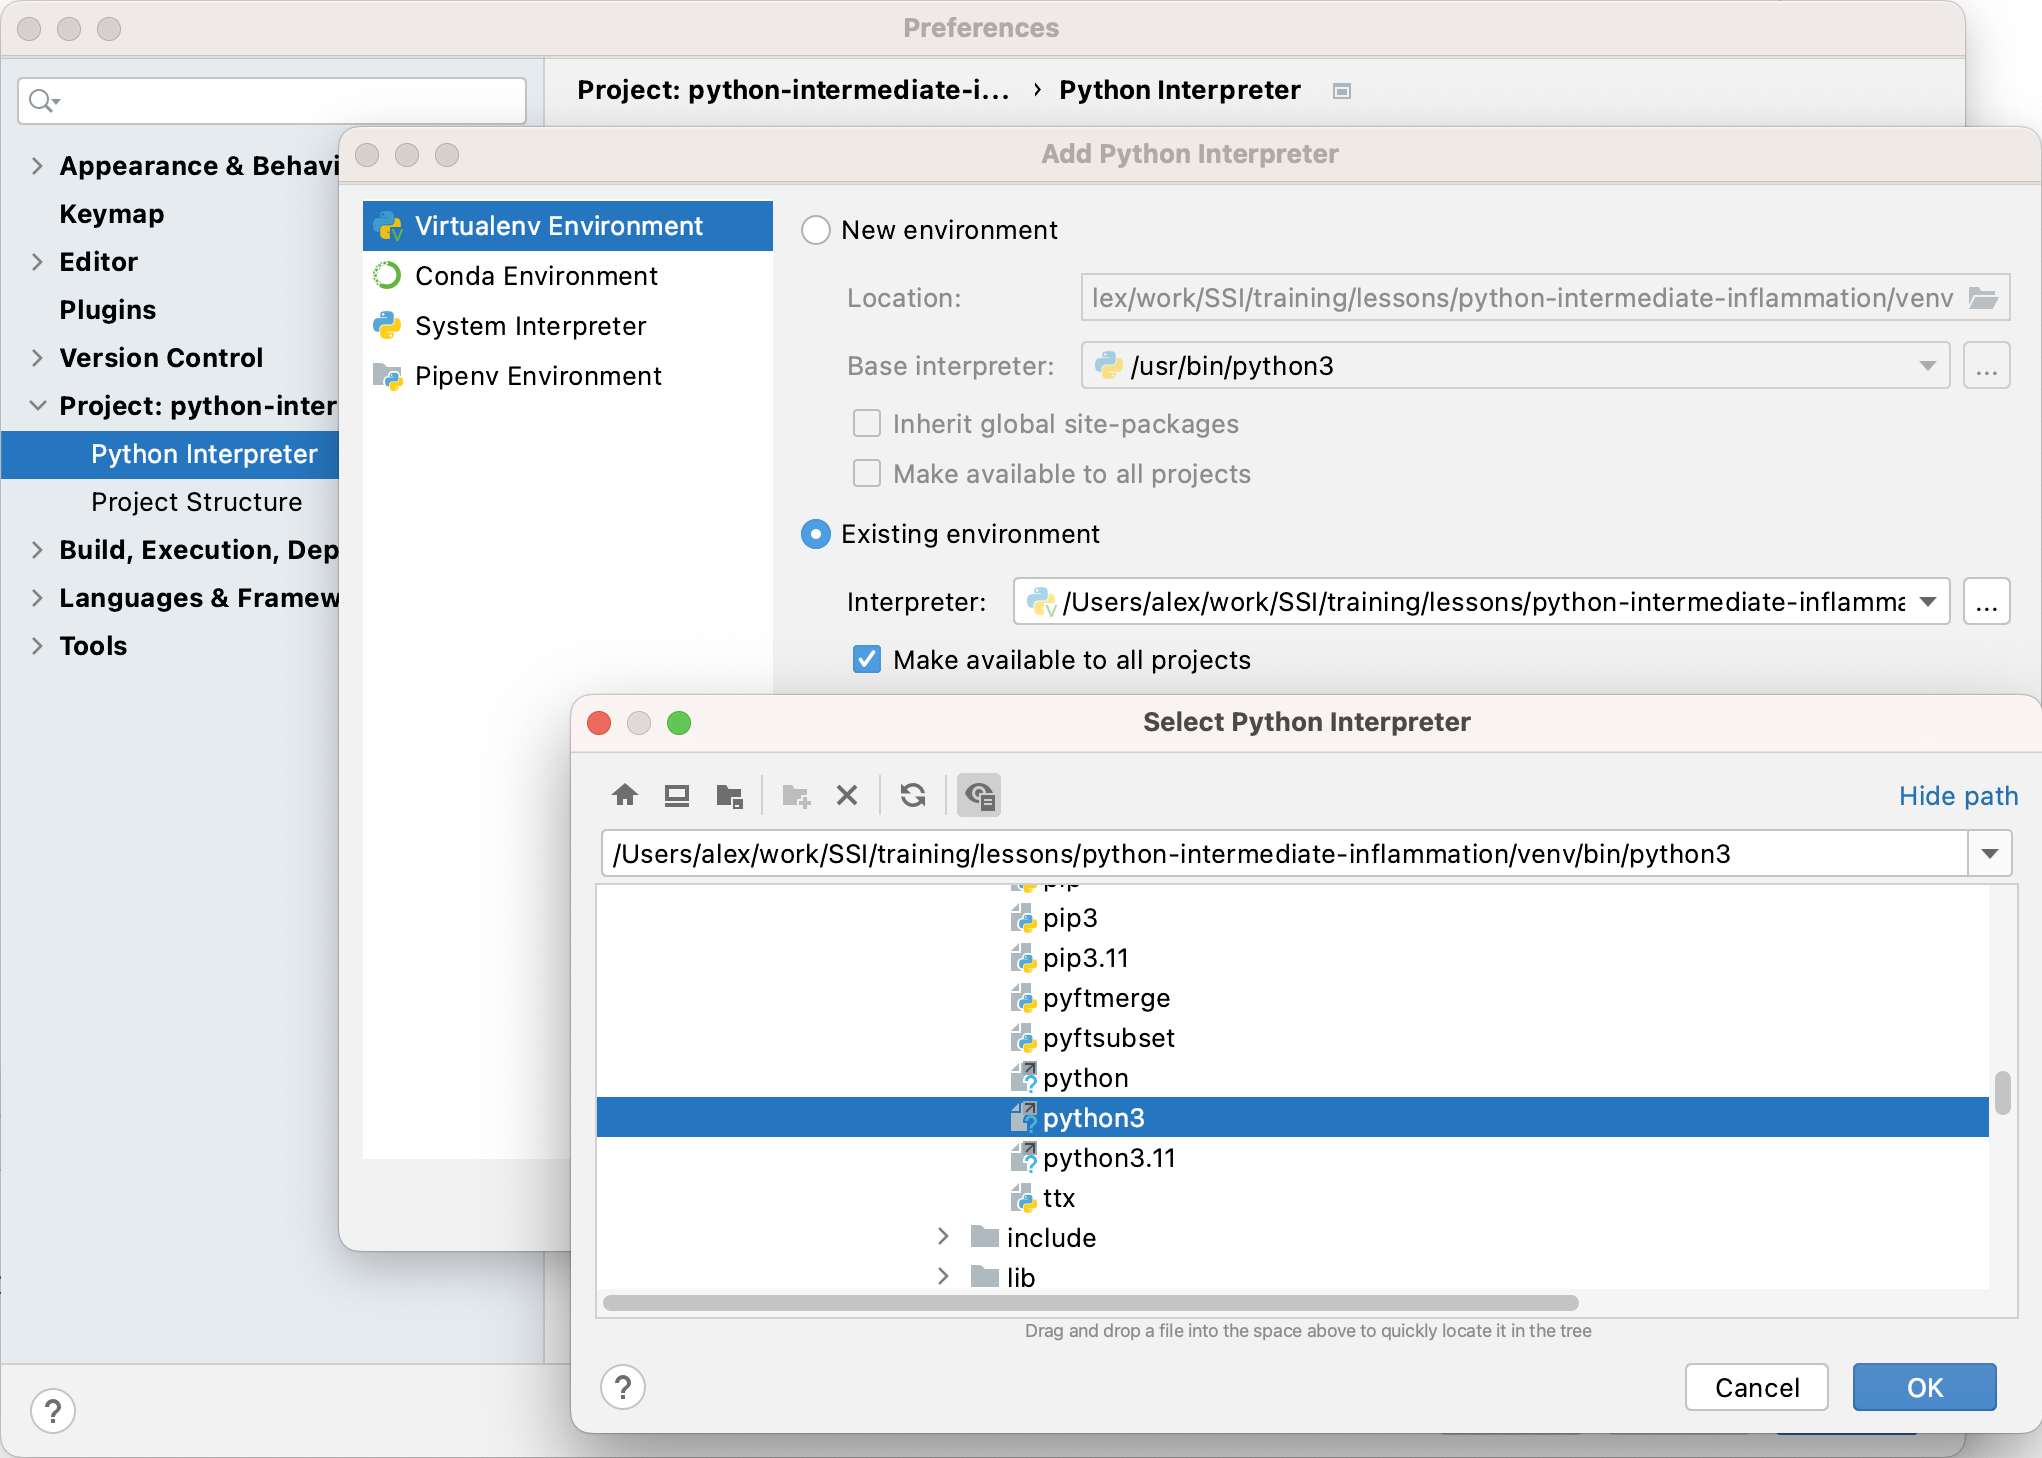
Figure 4
Figure 5
+ icon at the top of the window. In the
window that appears, search for the name of the library
(pytest), select it from the list, then select
Install Package. Once it finishes installing, you can close
that window. 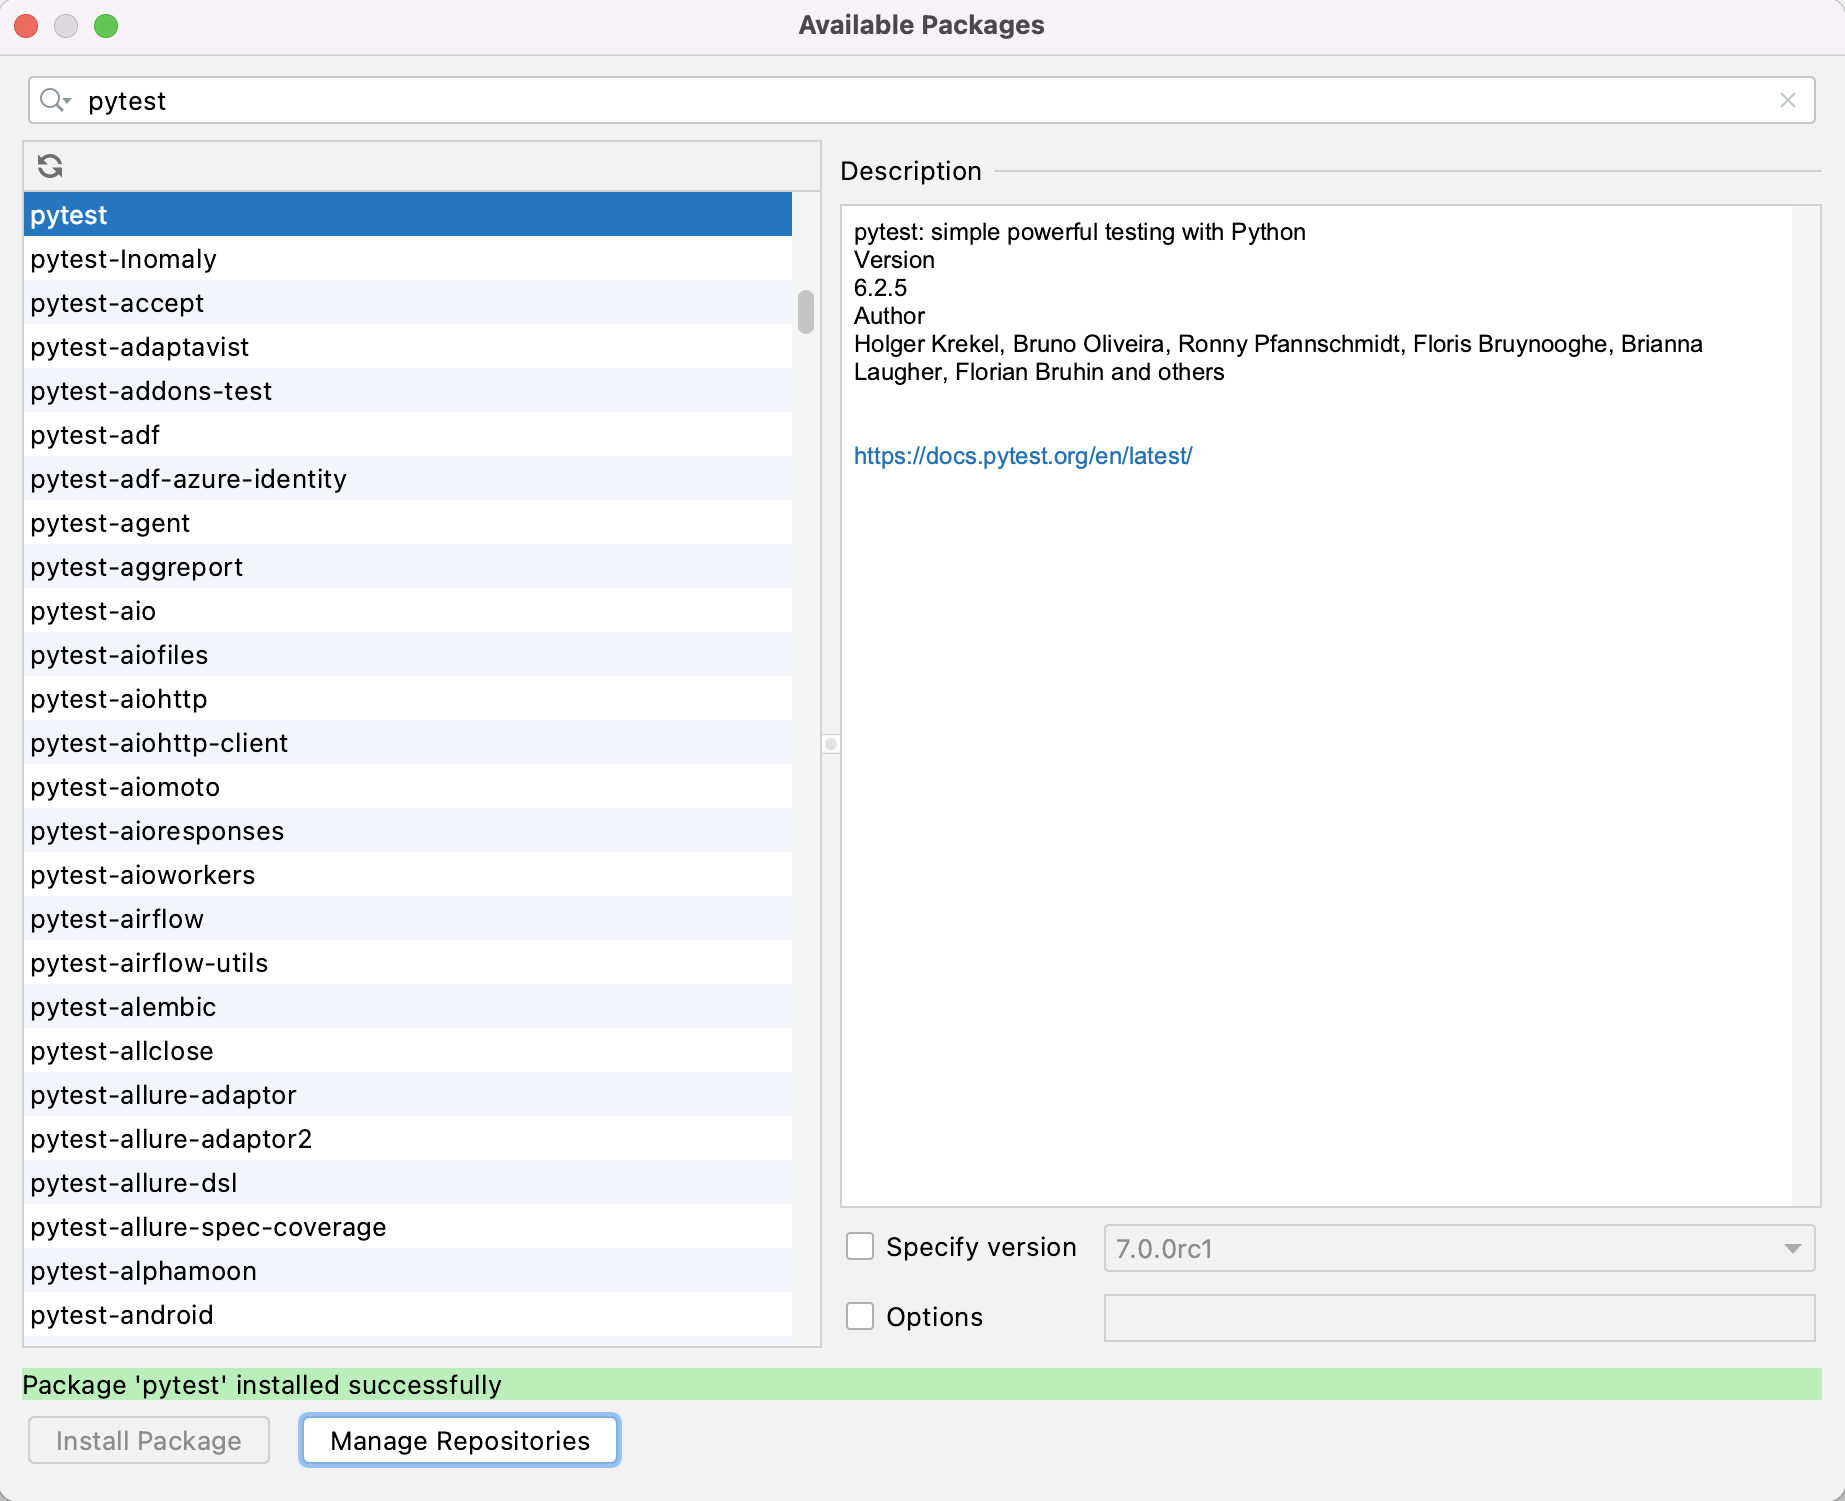
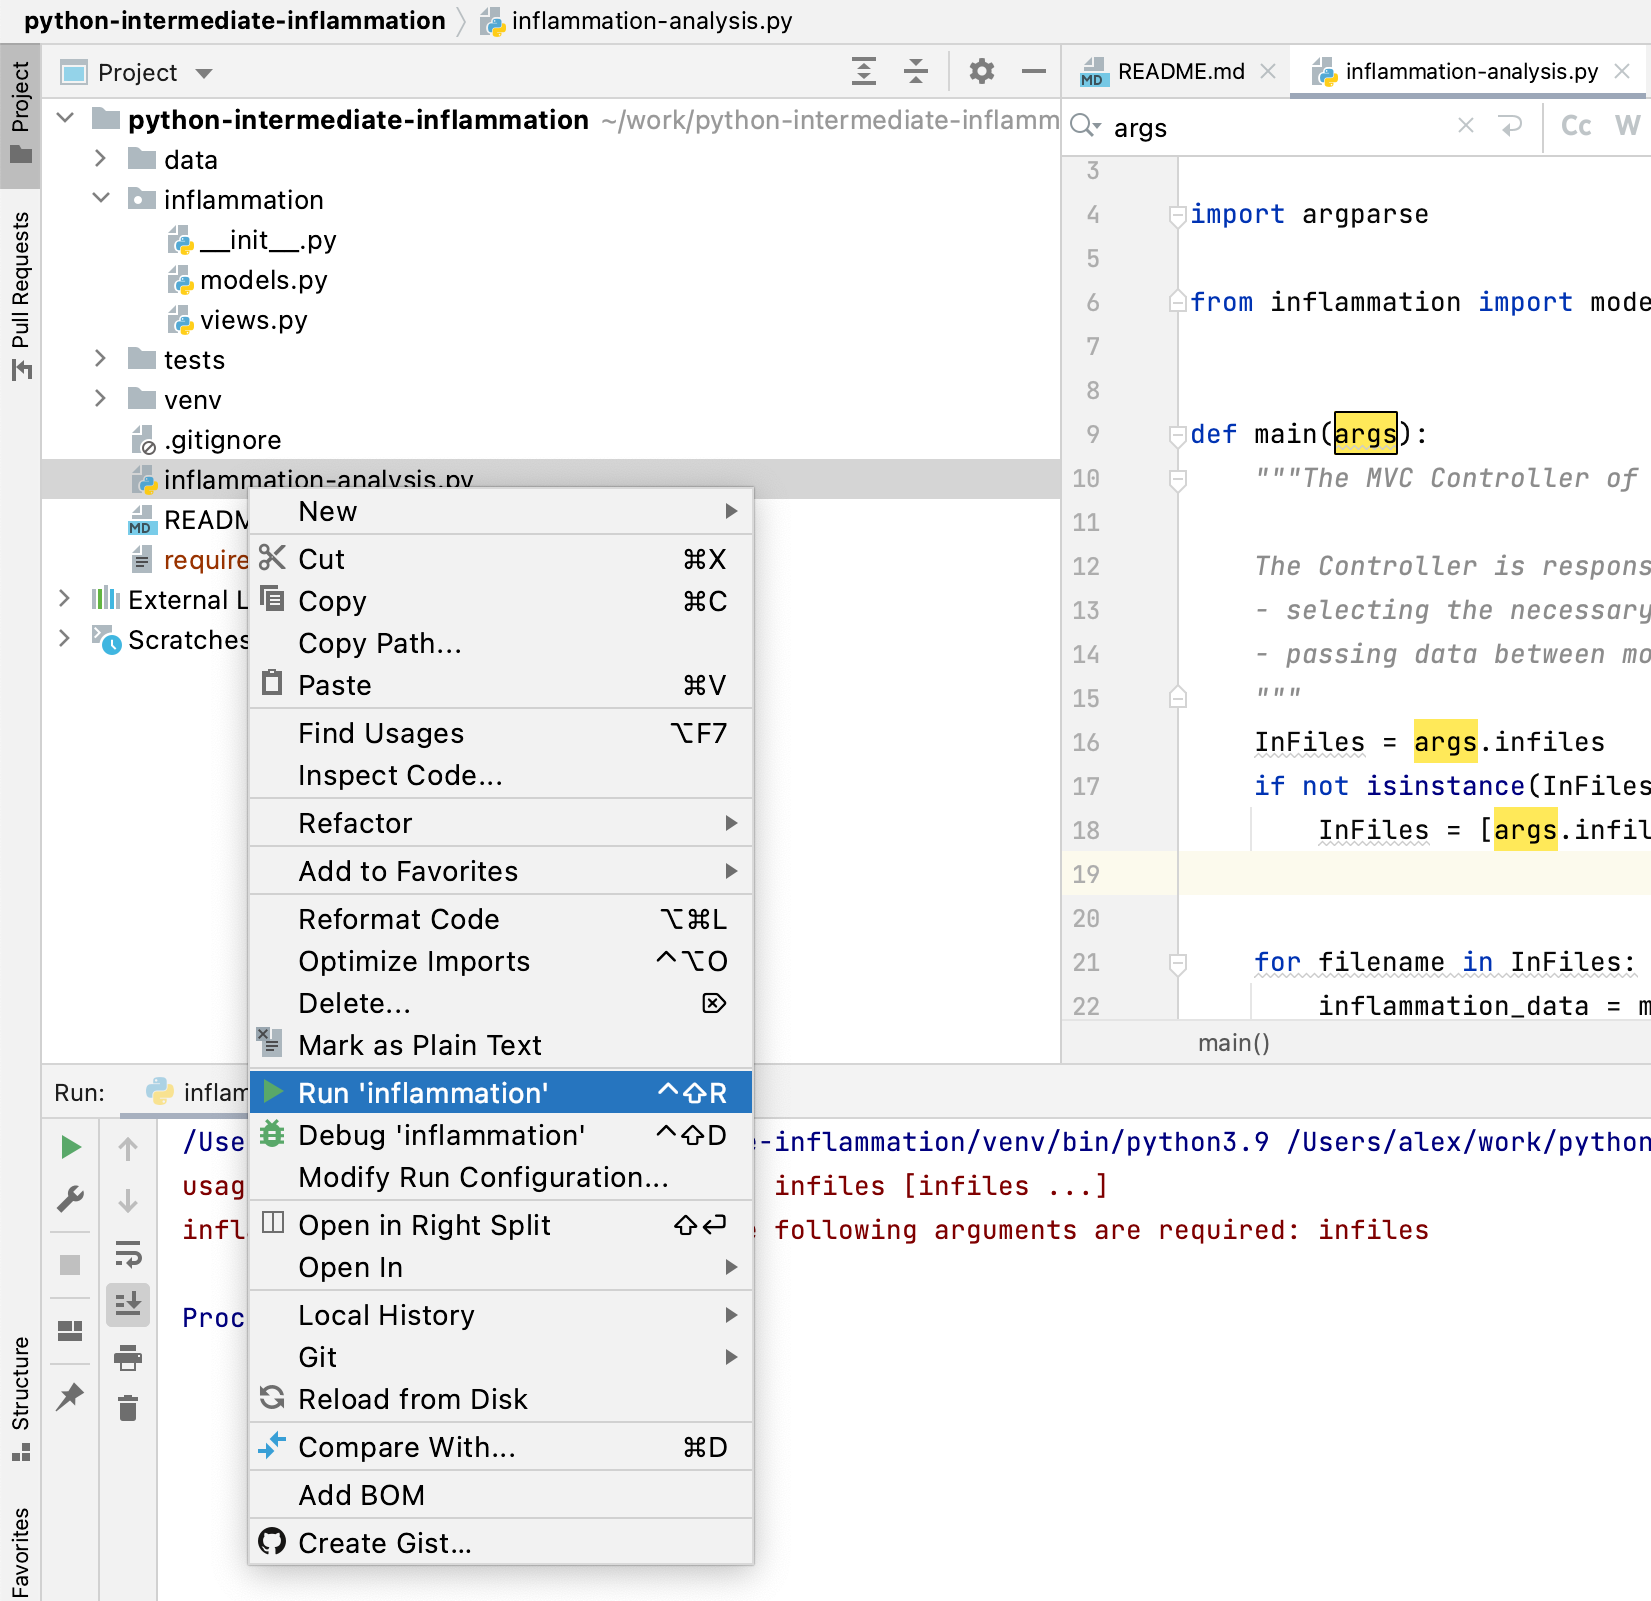
Figure 6
Add new run configuration... then
Python. 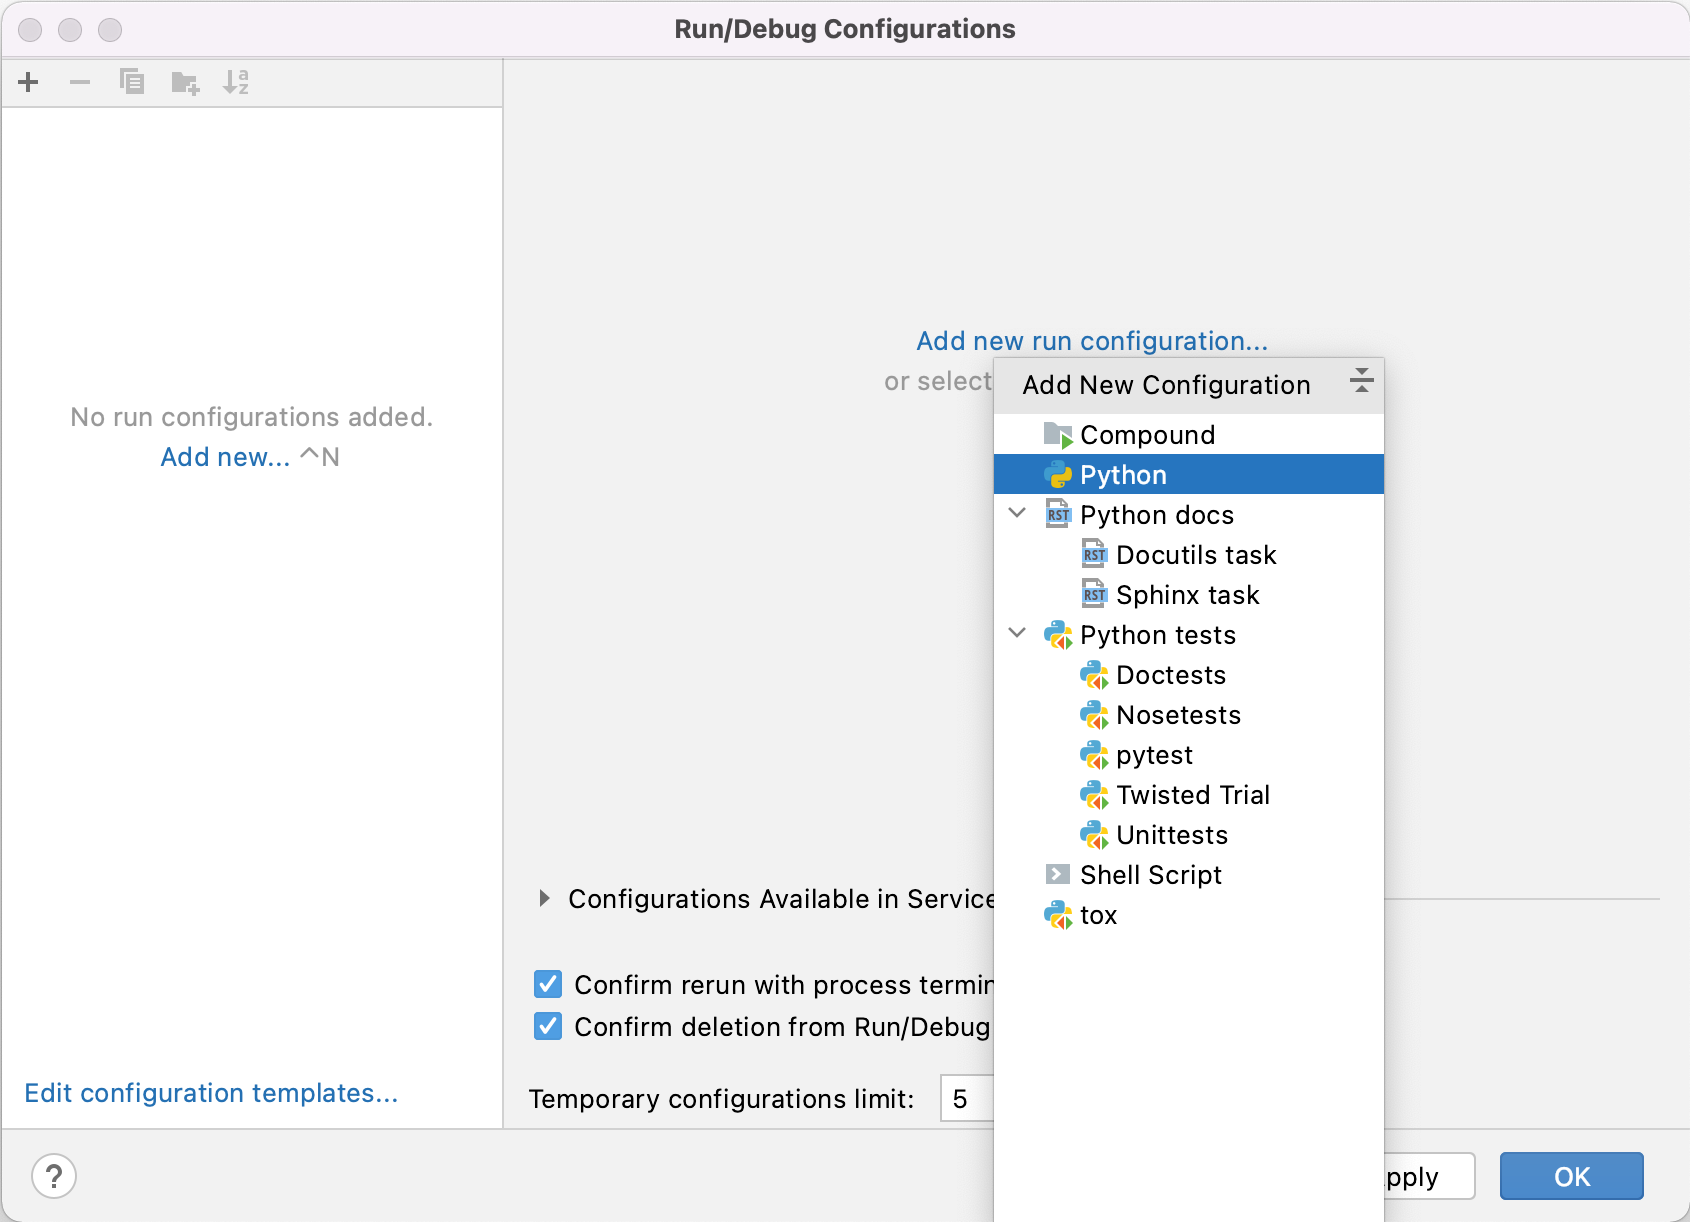
Figure 7
Script path field
select the folder button and find and select
inflammation-analysis.py. This tells PyCharm which script
to run (i.e. what the main entry point to our application is). 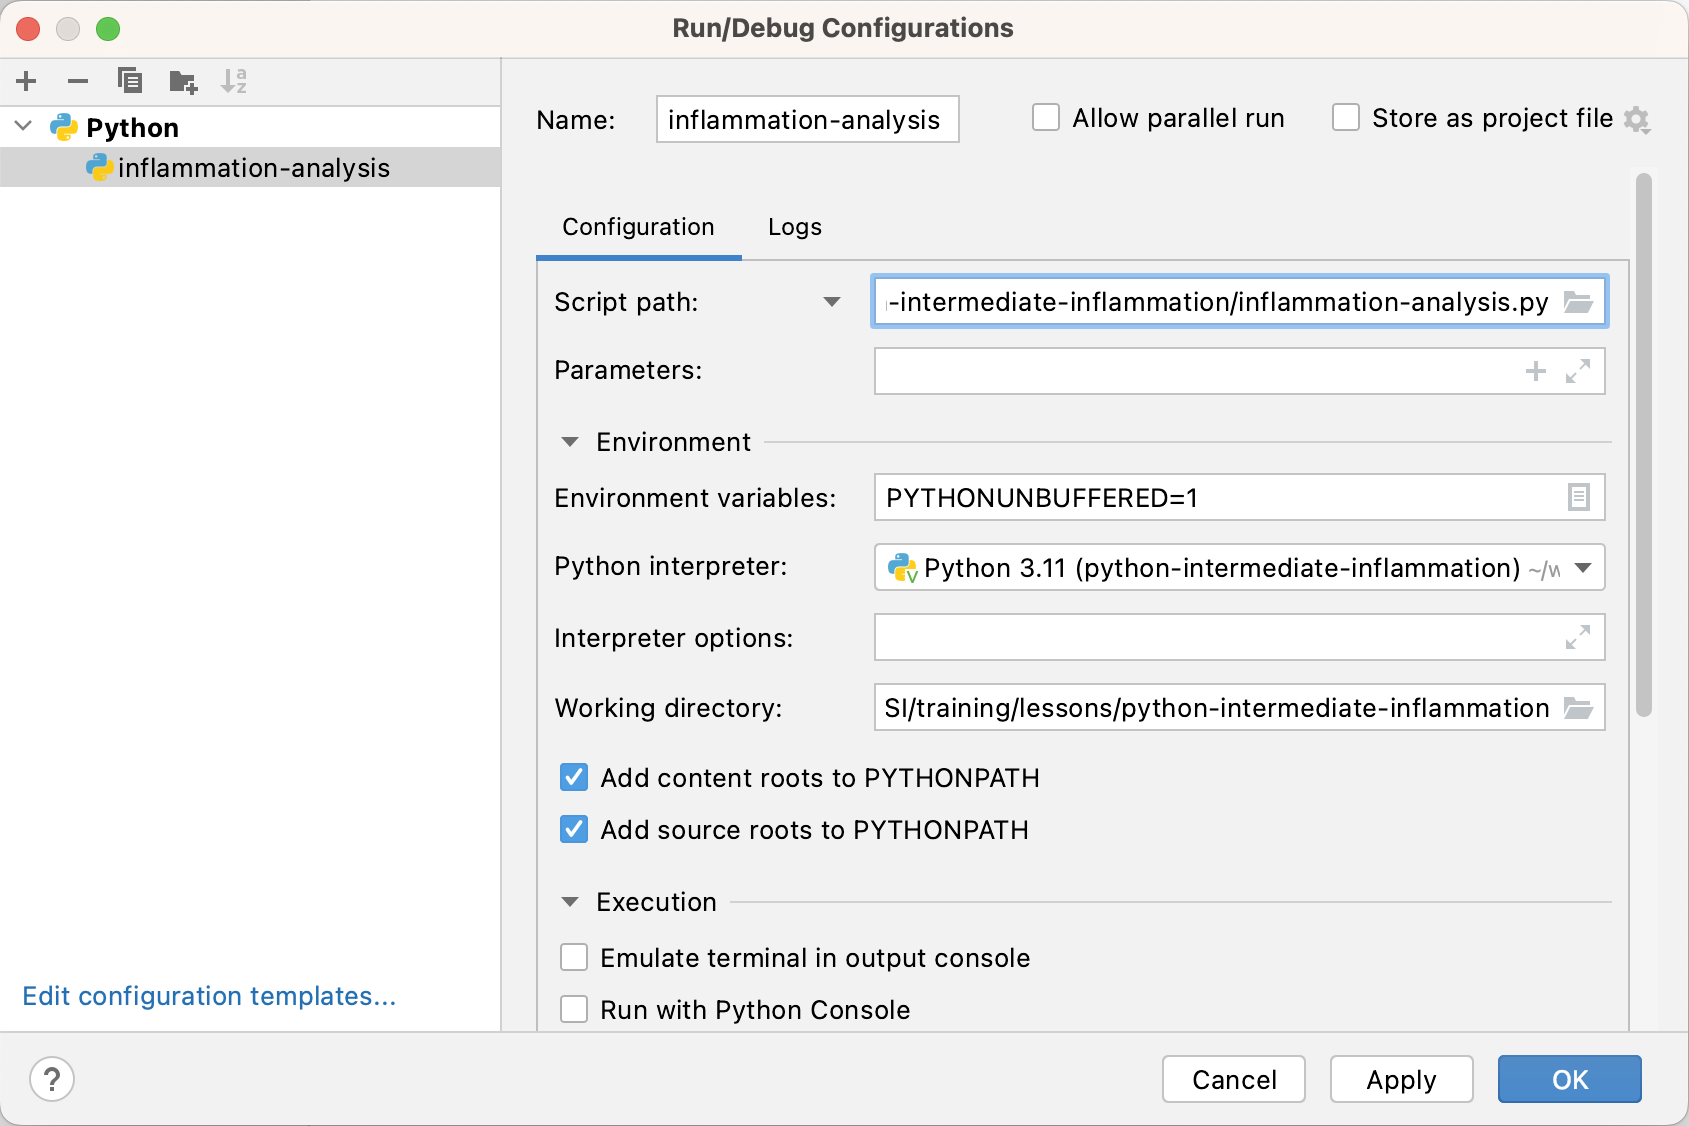
Figure 8
Figure 9

Figure 10
Figure 11
Figure 12

Figure 13
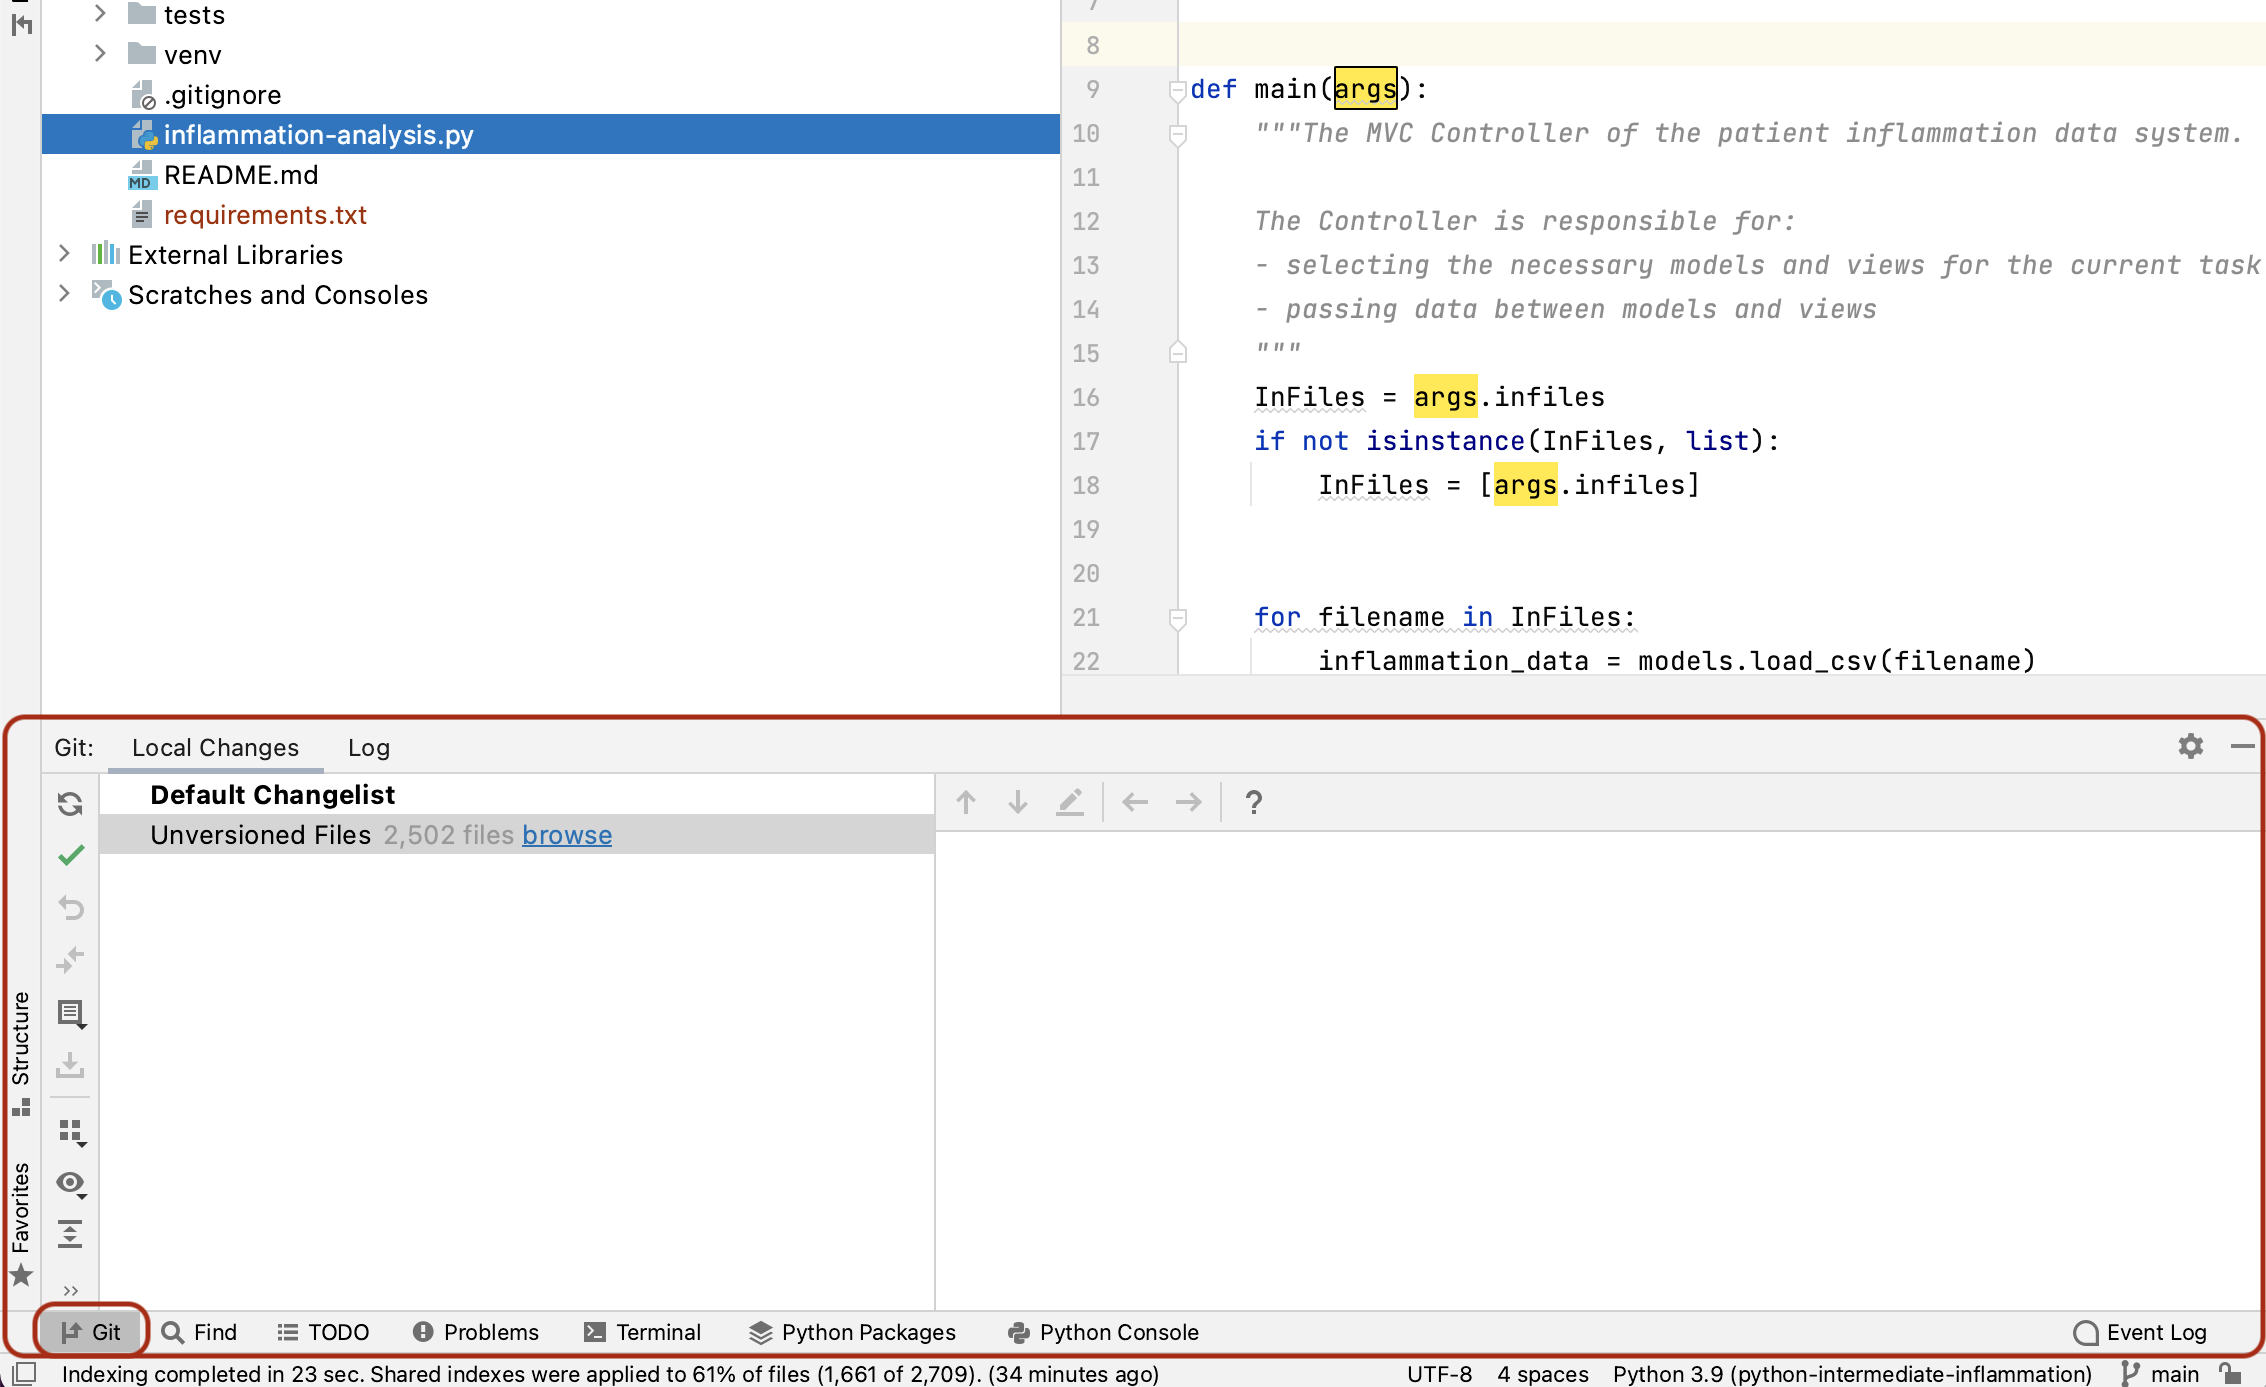
Figure 14
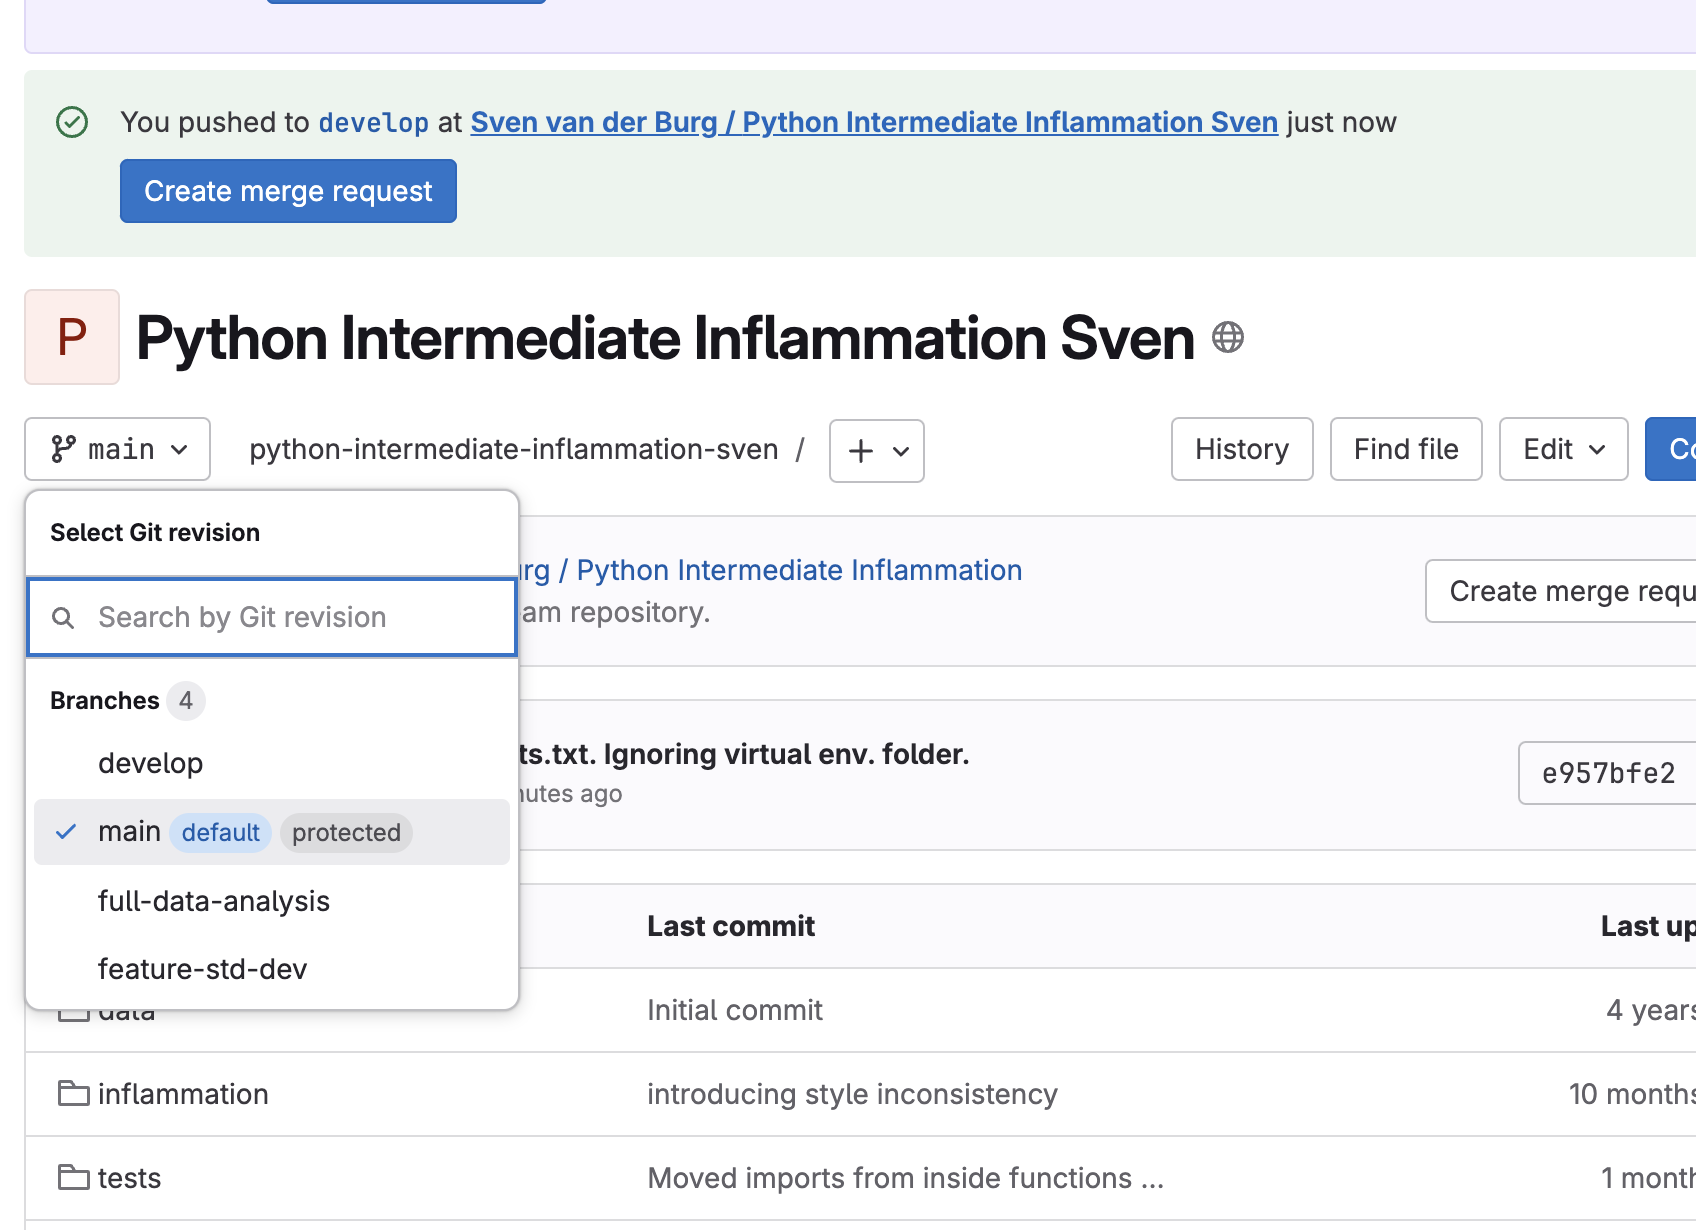
1.4 Software Development Using Git and GitLab
Figure 1

Figure 2
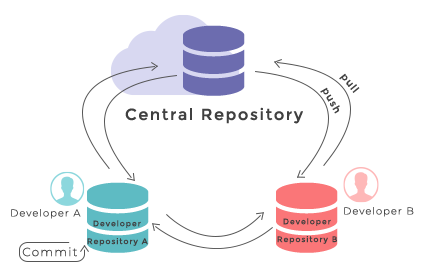
Figure 3

Figure 4
Figure 5
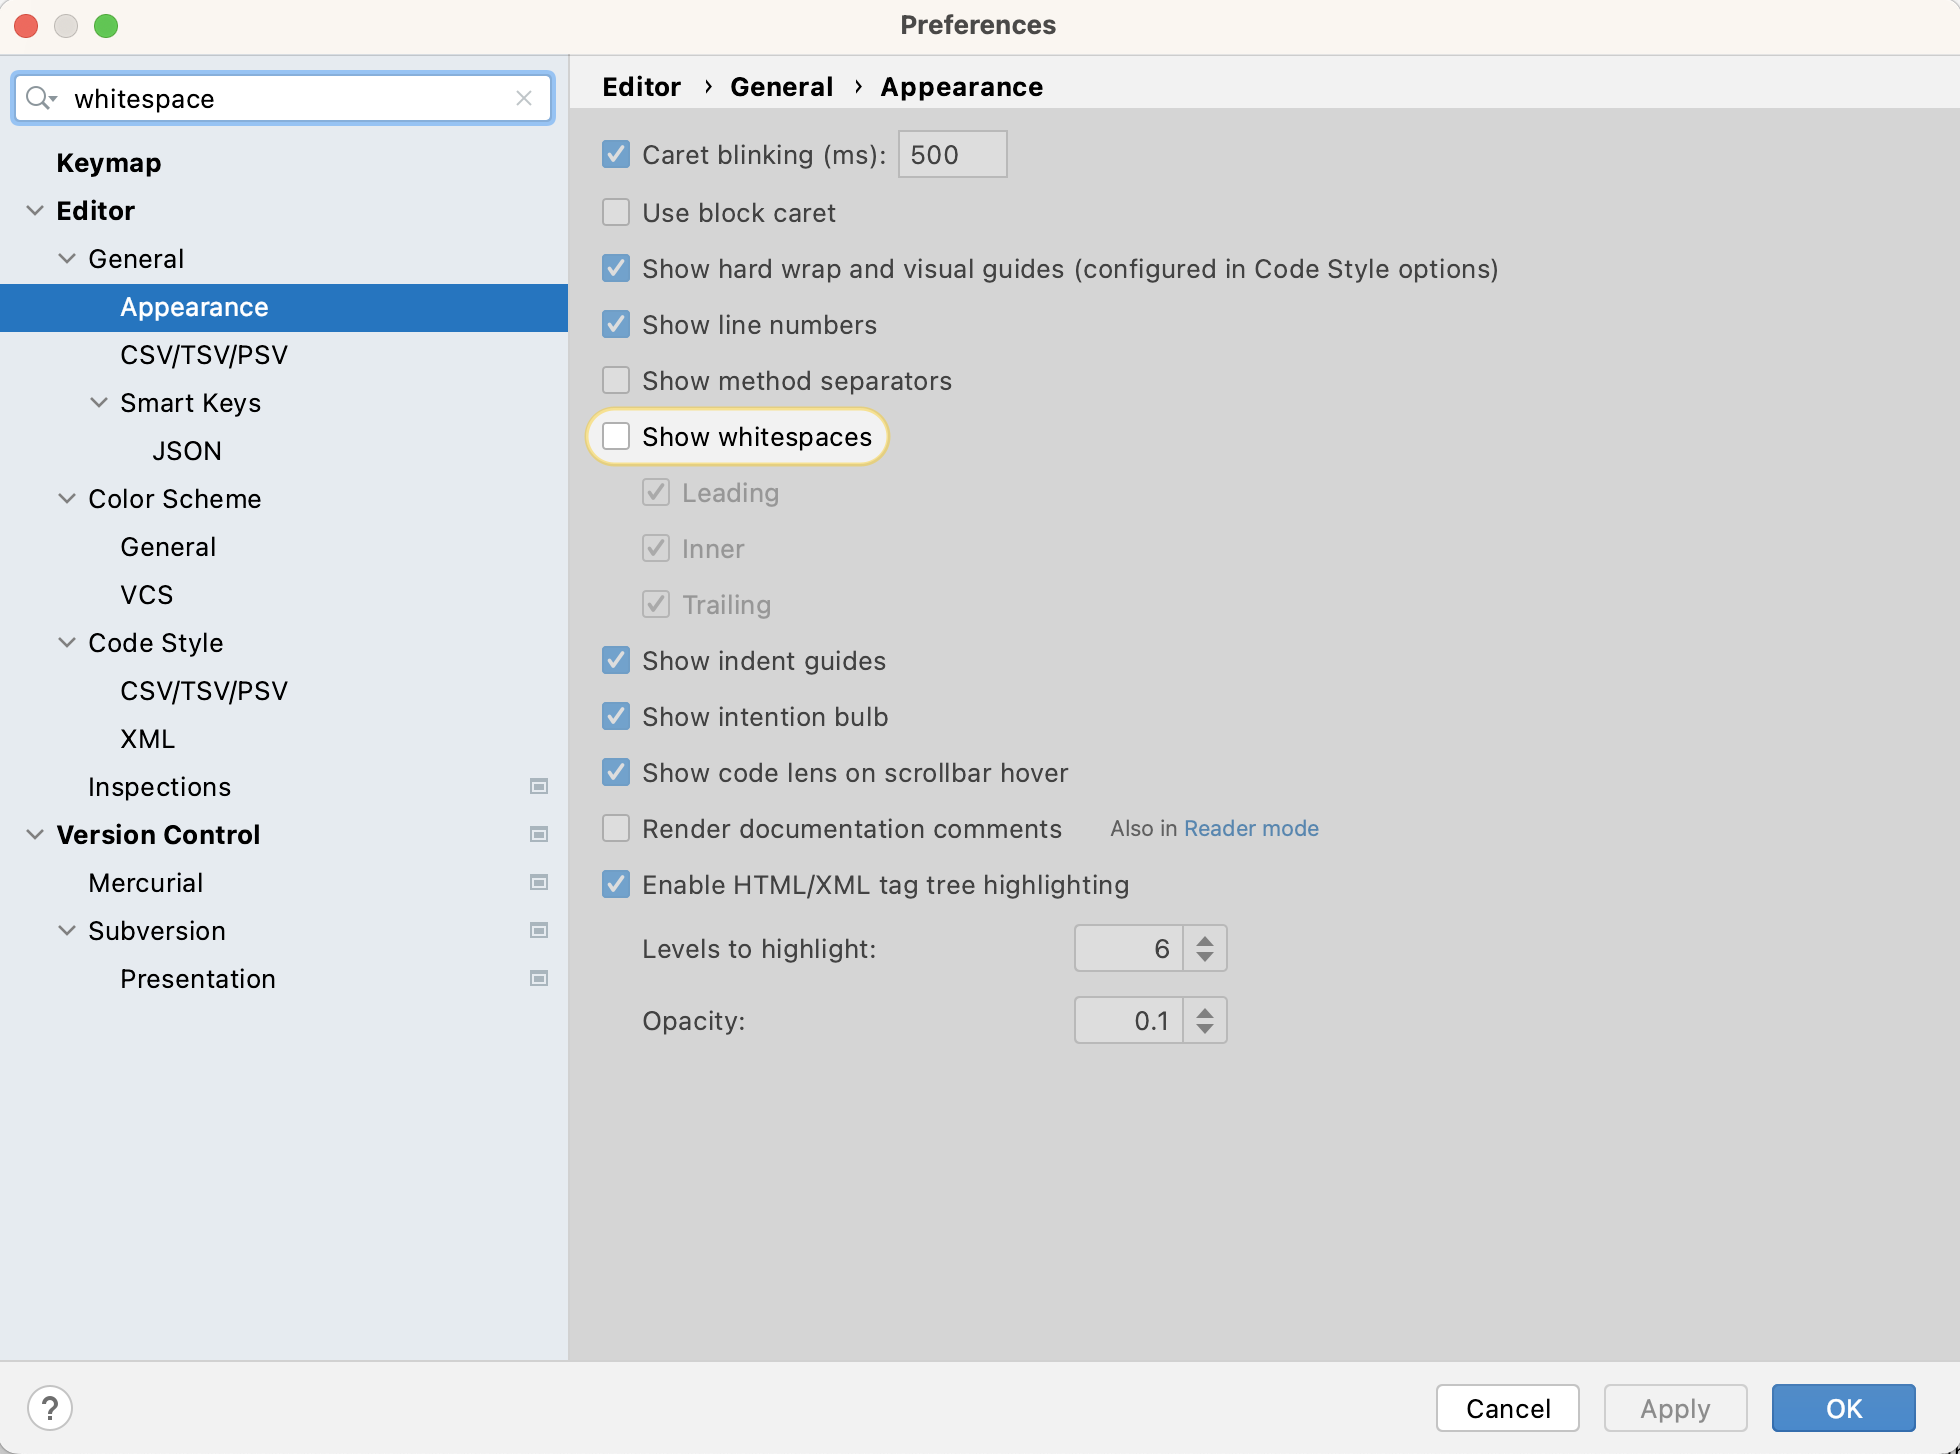
1.5 Python Code Style Conventions
Figure 1
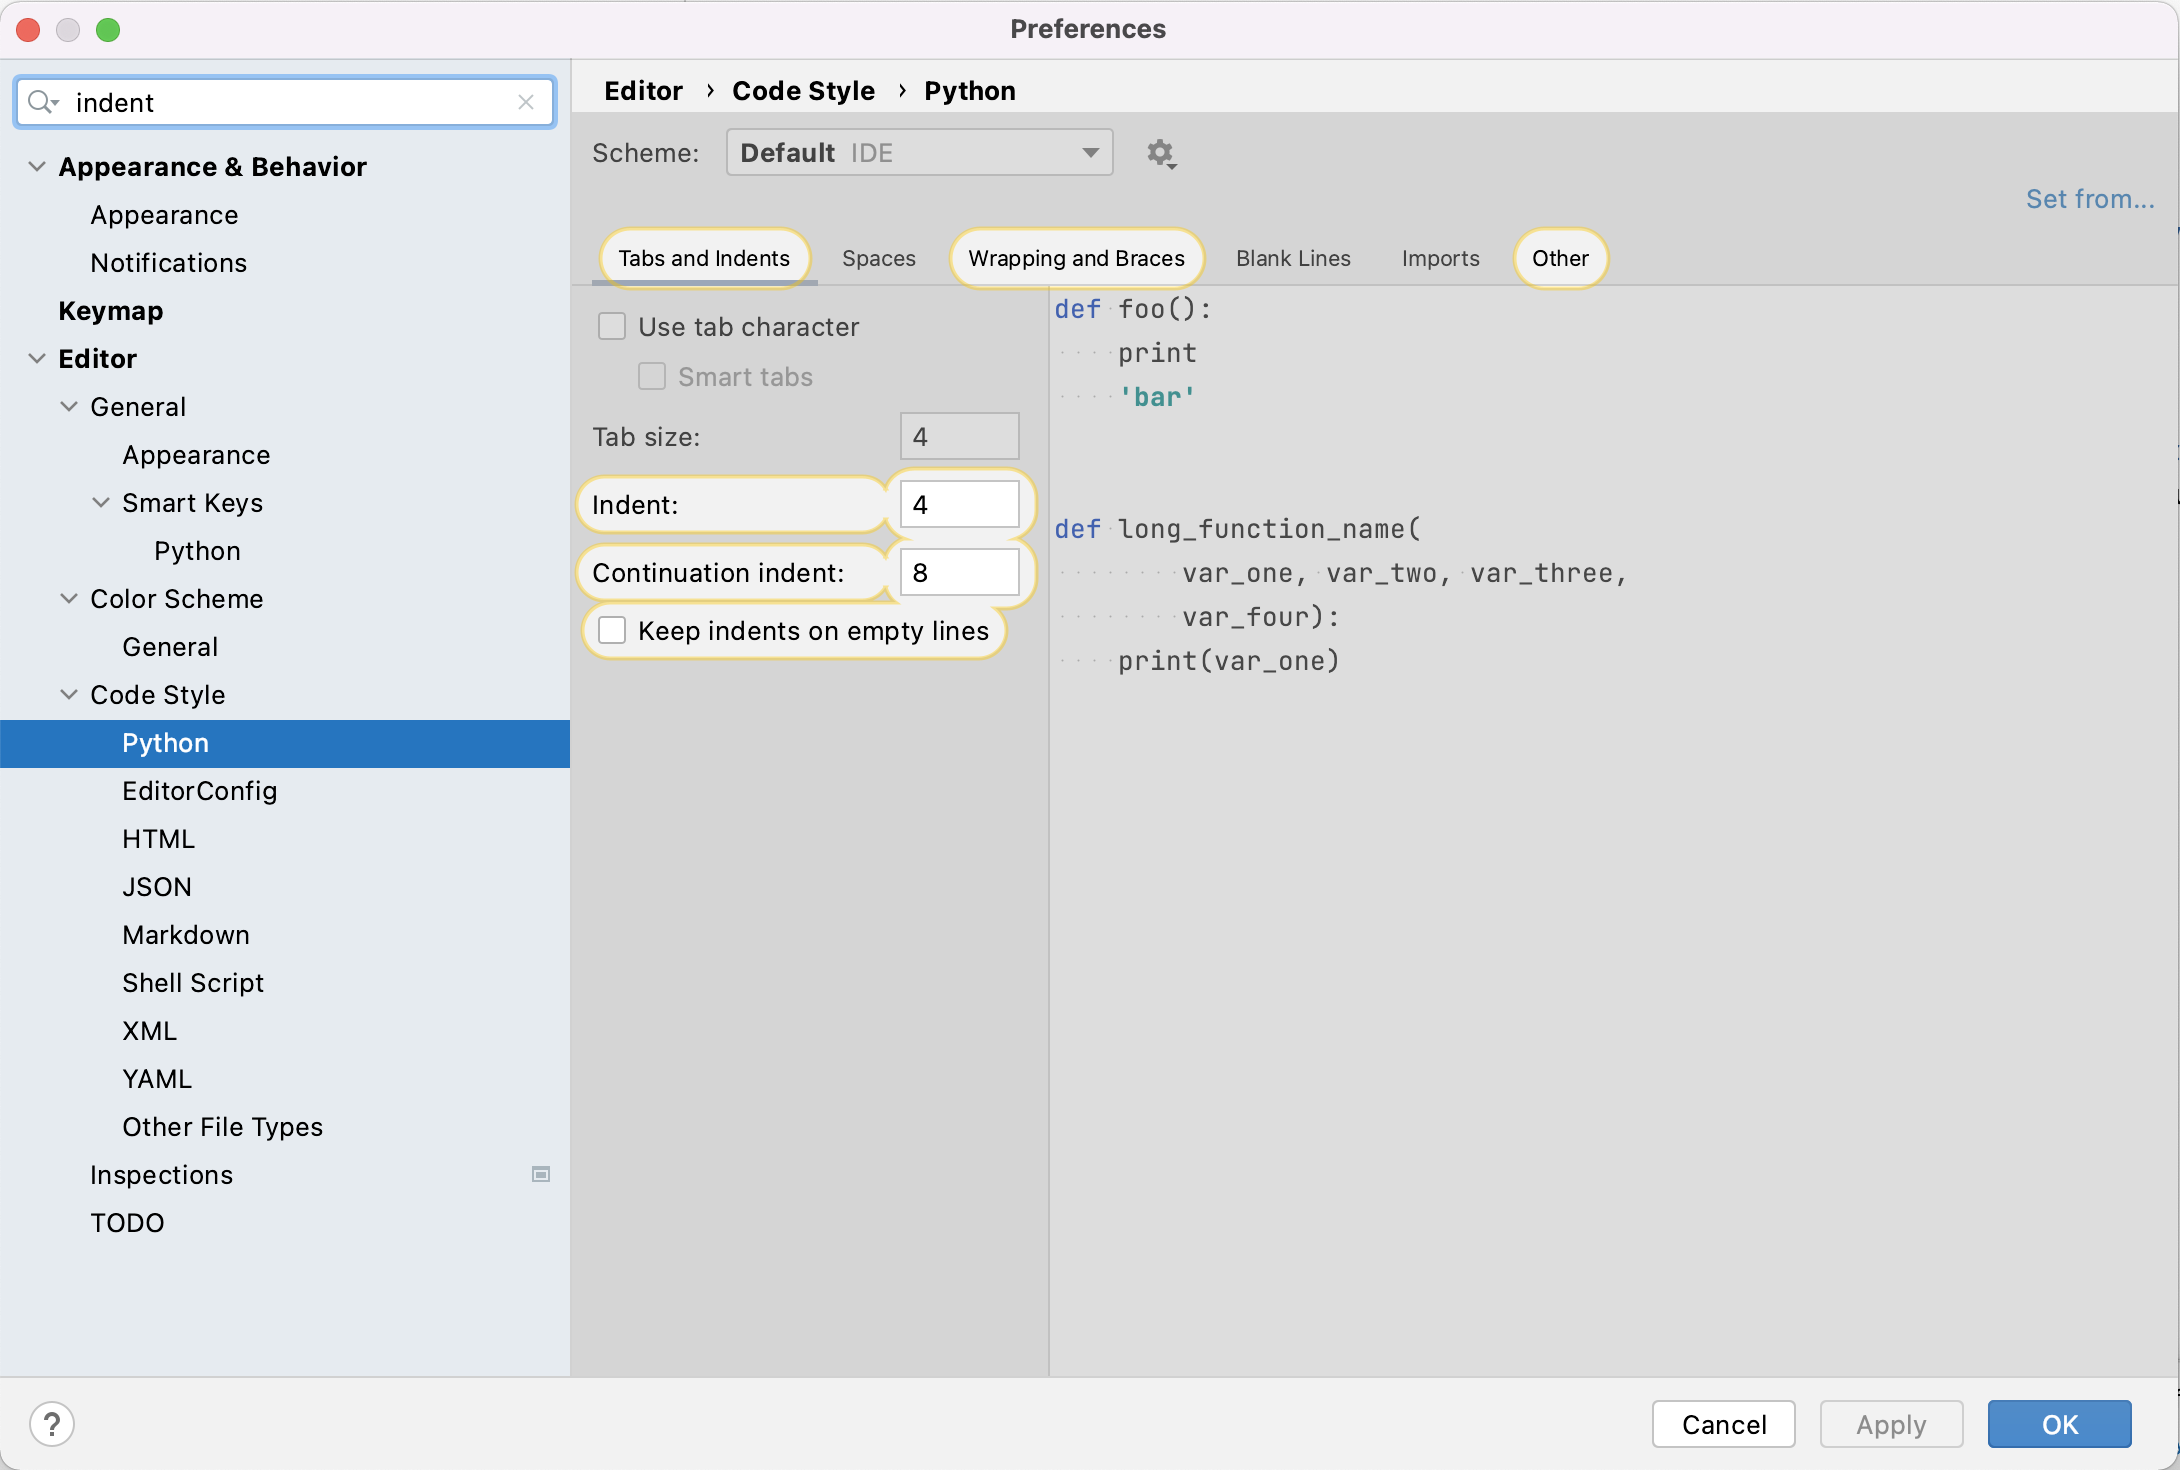
Figure 2
1.6 Verifying Code Style Using Linters
1.7 Optional Exercises
Section 2: Ensuring Correctness of Software at Scale
Figure 1

2.1 Automatically Testing Software
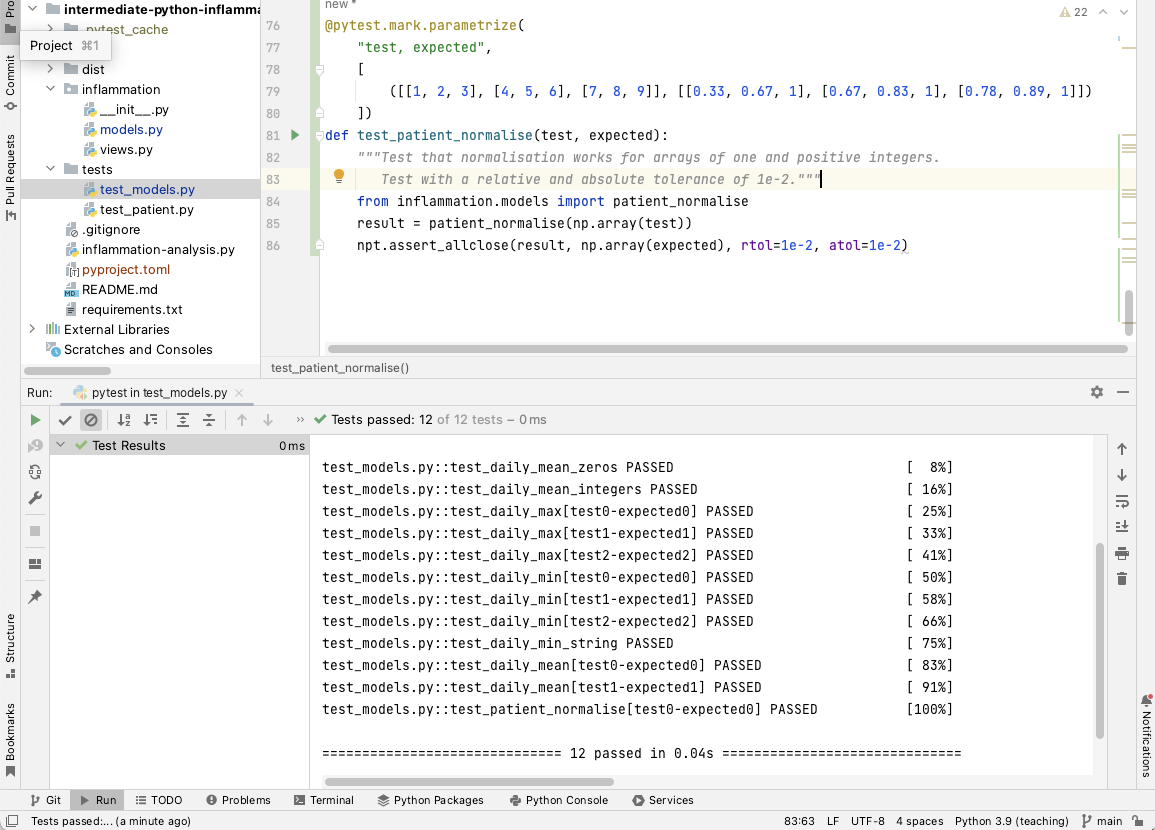
2.2 Scaling Up Unit Testing
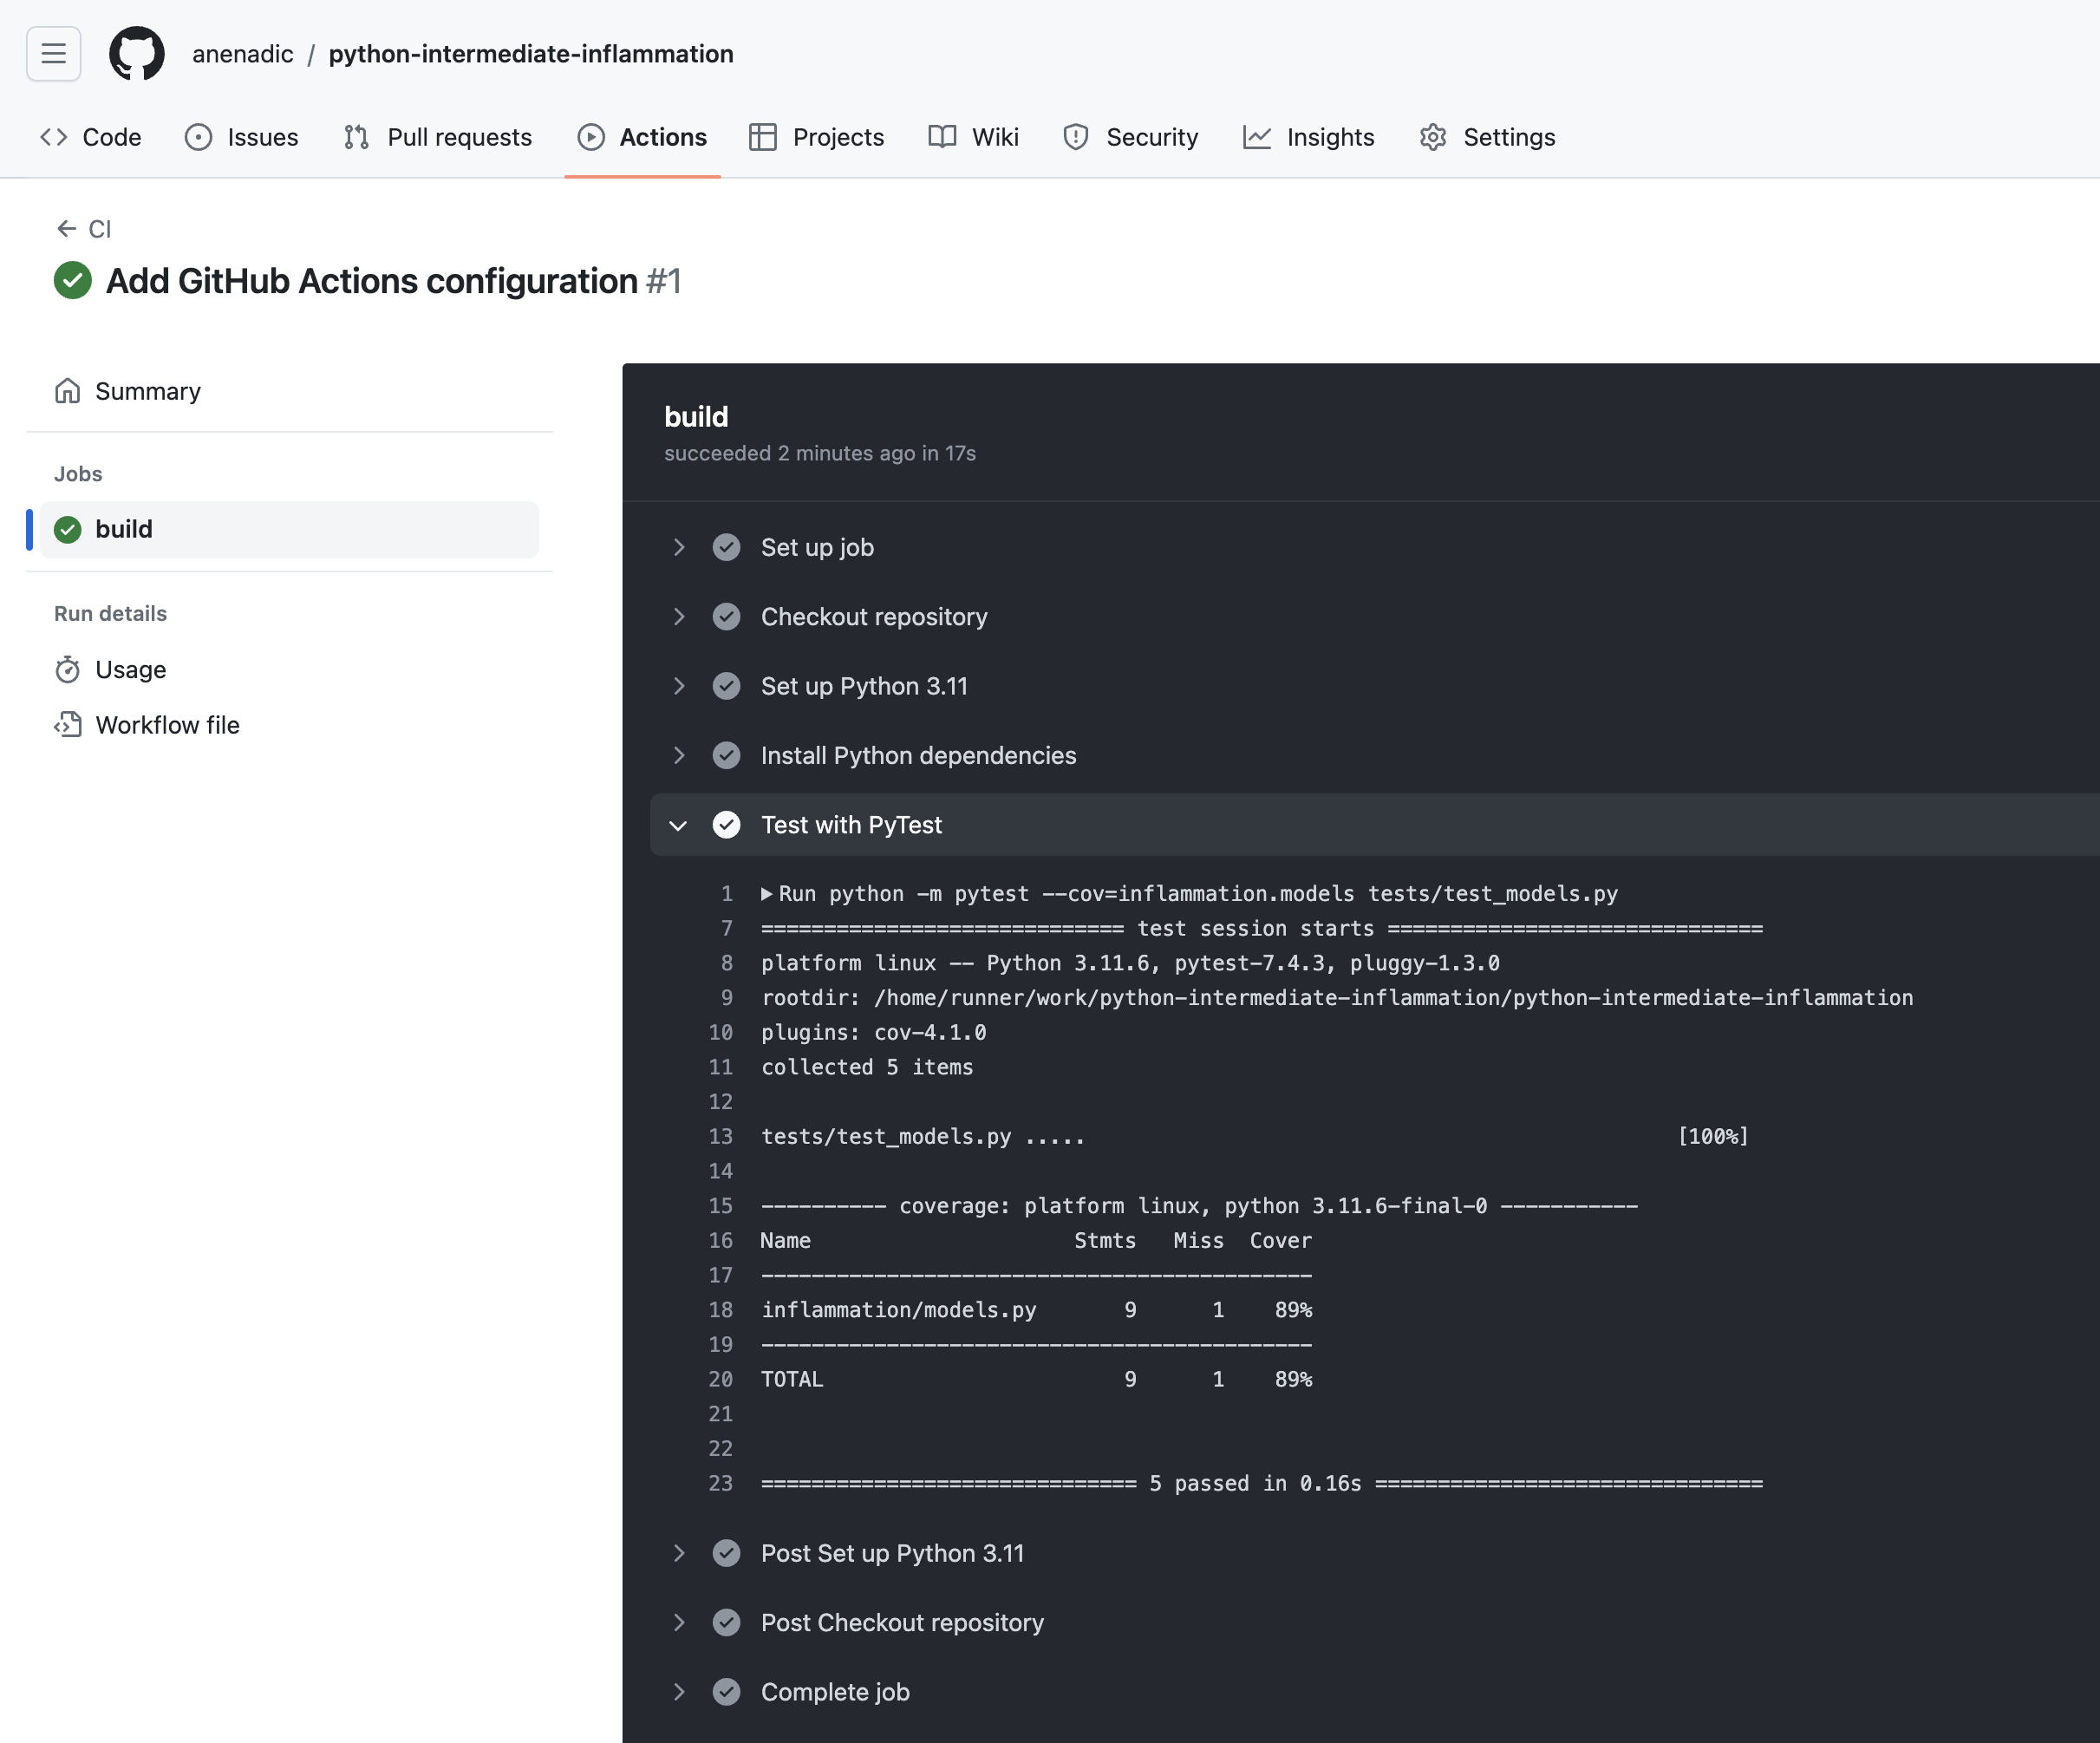
2.3 Continuous Integration for Automated Testing
Figure 1
You will see a list of Jobs and likely see a marker indicating that
it is still in progress. 
Figure 2
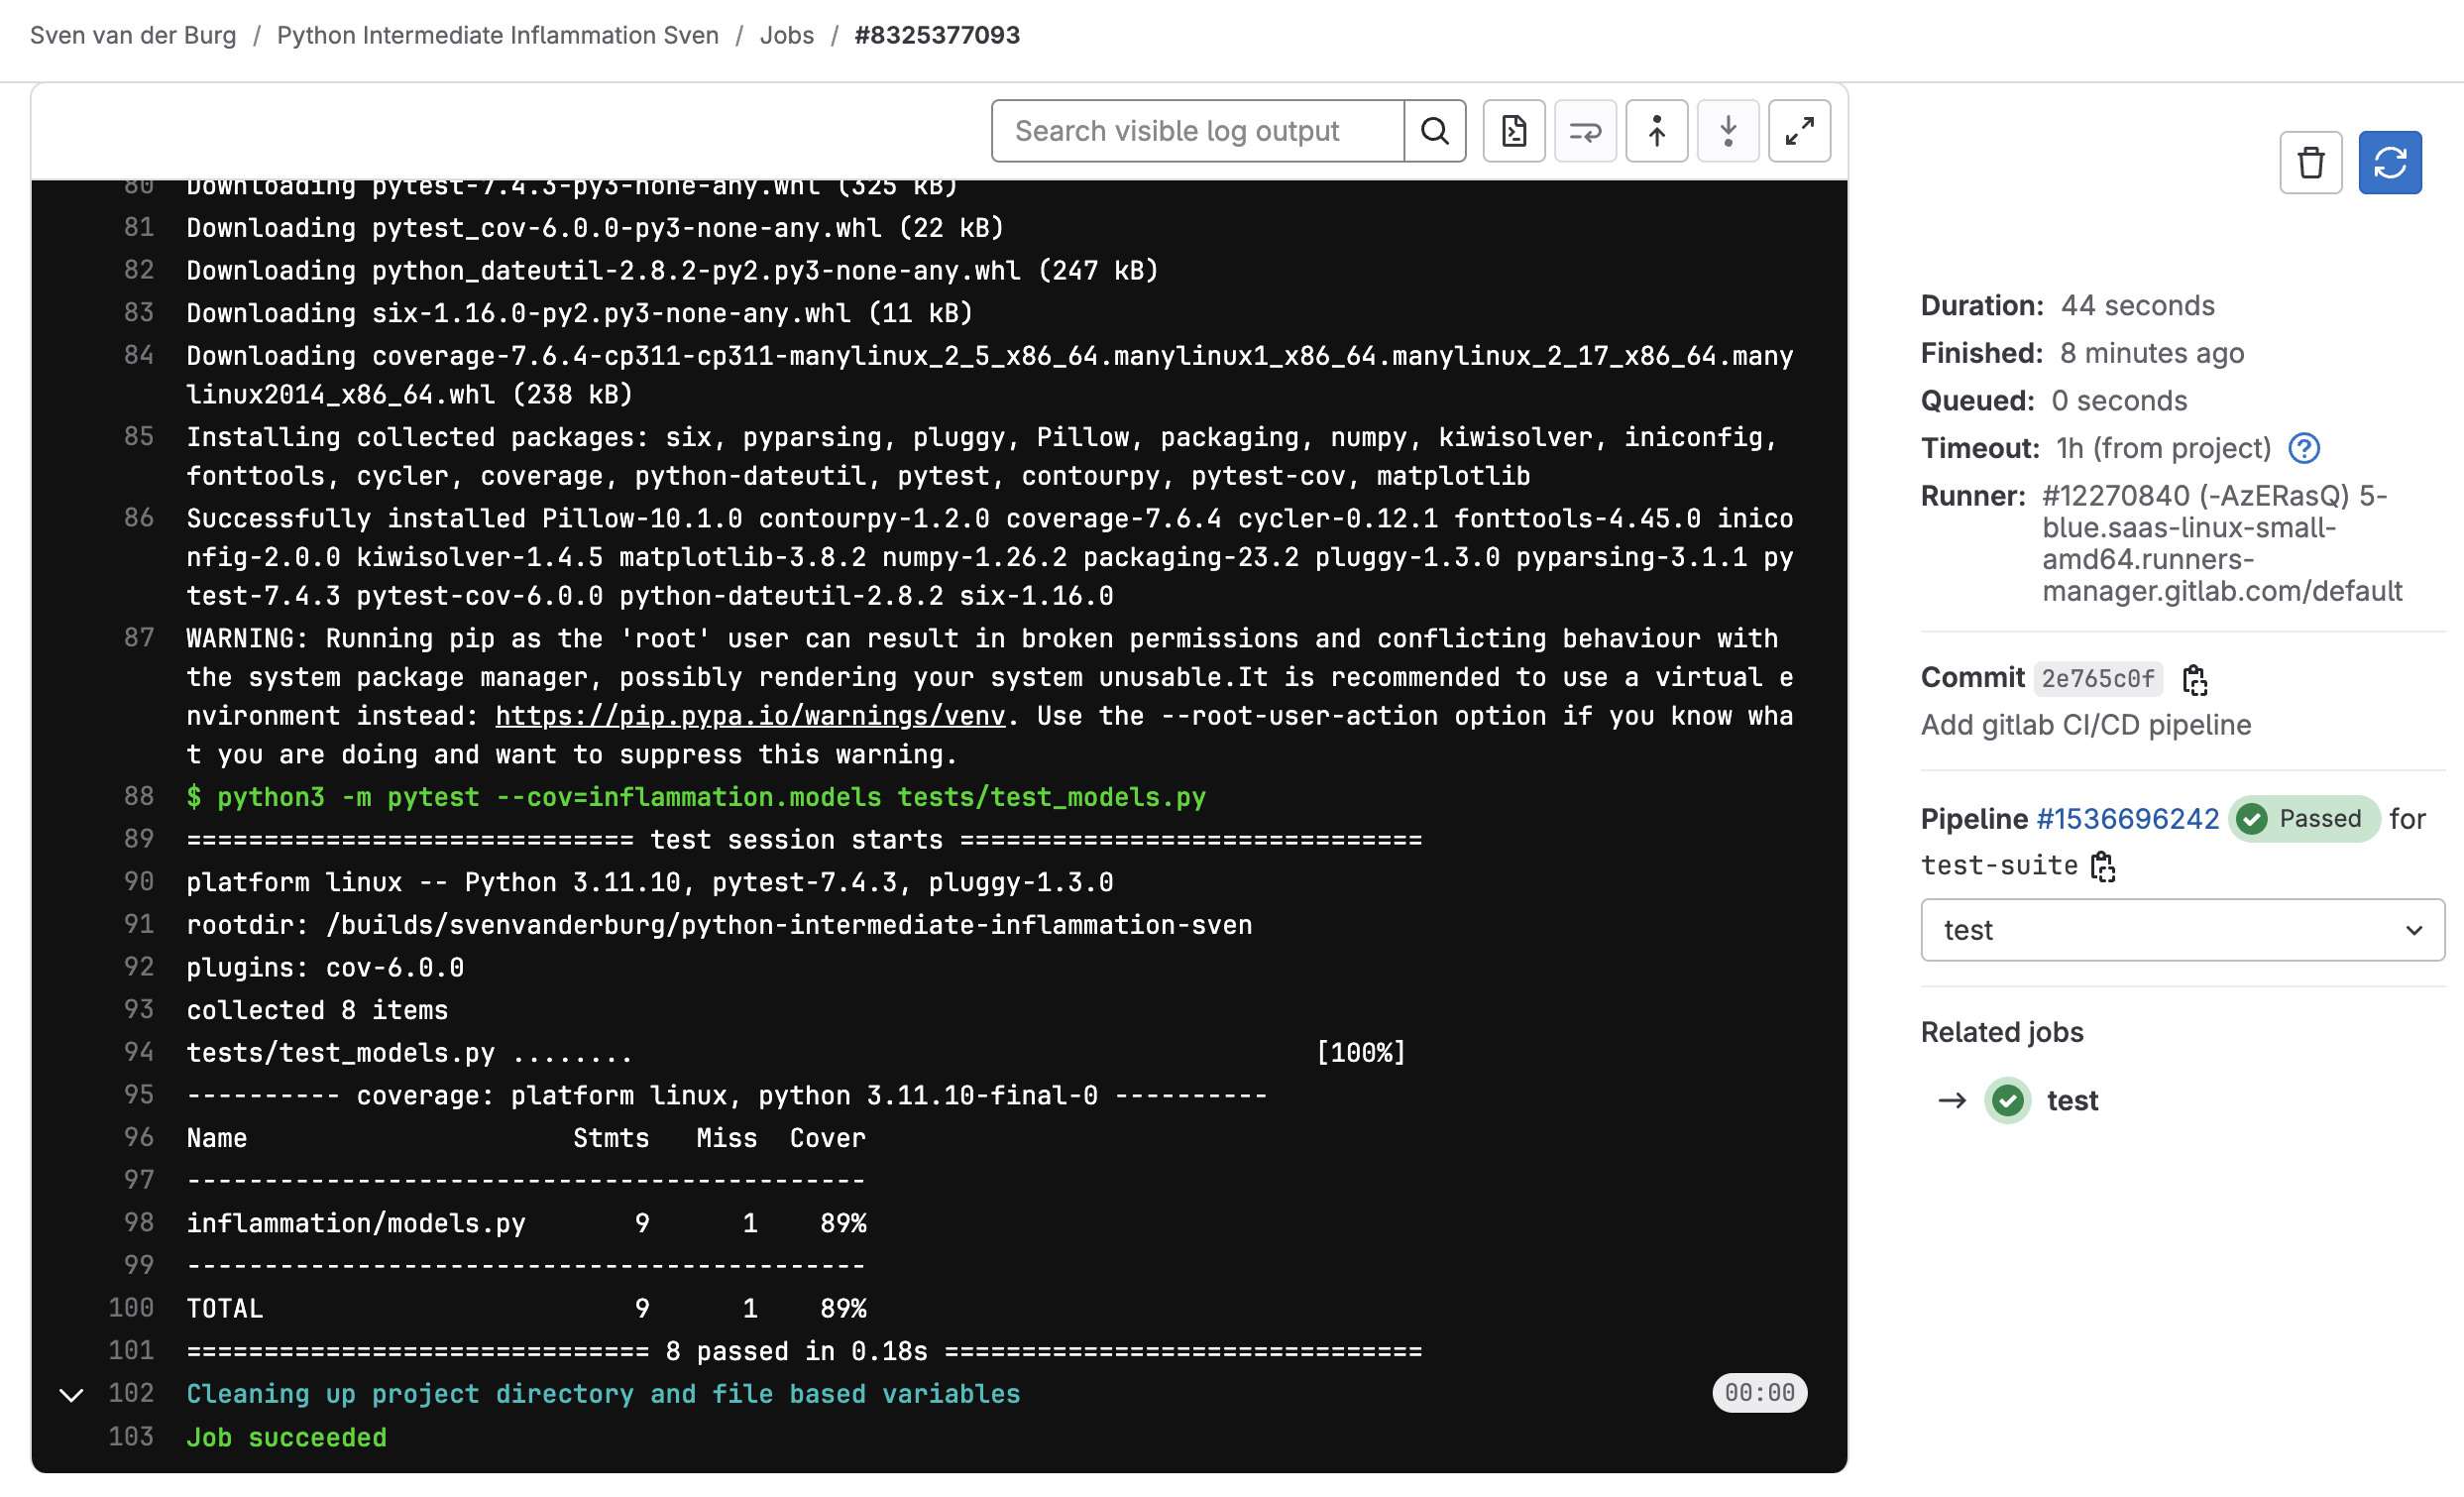
Figure 3
2.4 Type annotations
2.5 Diagnosing Issues and Improving Robustness
Figure 1
Figure 2
Figure 3
Figure 4

Figure 5
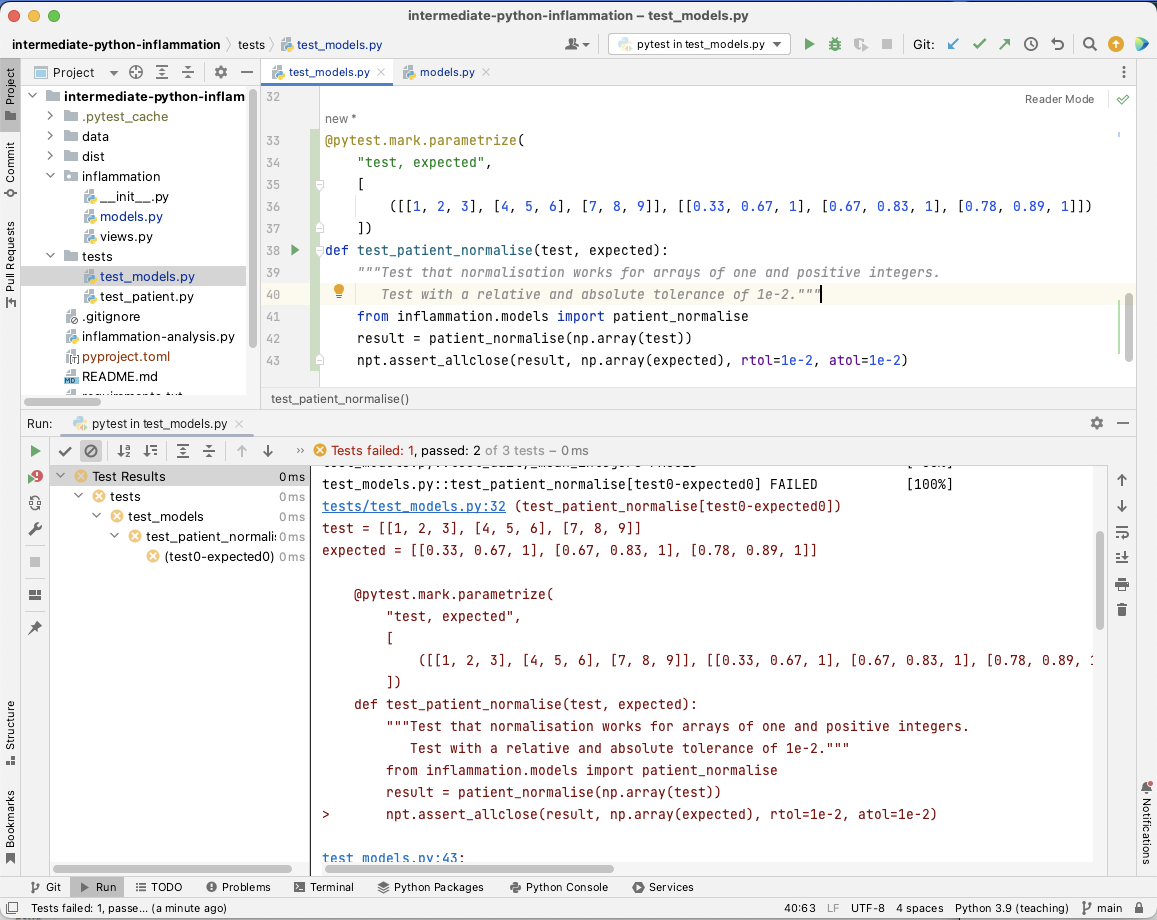
Figure 6
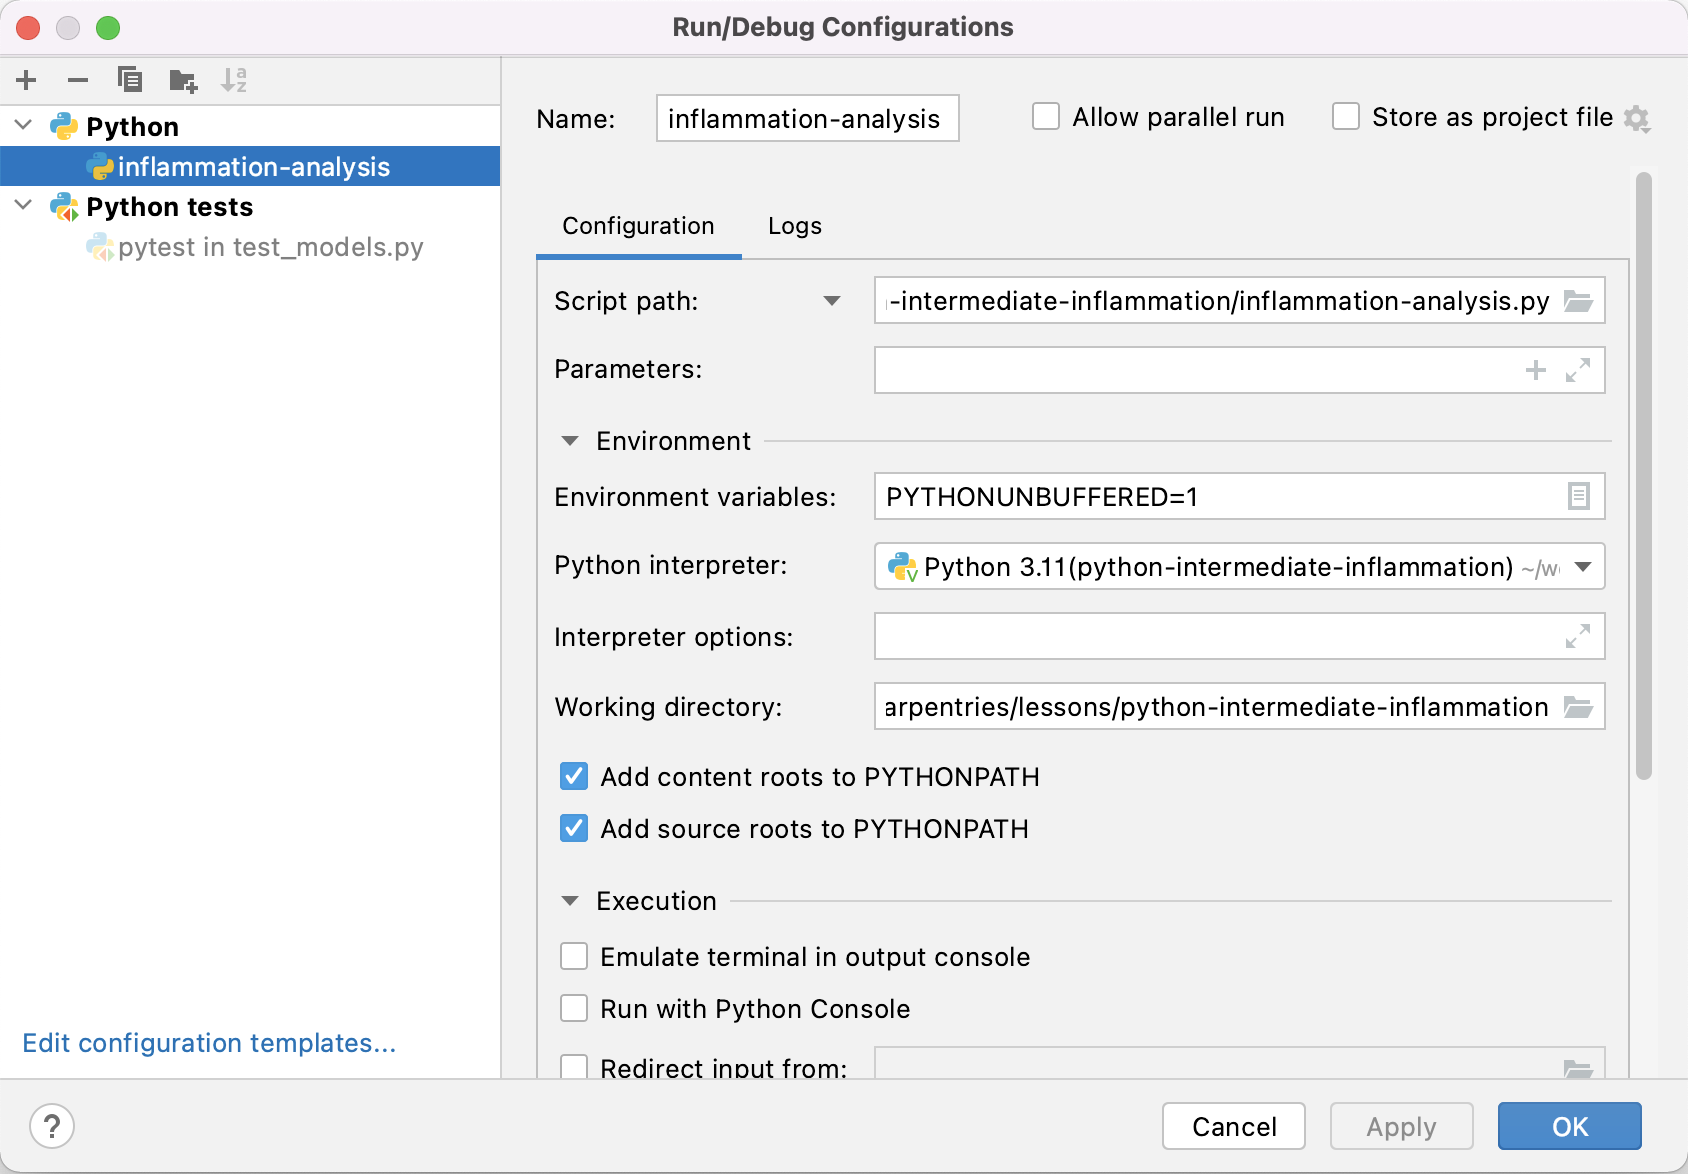
Figure 7
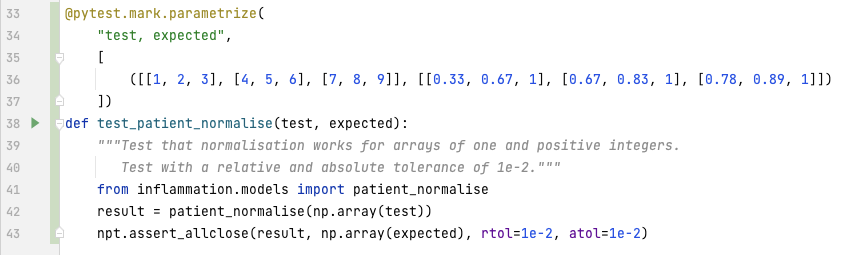
Figure 8

Figure 9
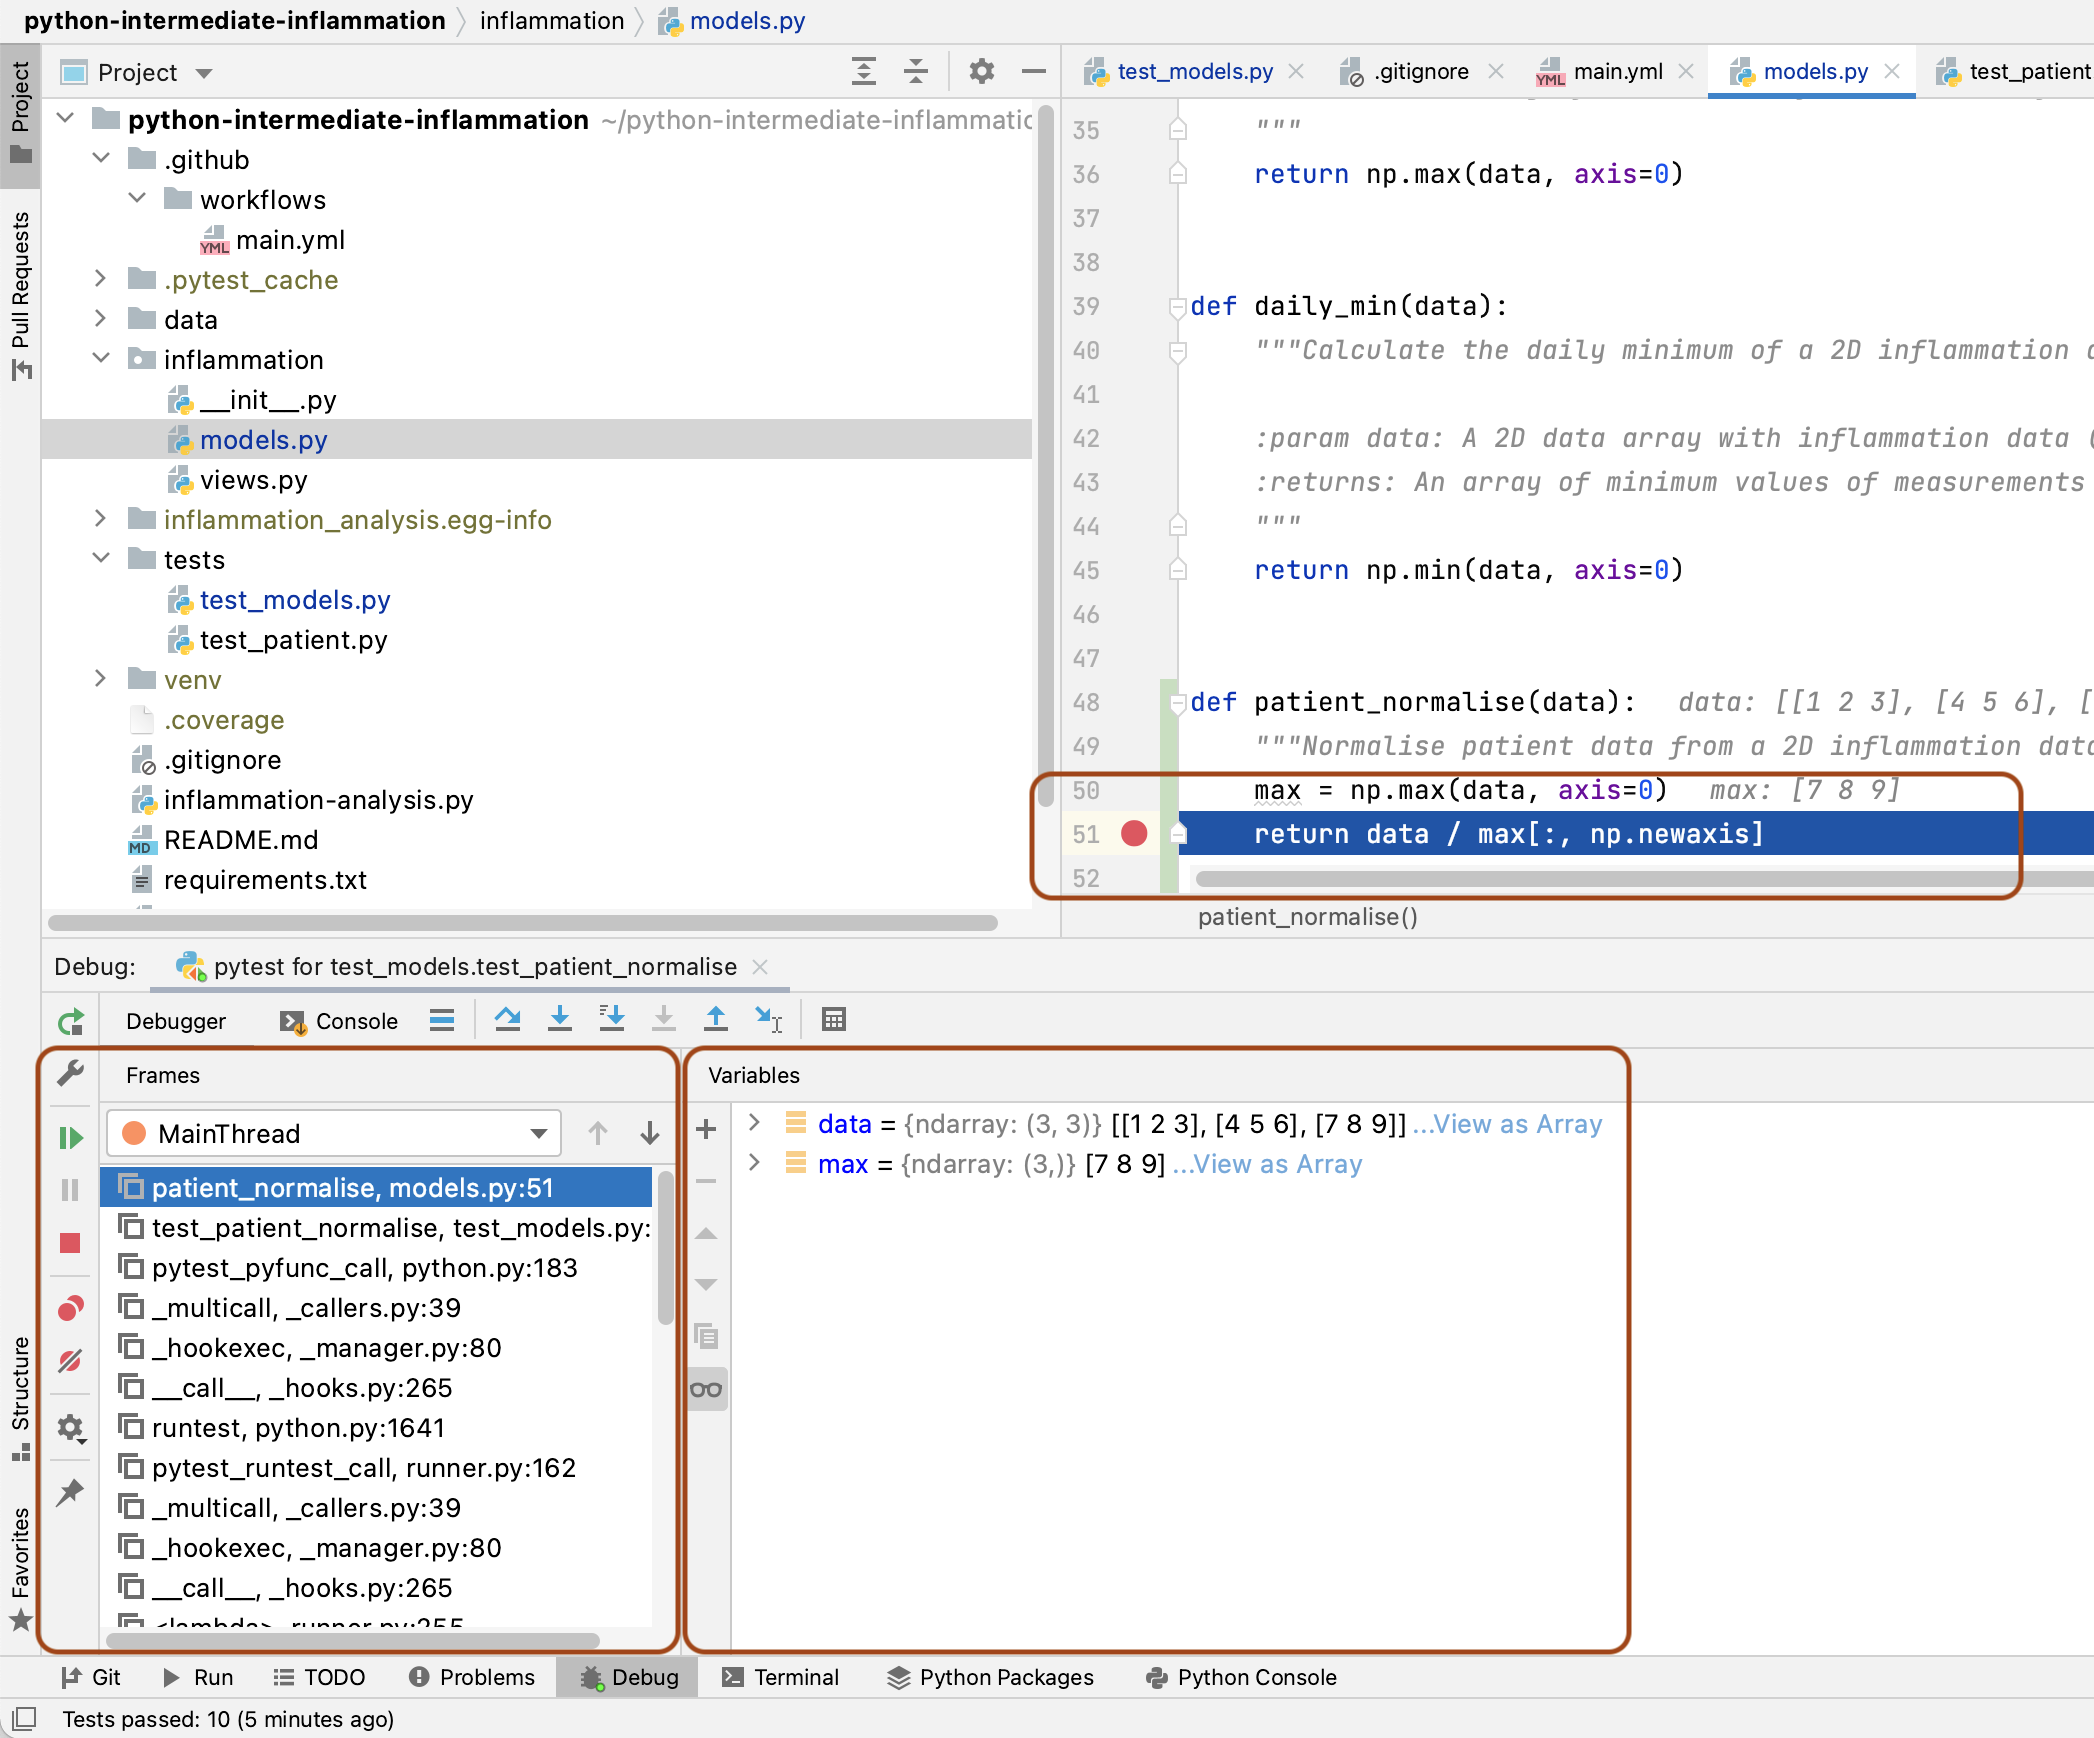
Figure 10
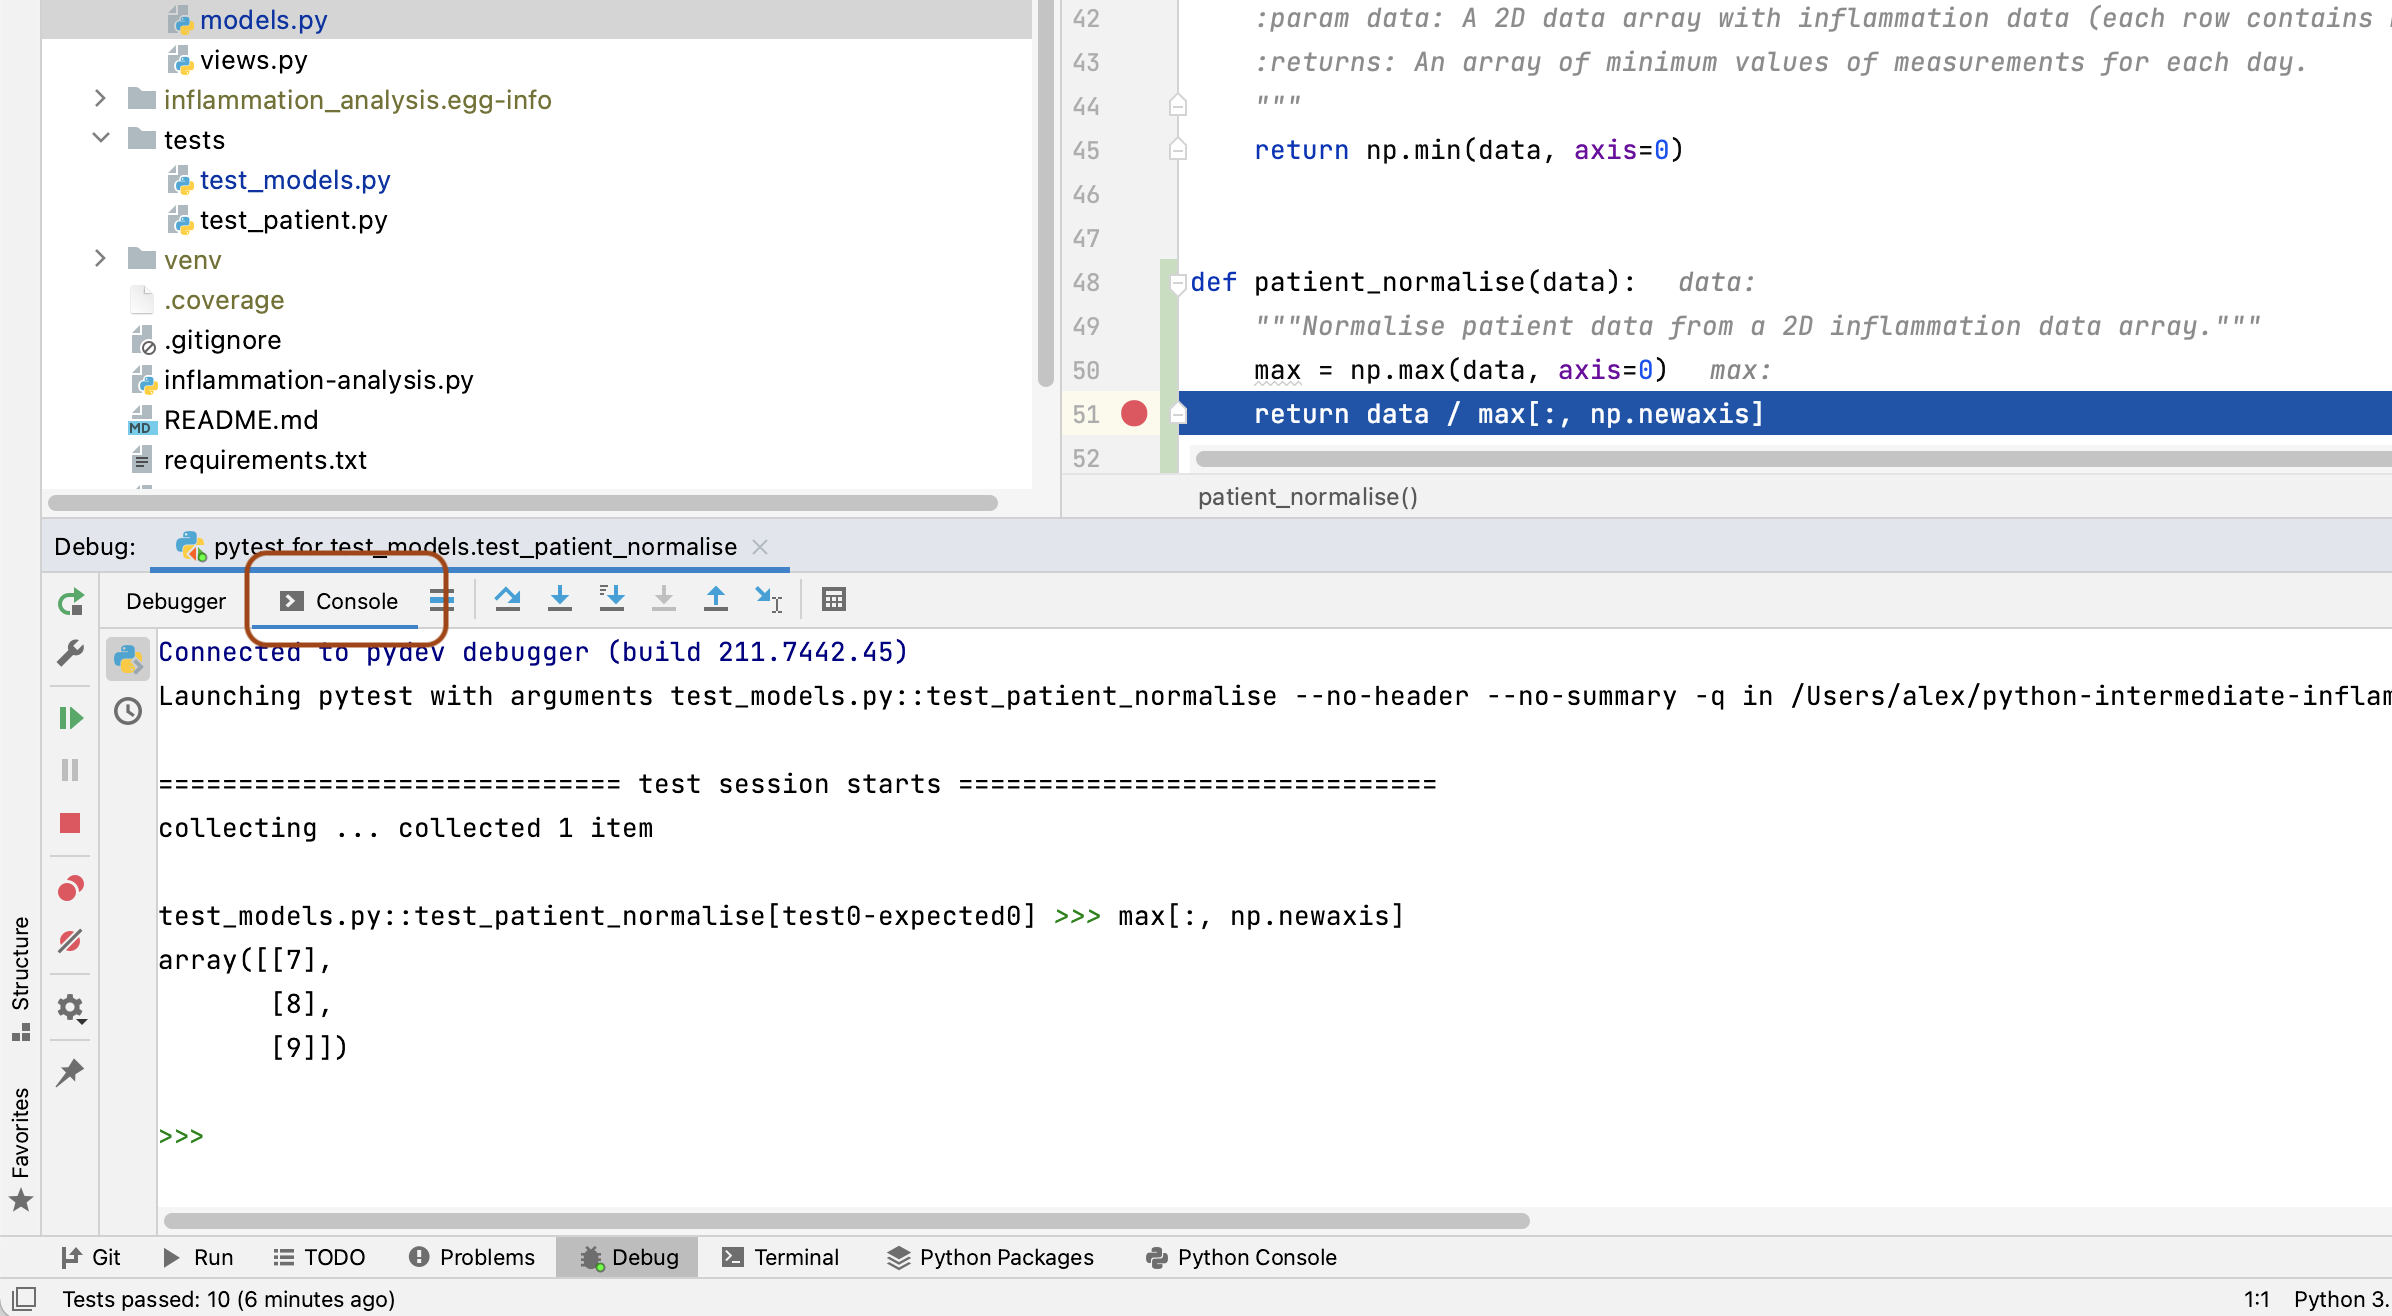
Figure 11
2.6 Optional Exercises for Section 2
Section 3: Software Development as a Process
Figure 1

3.1 Software Requirements
3.2 Software Architecture and Design
Figure 1
Figure 2

3.3 Code Decoupling & Abstractions
3.4 Code Refactoring
3.5 Software Architecture Revisited
Section 4: Collaborative Software Development for Reuse
4.1 Developing Software In a Team: Code Review
Figure 1

Figure 2
New merge request button. 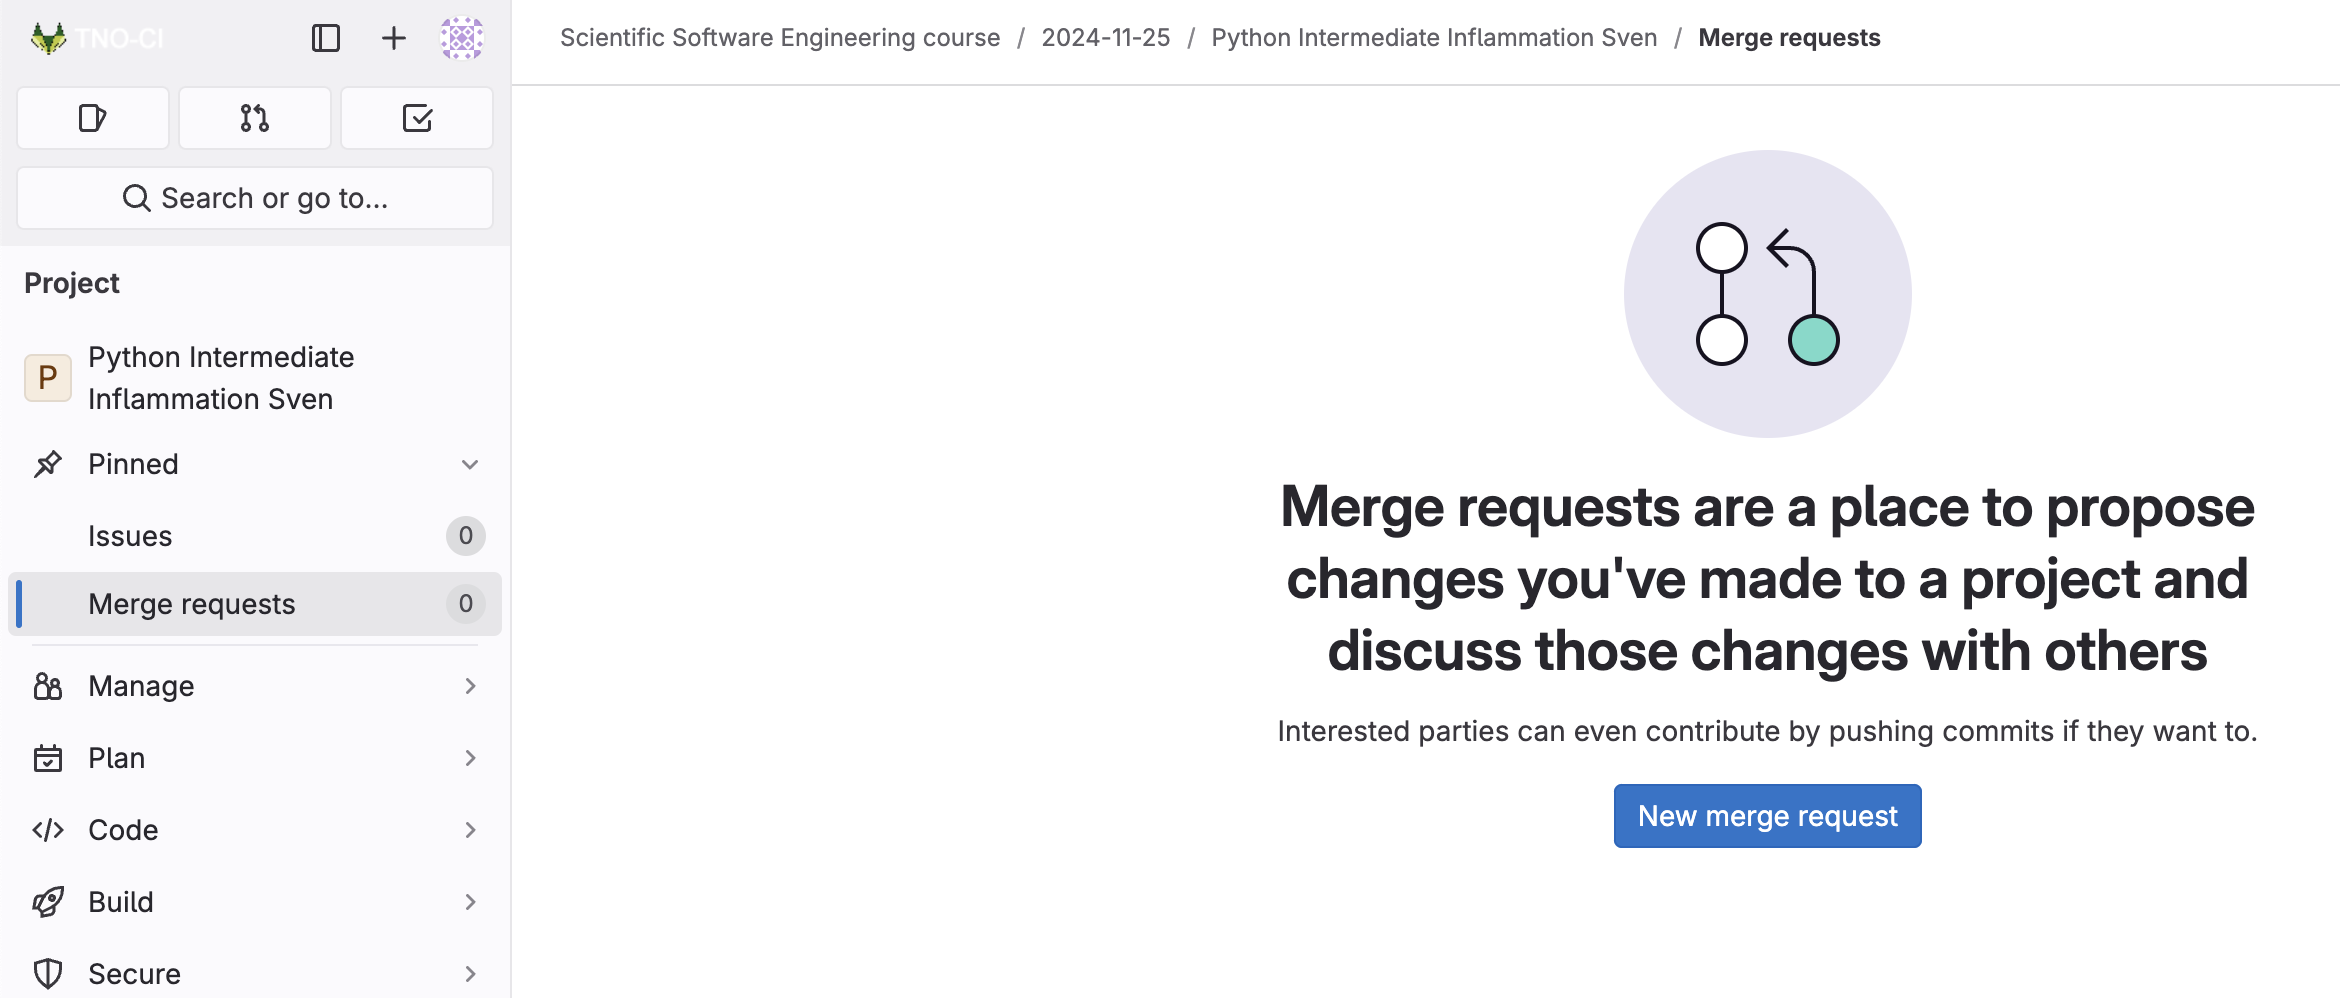
Figure 3
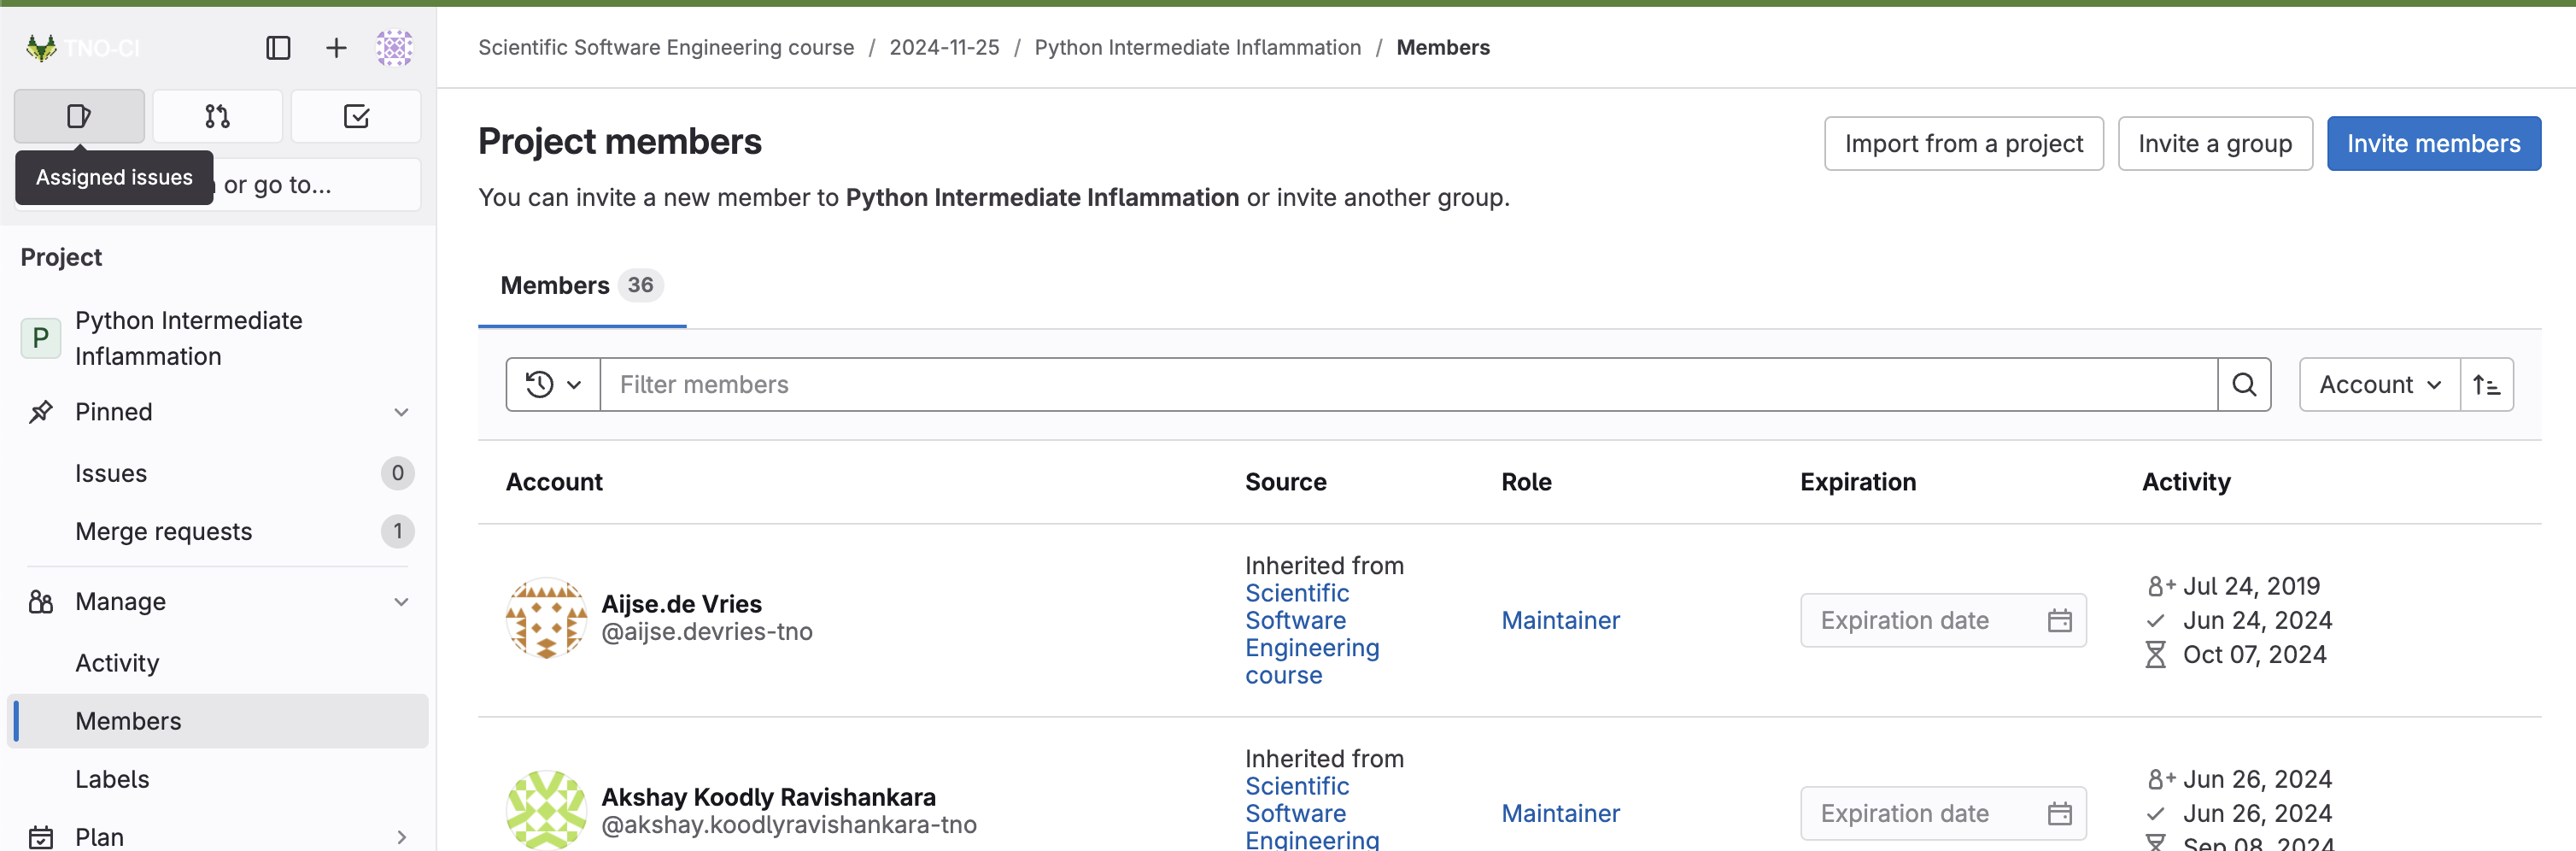
Figure 4
Locate up the merge request from the GitLab’s
Merge Requests tab on the home page of your fellow
learner’s software repository, then head to the
Files changed tab on the merge request. 
Figure 5
When you find a line that you want to add a comment to, click on
the blue plus (+) button next to the line. This will bring up a “Write”
box to add your comment. 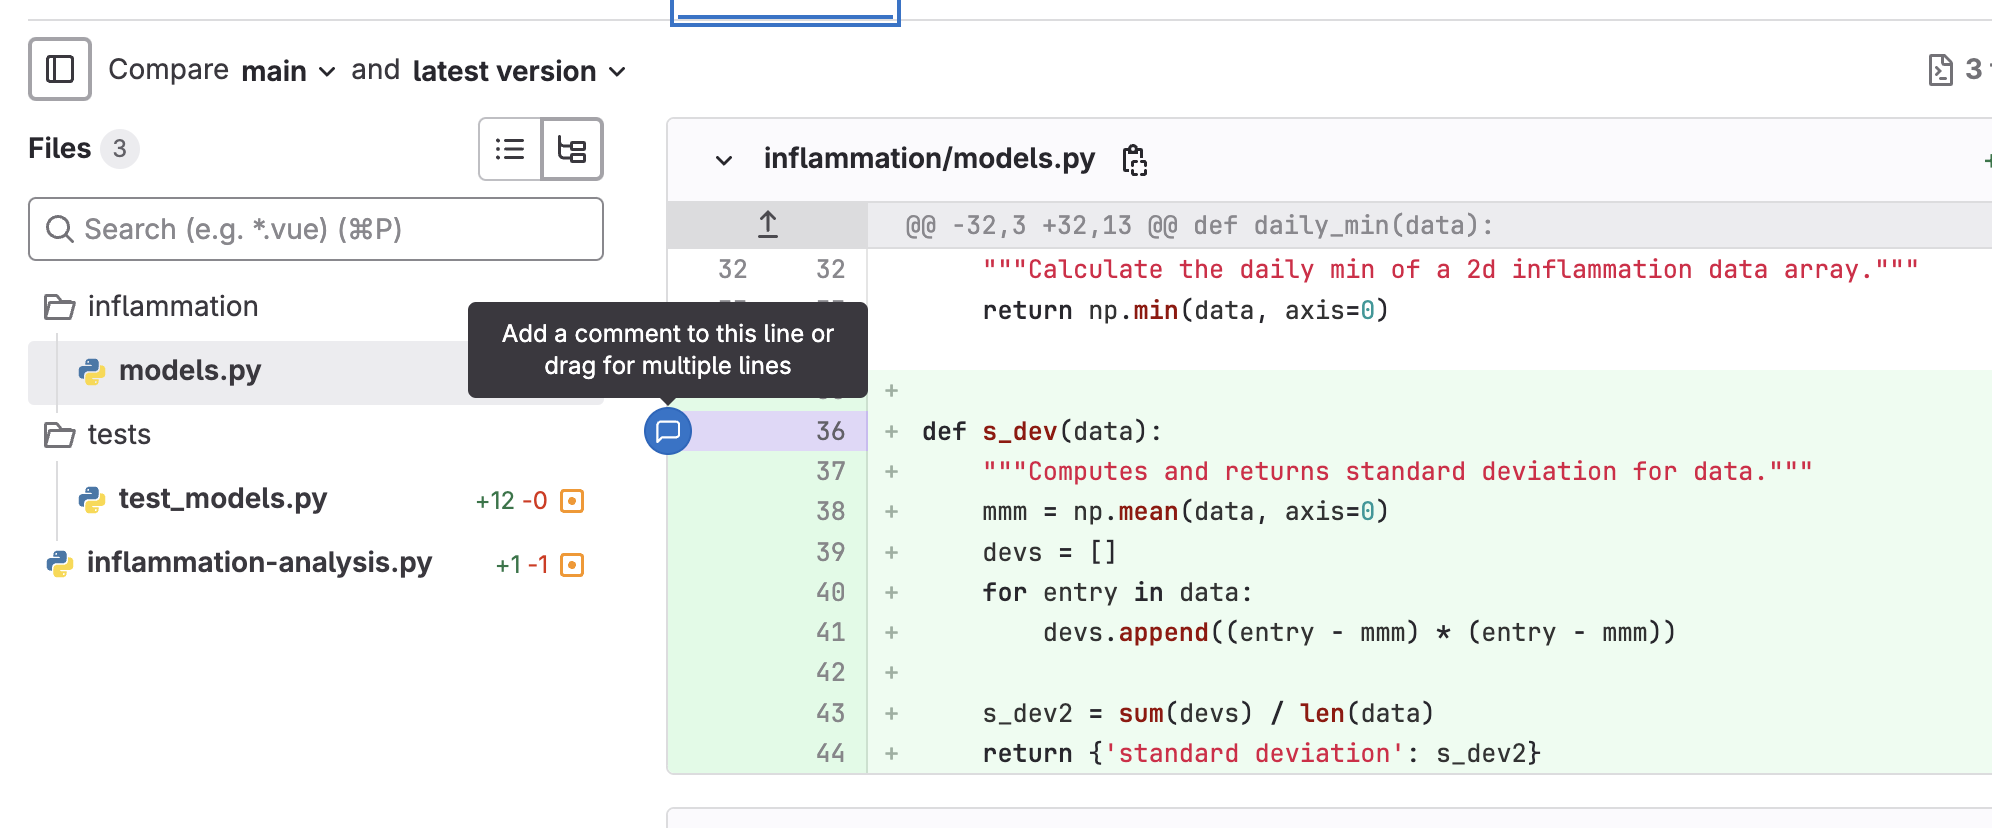 You can
also add comments referring to multiple lines by clicking the plus and
dragging down over the relevant lines. If you want to make a concrete
suggestion or a change to the code directly, such as renaming a
variable, you can click the
You can
also add comments referring to multiple lines by clicking the plus and
dragging down over the relevant lines. If you want to make a concrete
suggestion or a change to the code directly, such as renaming a
variable, you can click the Add a suggestion button (which
looks like a document with a plus and a minus in it). This will populate
the comment with the existing code, and you can edit it to be what you
think the code should be.
Figure 6
Note: you can only make direct code suggestions
if you are a collaborator on a repository. Otherwise, you can add
comments only. 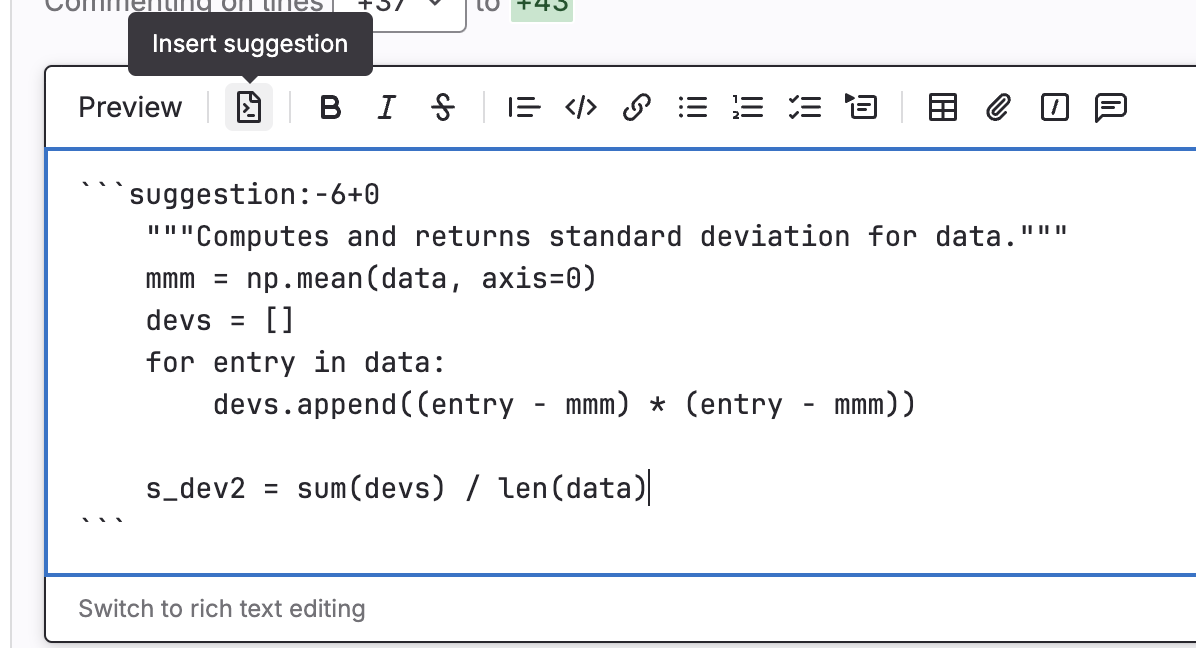 GitLab will then provide a button for the code author to
apply your changes directly.
GitLab will then provide a button for the code author to
apply your changes directly.
Figure 7
Finish your review button at the
top of the Files changed tab. 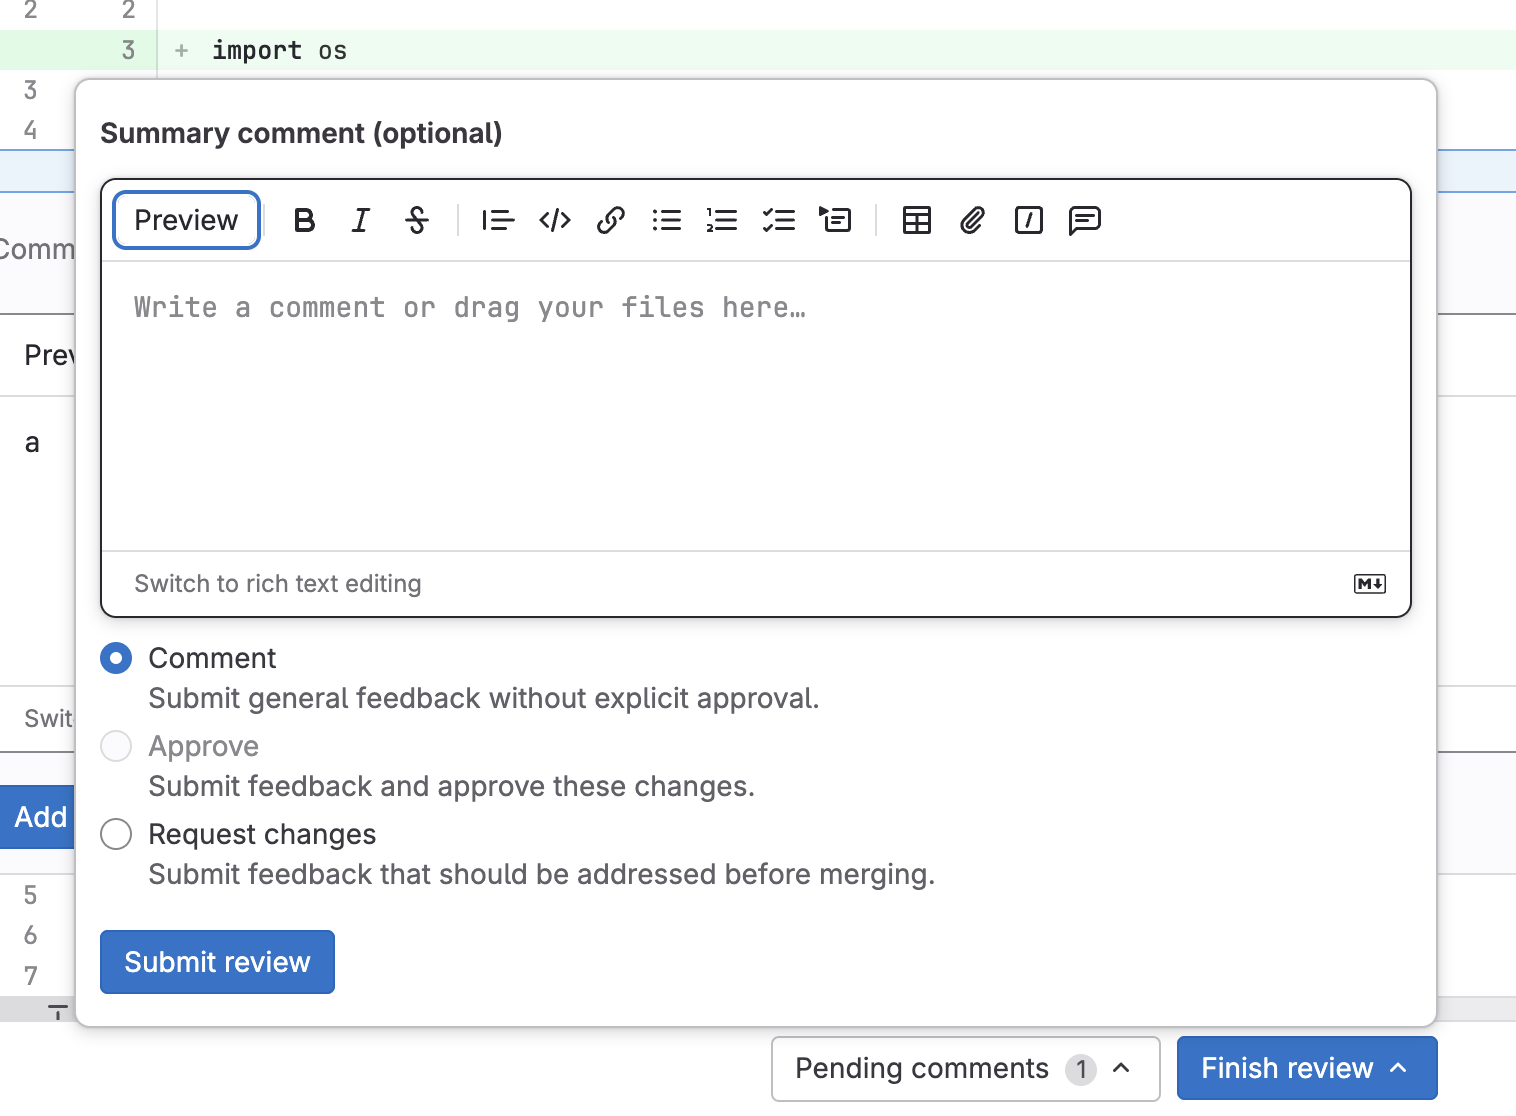 In the comment box, you can add any other comments that
are not associated with a specific line. For example, you can put the
list of tests that you want to see added here.
In the comment box, you can add any other comments that
are not associated with a specific line. For example, you can put the
list of tests that you want to see added here.4.2 Preparing Software for Reuse and Release
4.3 Packaging Code for Release and Distribution
Wrap-up
Figure 1
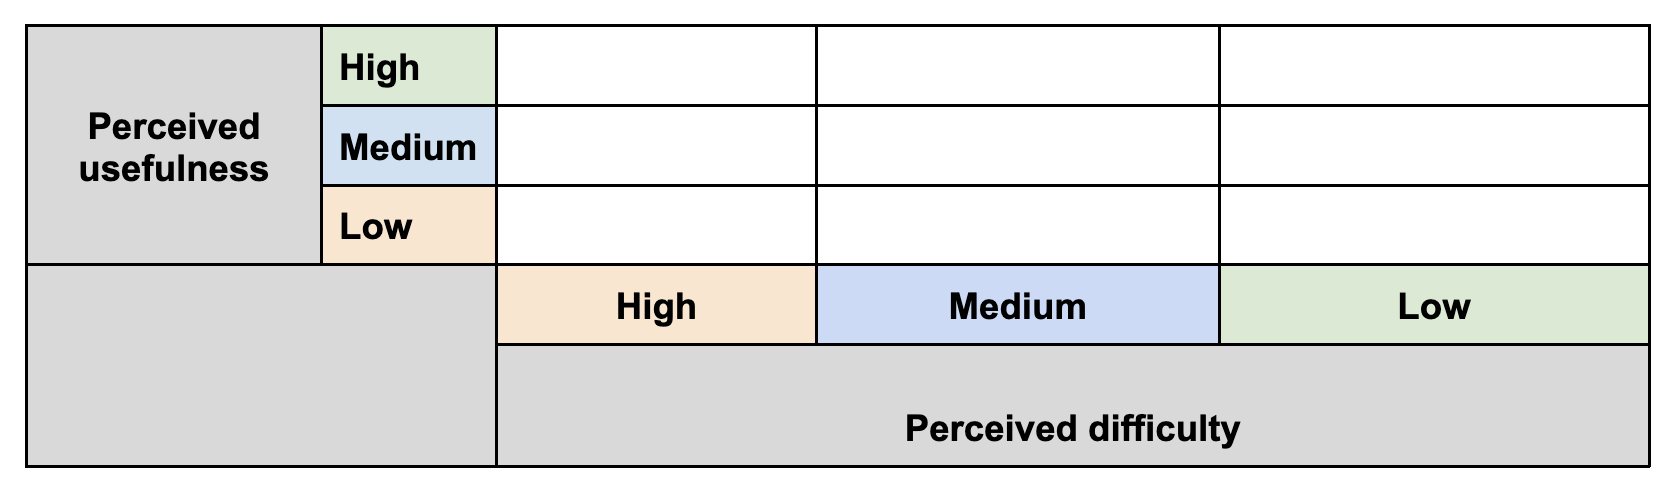
Figure 2
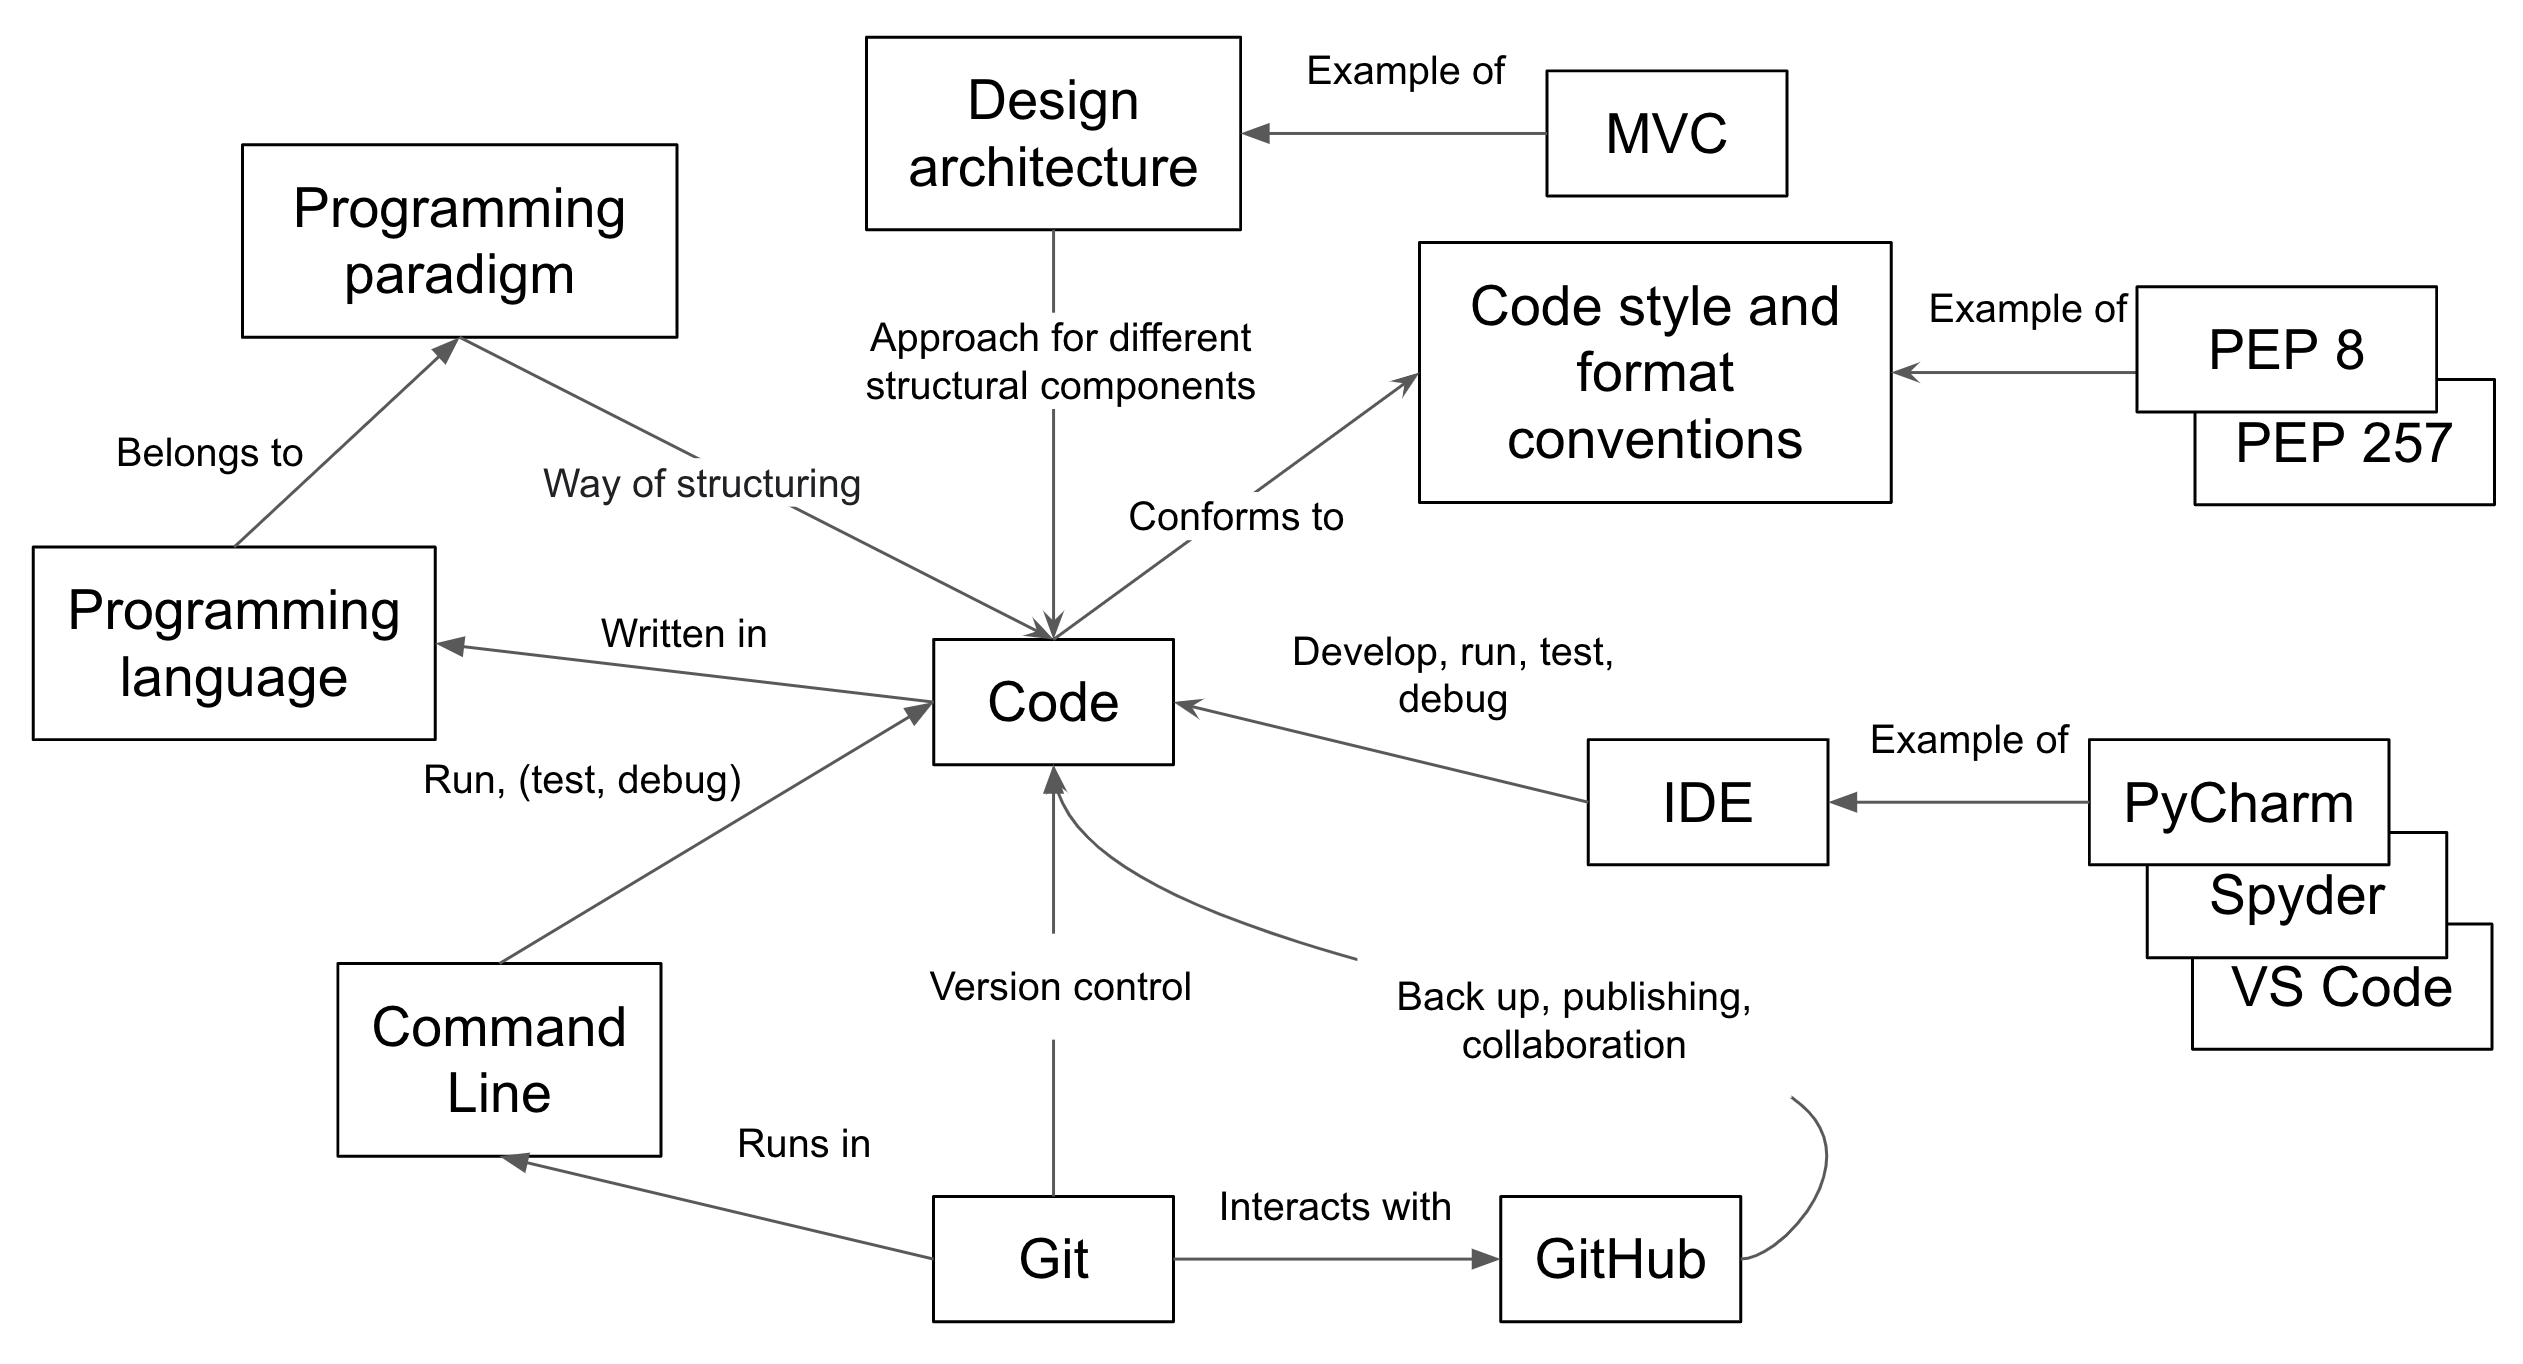
Figure 3