Content from Pre-workshop assignment: Uploading a coding project to GitHub
Last updated on 2025-03-25 | Edit this page
Overview
Questions
- How do I share my changes with others on the web?
Objectives
- Create a repository on GitHub
- Push to or pull from a remote repository
Install Git and create a GitHub account
You are going to add your existing project to GitHub. This is important for multiple reasons:
Your project will be under version control. This means that you and others can from now on track the exact history of changes.
You will have an external copy of your code on GitHub. If for some reason you lose your local copy, you can always ‘clone’ the repository on GitHub back to your local system (to continue working there).
By publishing your code on GitHub, your code is now available for others for re-use.
The exercises on this page should be done before the workshop. This will help us to focus on improving the code during the workshop day. You will need approximately one hour to finish this pre-workshop assignment.
Please let us know if you are stuck or have any questions by emailing s.vanderburg@esciencecenter.nl and e.klapwijk@essb.eur.nl.
Exercise: Install Git and create a GitHub account
You need to have Git installed on your local system:
Install Git
Create a GitHub account
You will need an account for GitHub to publish your code there.
- To sign up for an account, navigate to https://github.com/ and follow the prompts.
- Verify your email address.
- Configure GitHub authentication.
Optional exercise: My code is already on GitHub
If your code is already on GitHub you can explore the following topics:
- Familiarize yourself with the basics of
git - Learn more about
.gitignorefiles - If you already know the basics of
git, familiarize yourself with best practices in using git with this lesson. This lesson assumes you have some project with changes to it, you can make some changes in your project to mimic the lesson.
Pushing existing code to GitHub
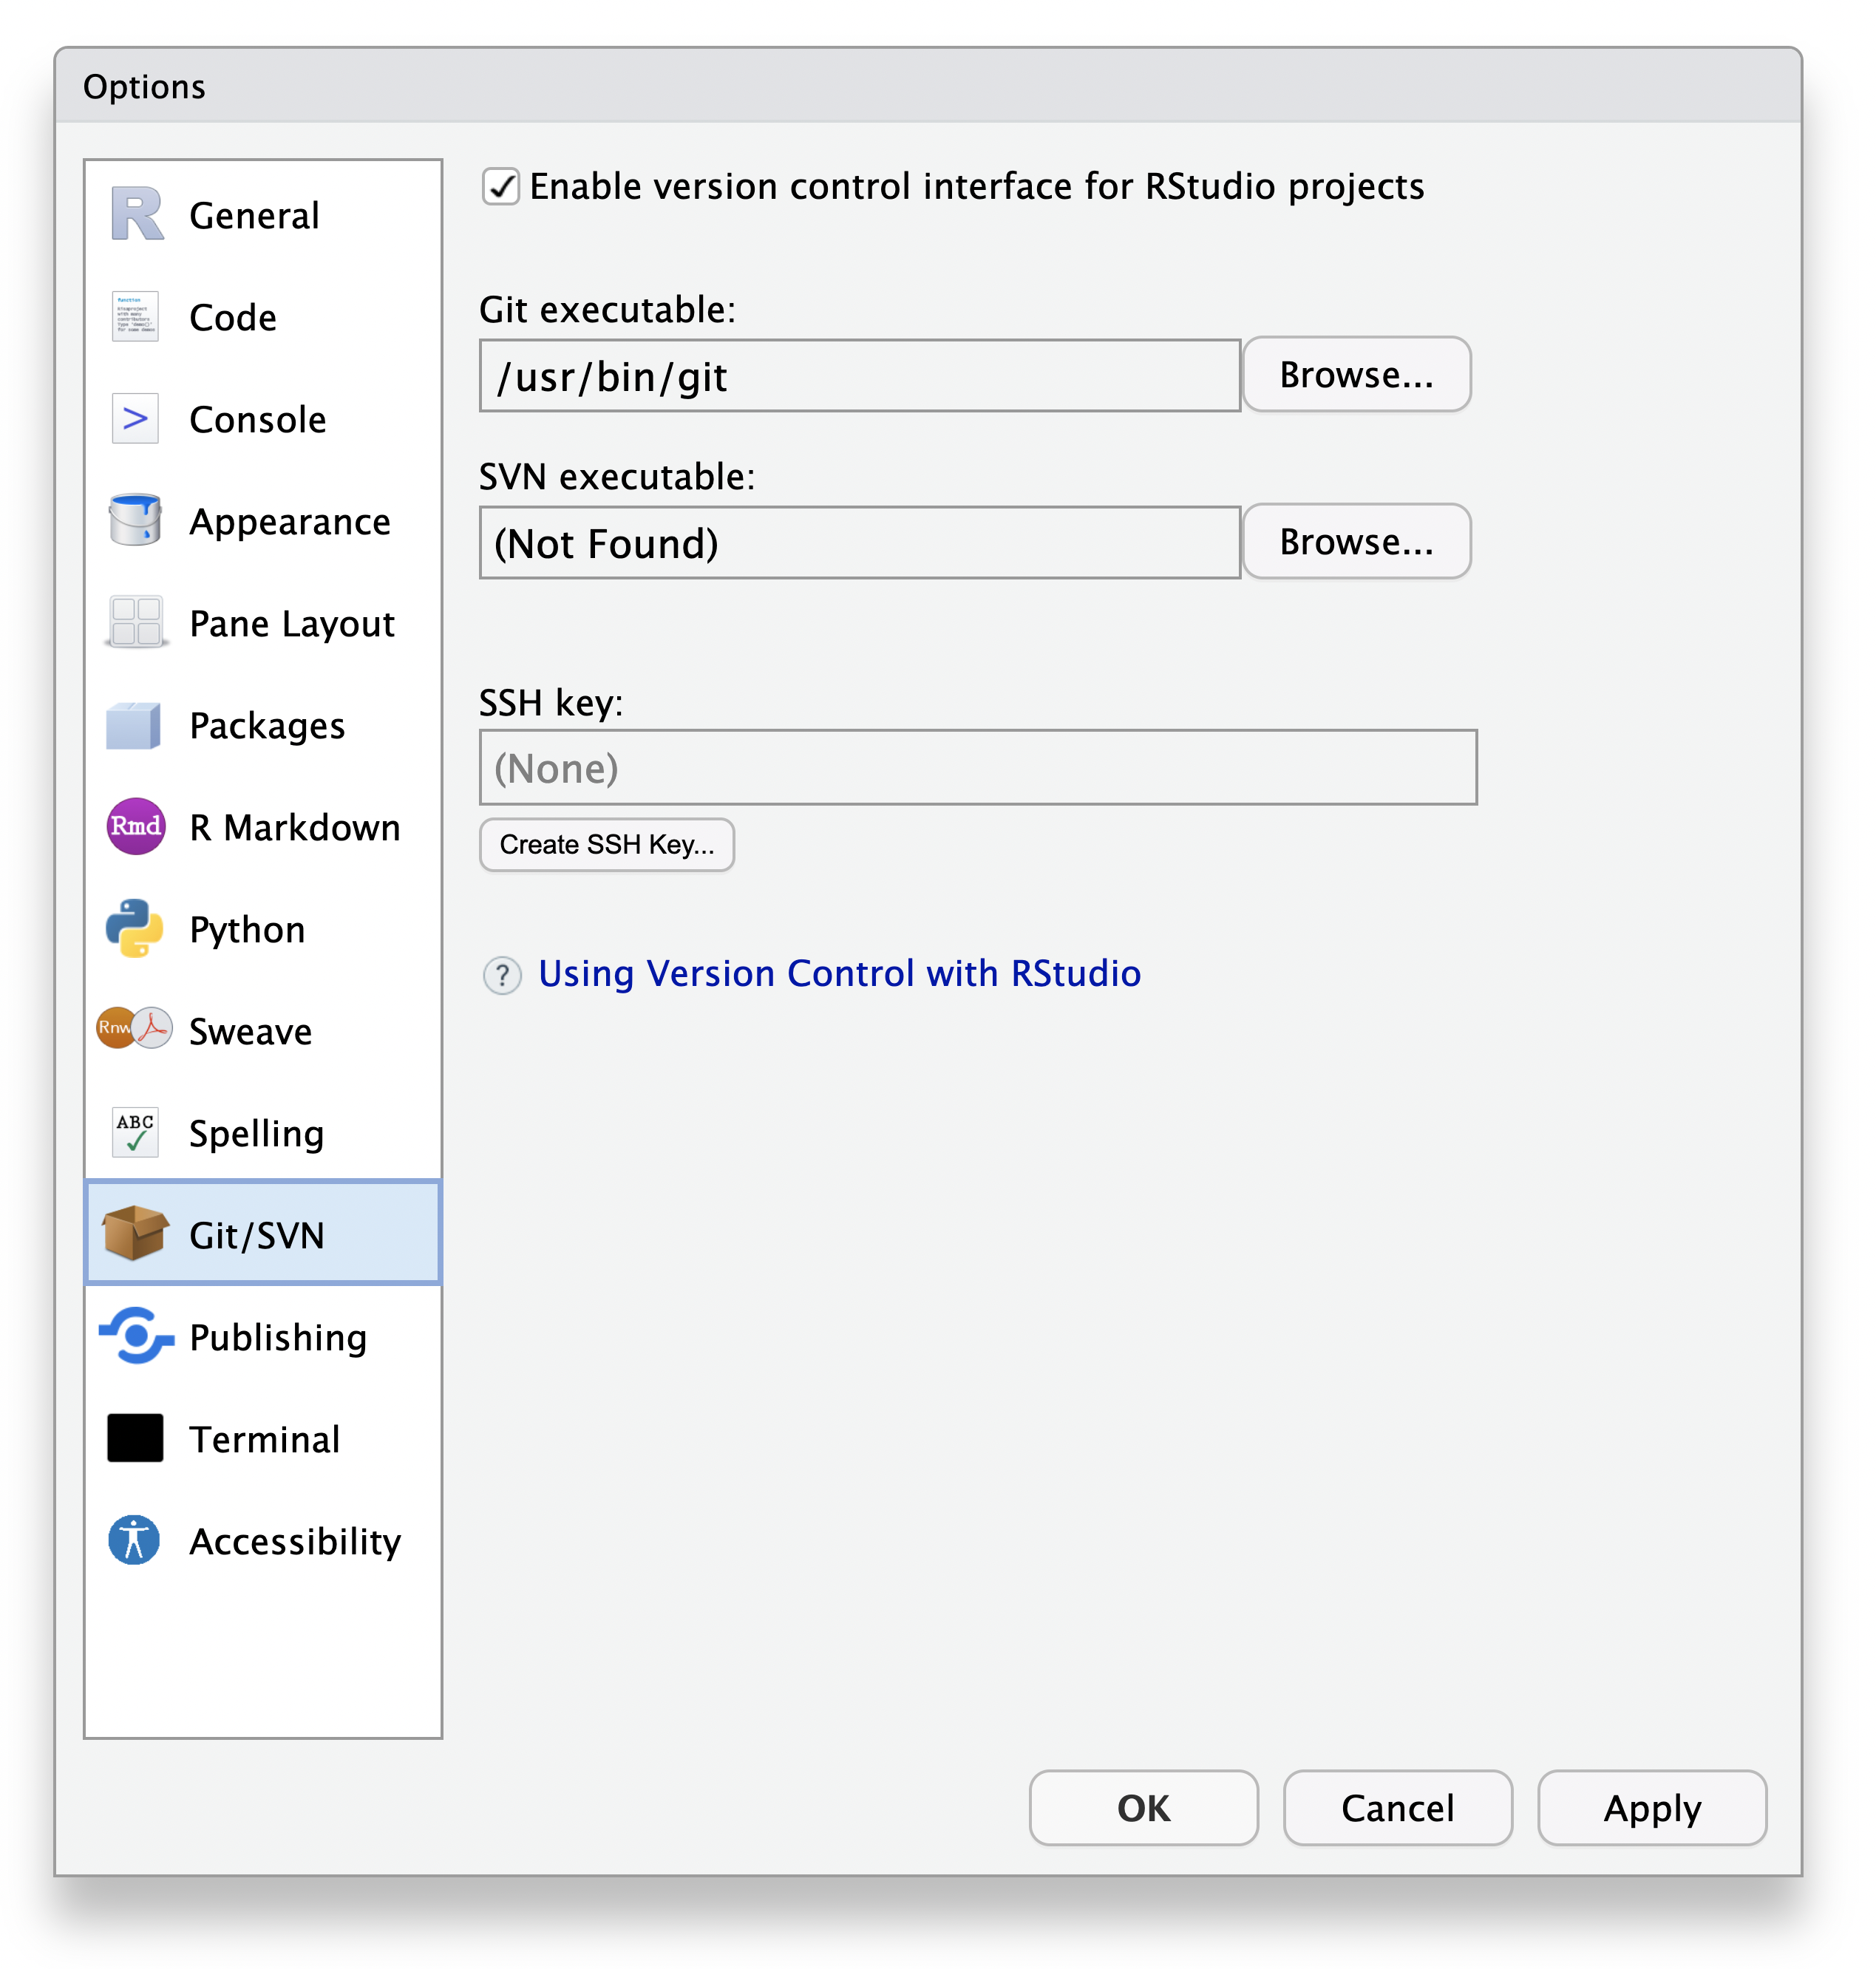
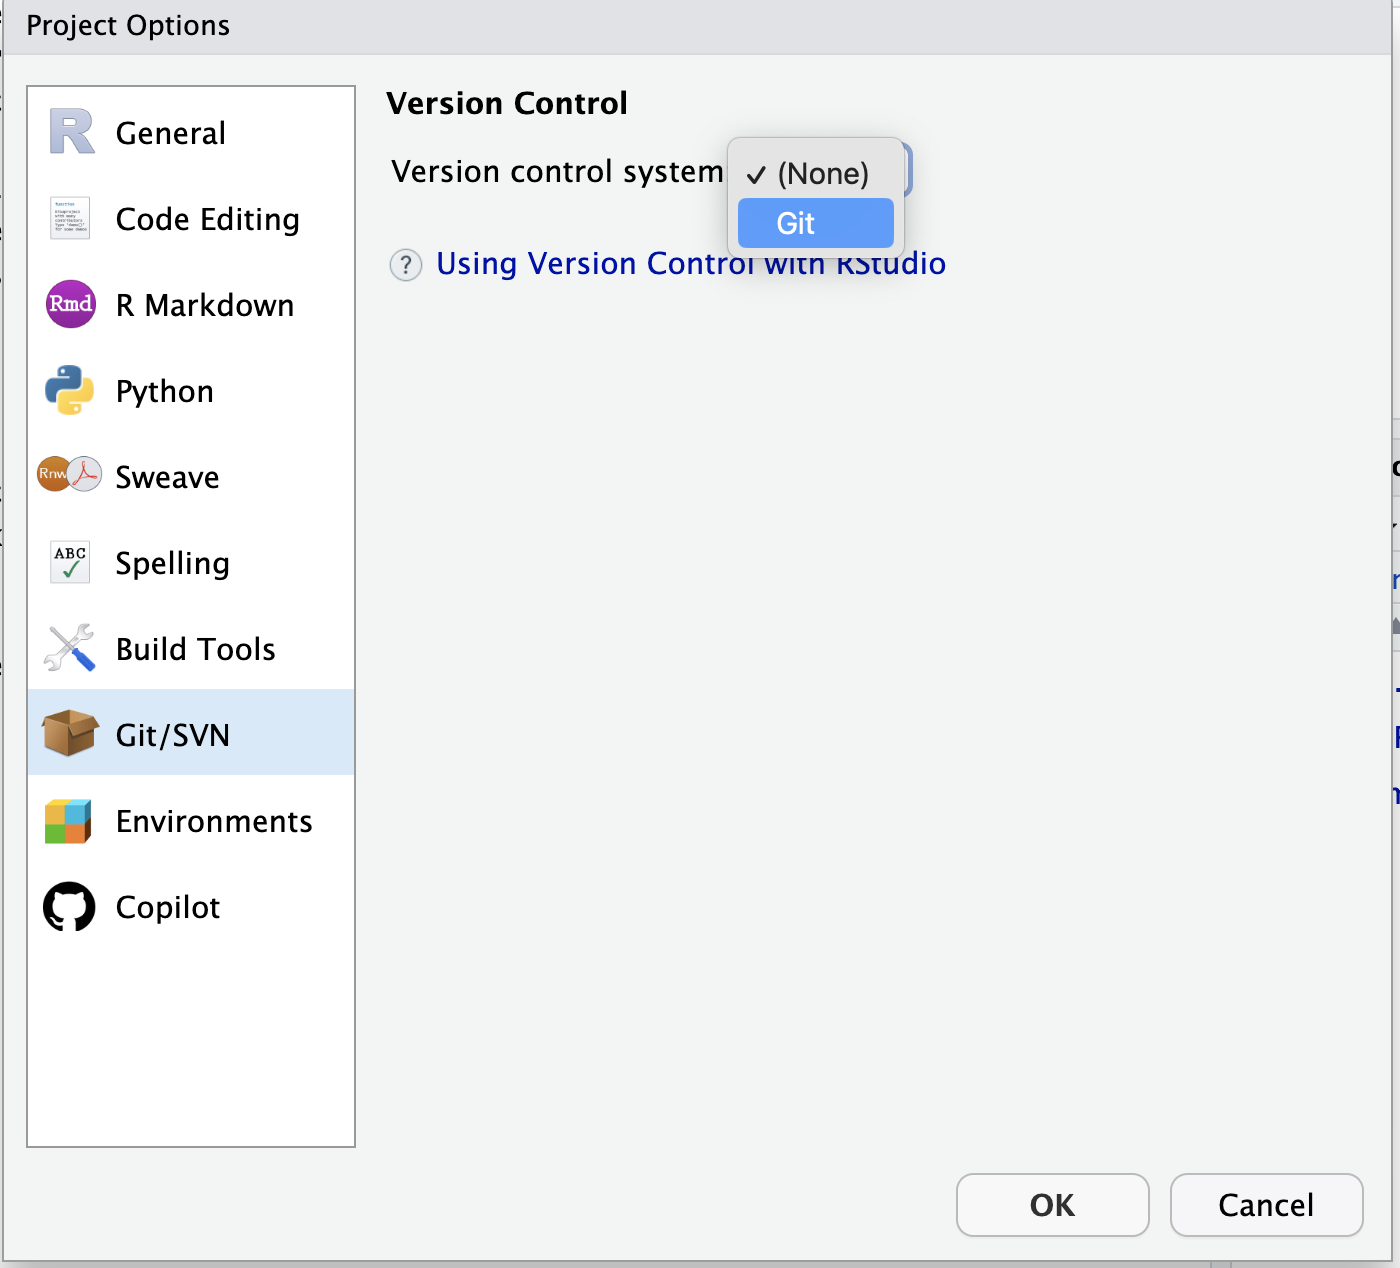
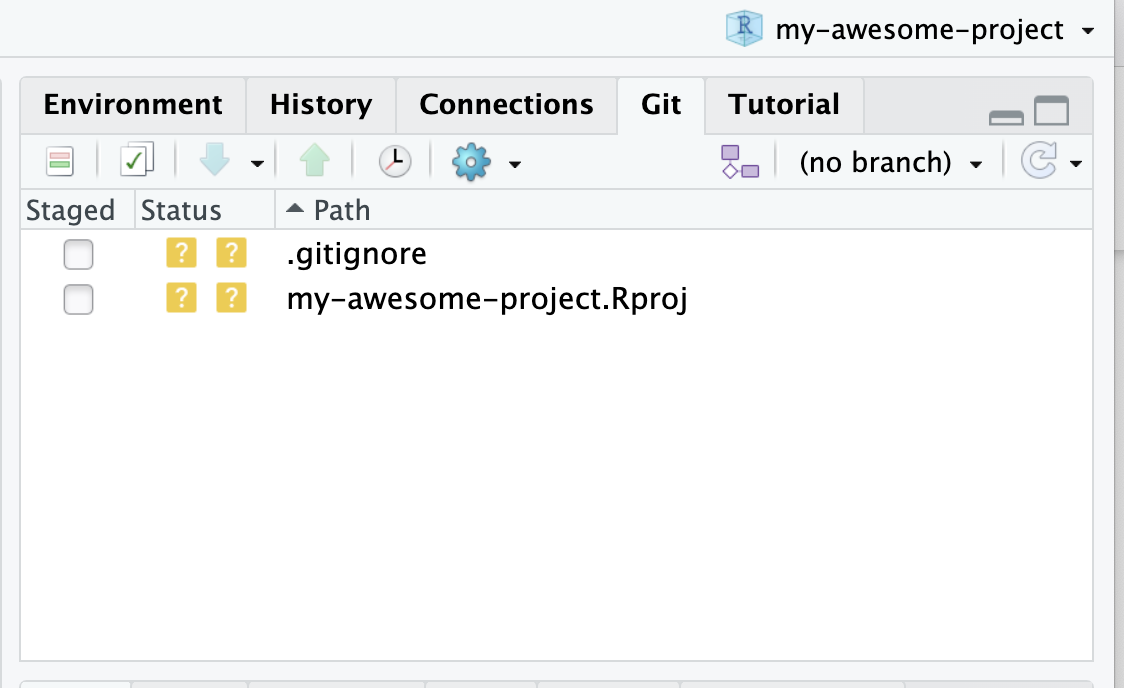
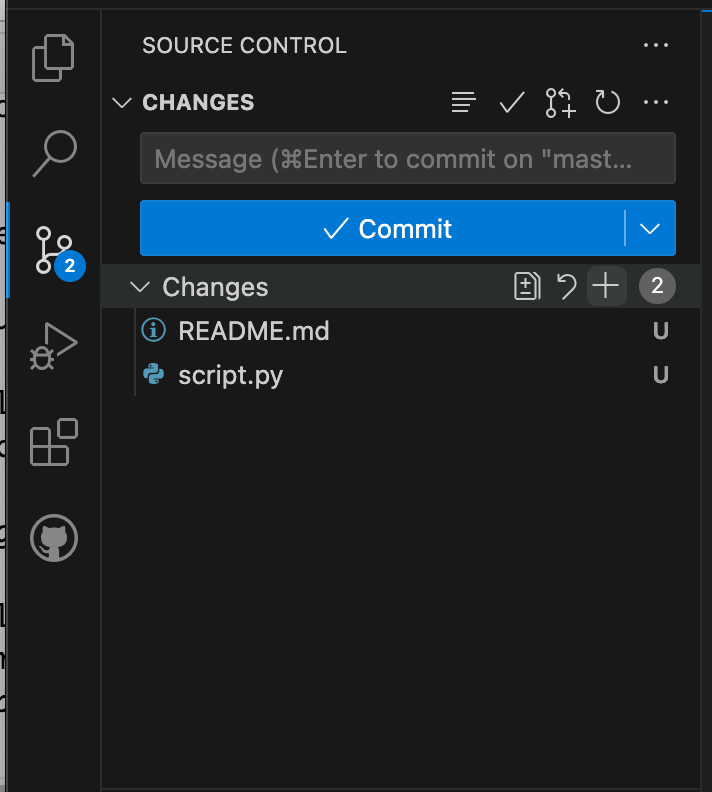
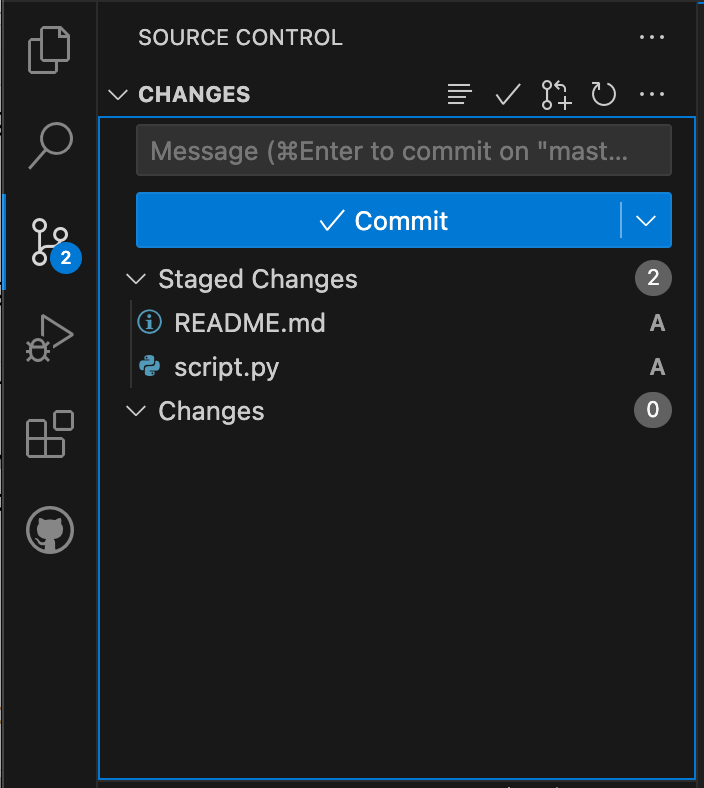
Below are steps for pushing your existing code to GitHub using RStudio or Visual Studio Code. There are many tools to push your code to GitHub (including the command line), but if you are not used to doing this we recommend one of these options.
First install RStudio (recommended for R users) or Visual Studio Code.
Exercise: Push your existing code to GitHub
Wait, what did we just do?
These are the basics for uploading a project to GitHub. We realize we are skipping a lot of details on how git works and how to use it. Our excuse is we want reproducible code on GitHub within a day.
If you want to learn more about git later, you can follow this great lesson.
All prepared for the workshop!
Now that you published your project on GitHub and know how to push new changes to it you are ready for the workshop!
Key Points
- Install Git and create a GitHub account
- Initialize a local git repository for your project
- Add your files to be “monitored” by git
- Commit your changes accompanied by a commit message
- Push your local project to GitHub
Content from Software dependencies
Last updated on 2025-04-03 | Edit this page
Overview
Questions
- How can we communicate different versions of software dependencies?
Objectives
- Know how to track dependencies of a project
- Set up an environment and make sure others can reproduce your environment
Our codes often depend on other codes that in turn depend on other codes …
- Reproducibility: We can version-control our code with Git but how should we version-control dependencies? How can we capture and communicate dependencies?
- Dependency hell: Different codes on the same environment can have conflicting dependencies.

Kitchen analogy
- Software <-> recipe
- Data <-> ingredients
- Libraries <-> pots/tools


Tools and what problems they try to solve
Conda, Anaconda, pip, virtualenv, Pipenv, pyenv, Poetry, requirements.txt, environment.yml, renv, …, these tools try to solve the following problems:
- Defining a specific set of dependencies, possibly with well defined versions
- Installing those dependencies mostly automatically
- Recording the versions for all dependencies
-
Isolate environments
- On your computer for projects so they can use different software
- Isolate environments on computers with many users (and allow self-installations)
- Using different Python/R versions per project
- Provide tools and services to share packages
Isolated environments are also useful because they help you make sure that you know your dependencies!
If things go wrong, you can delete and re-create - much better than debugging. The more often you re-create your environment, the more reproducible it is.
Dependencies-1: Time-capsule of dependencies
Situation: 5 students (A, B, C, D, E) wrote a code that depends on a couple of libraries. They uploaded their projects to GitHub. We now travel 3 years into the future and find their GitHub repositories and try to re-run their code before adapting it.
Answer in the collaborative document:
- Which version do you expect to be easiest to re-run? Why?
- What problems do you anticipate in each solution?
A: It will be tedious to collect the dependencies one by one. And after the tedious process you will still not know which versions they have used.
B: If there is no standard file to look for and look at and it might become very difficult for to create the software environment required to run the software. But at least we know the list of libraries. But we don’t know the versions.
C: Having a standard file listing dependencies is definitely better than nothing. However, if the versions are not specified, you or someone else might run into problems with dependencies, deprecated features, changes in package APIs, etc.
D and E: In both these cases exact versions of all dependencies are specified and one can recreate the software environment required for the project. One problem with the dependencies that come from GitHub is that they might have disappeared (what if their authors deleted these repositories?).
E is slightly preferable because version numbers are easier to understand than Git commit hashes or Git tags.
Dependencies-2: Create a time-capsule for the future
Now we will demo creating our own time-capsule and share it with the future world. If we asked you now which dependencies your project is using, what would you answer? How would you find out? And how would you communicate this information?
Uploading your requirements.txt or renv files to GitHub
Follow these steps to add the files in which you recorded your dependencies to GitHub:
This episode is based on the Code Refinery Reproducible Research lesson about dependencies.
Key Points
- Recording dependencies with versions can make it easier for the next person to execute your code
- There are many tools to record dependencies
Content from Document your research software
Last updated on 2025-04-03 | Edit this page
Overview
Questions
- What can I do to make my project more easily understandable?
Objectives
- Know what makes a good README file
Writing good README files
The README file is the first thing a user/collaborator sees. It should include:
- A descriptive project title
- Motivation (why the project exists)
- How to setup
- Copy-pastable quick start code example
- Link or instructions for contributing
- Recommended citation
Exercise README: Draft or improve a README for your project
Create a new file called README.md in your local project (or improve the README.md file for your project).
You can work individually, but you could also discuss whether anything can be improved on your neighbour’s README file(s).
Think about the user (which can be a future you) of your project, what does this user need to know to use or contribute to the project? And how do you make your project attractive to use or contribute to?
(Optional): Try the https://hemingwayapp.com/ to analyse your README file and make your writing bold and clear.
Uploading your README file to GitHub
Follow these steps to add (the changes to) your README file to GitHub:
Go to your GitHub repository and refresh the home page to see how the README file becomes a sort of landing page for your project.
(Optional) Other types of documentation.
In-code documentation
In-code documentation:
- Makes code more understandable
- Explains decisions we made
When not to use in-code documentation:
- When the code is self-explanatory
- To replace good variable/function names
- To replace version control
- To keep old (zombie) code around
Readable code vs commented code
vs
Writing good comments - In-code-1: Comments
Let’s take a look at two example comments (comments in Python start
with #):
Comment A
PYTHON
  # now we check if temperature is below -50
  if temperature < -50:
      print("ERROR: temperature is too low")
Comment B
PYTHON
  # we regard temperatures below -50 degrees as measurement errors
  if temperature < -50:
      print("ERROR: temperature is too low")
Which of these comments is more useful? Can you explain why?
- Comment A describes what happens in this piece of code. This can be useful for somebody who has never seen Python or a program, but for somebody who has, it can feel like a redundant commentary.
- Comment B is probably more useful as it describes why this piece of code is there, i.e. its purpose.
What are “docstrings” and how can they be useful?
Here is function fahrenheit_to_celsius which converts
temperature in Fahrenheit to Celsius.
The first set of examples uses regular comments:
PYTHON
# This function converts a temperature in Fahrenheit to Celsius.
def fahrenheit_to_celsius(temp_f: float) -> float:
    temp_c = (temp_f - 32.0) * (5.0/9.0)
    return temp_c
The second set uses docstrings or similar concepts. Please compare the two (above and below):
PY
def fahrenheit_to_celsius(temp_f: float) -> float:
    """
    Converts a temperature in Fahrenheit to Celsius.

    Parameters
    ----------
    temp_f : float
        The temperature in Fahrenheit.

    Returns
    -------
    float
        The temperature in Celsius.
    """

    temp_c = (temp_f - 32.0) * (5.0/9.0)
    return temp_c
Docstrings can do a bit more than just comments:
Tools can generate help text automatically from the docstrings.
Tools can generate documentation pages automatically from code.
It is common to write docstrings for functions, classes, and modules.
Good docstrings describe:
What the function does.
What goes in (including the type of the input variables).
What goes out (including the return type).
Naming is documentation: Giving explicit, descriptive names to your code segments (functions, classes, variables) already provides very useful and important documentation. In practice you will find that for simple functions it is unnecessary to add a docstring when the function name and variable names already give enough information.
User/API documentation
- What if a README file is not enough?
- How do I easily create user documentation?
Content from Coding conventions and modular coding
Last updated on 2025-04-03 | Edit this page
Overview
Questions
- Why should you follow software code style conventions?
- What code style conventions can you use in Python and R?
- How can nested code be targeted and improved through modularization?
- How can I write a new function in R?
Objectives
- Know how to write readable code
- Know how to write modular code
Coding conventions and style guides
Readable code - for others and our future selves - should be descriptive, cleanly and consistently formatted, and use sensible, descriptive names for variables, functions and modules.
In order to help us format our code, we can follow guidelines known as a style guide. A style guide is a set of conventions that we agree upon with our colleagues or community, to ensure that people produce code which looks similar in style. The most important thing about a style guide is that it provides consistency, making code easier to read and also easier to write - because you need to make fewer decisions.
Challenge
Modular coding
What is modularity?
Modularity refers to the practice of building software from smaller, self-contained, and independent elements. Each element is designed to handle a specific set of tasks, contributing to the overall functionality of the system.
Modular coding is explained in more detail in these slides.
Writing functions
One of the best ways to improve your code and to make it more modular is to write functions. Functions allow you to automate common tasks in a more powerful and general way than copy-and-pasting. Writing a function has four big advantages over using copy-and-paste:
You can give a function an evocative name that makes your code easier to understand.
As requirements change, you only need to update code in one place, instead of many.
You eliminate the chance of making incidental mistakes when you copy and paste (i.e. updating a variable name in one place, but not in another).
It makes it easier to reuse work from project-to-project, increasing your productivity over time.
A good rule of thumb is to consider writing a function whenever you’ve copied and pasted a block of code more than twice (i.e. you now have three copies of the same code).
Defining a function
Challenge: Identify code that can be put in a function
In your own project: identify code that would fit better in a function. Try to look for pieces of code that you repeat throughout your project.
Create an issue in your project for each possible function that you find. (Actually implementing the function is beyond the scope of this workshop).
GitHub issues are a good way to track your progress and to-do list. As well as a way for others to signal issues with your code.
(Optional) Modularity in Python
Challenge
Carefully review the following code snippet:
PYTHON
def convert_temperature(temperature, unit):
if unit == "F":
# Convert Fahrenheit to Celsius
celsius = (temperature - 32) * (5 / 9)
if celsius < -273.15:
# Invalid temperature, below absolute zero
return "Invalid temperature"
else:
# Convert Celsius to Kelvin
kelvin = celsius + 273.15
if kelvin < 0:
# Invalid temperature, below absolute zero
return "Invalid temperature"
else:
fahrenheit = (celsius * (9 / 5)) + 32
if fahrenheit < -459.67:
# Invalid temperature, below absolute zero
return "Invalid temperature"
else:
return celsius, kelvin
elif unit == "C":
# Convert Celsius to Fahrenheit
fahrenheit = (temperature * (9 / 5)) + 32
if fahrenheit < -459.67:
# Invalid temperature, below absolute zero
return "Invalid temperature"
else:
# Convert Celsius to Kelvin
kelvin = temperature + 273.15
if kelvin < 0:
# Invalid temperature, below absolute zero
return "Invalid temperature"
else:
return fahrenheit, kelvin
elif unit == "K":
# Convert Kelvin to Celsius
celsius = temperature - 273.15
if celsius < -273.15:
# Invalid temperature, below absolute zero
return "Invalid temperature"
else:
# Convert Celsius to Fahrenheit
fahrenheit = (celsius * (9 / 5)) + 32
if fahrenheit < -459.67:
# Invalid temperature, below absolute zero
return "Invalid temperature"
else:
return celsius, fahrenheit
else:
return "Invalid unit"Refactor the code by extracting functions without altering its functionality.
- What functions did you create?
- What strategies did you use to identify them?
Share your answers in the collaborative document.
PYTHON
def celsius_to_fahrenheit(celsius):
"""
Converts a temperature from Celsius to Fahrenheit.
Args:
celsius (float): The temperature in Celsius.
Returns:
float: The temperature in Fahrenheit.
"""
return (celsius * (9 / 5)) + 32
def fahrenheit_to_celsius(fahrenheit):
"""
Converts a temperature from Fahrenheit to Celsius.
Args:
fahrenheit (float): The temperature in Fahrenheit.
Returns:
float: The temperature in Celsius.
"""
return (fahrenheit - 32) * (5 / 9)
def celsius_to_kelvin(celsius):
"""
Converts a temperature from Celsius to Kelvin.
Args:
celsius (float): The temperature in Celsius.
Returns:
float: The temperature in Kelvin.
"""
return celsius + 273.15
def kelvin_to_celsius(kelvin):
"""
Converts a temperature from Kelvin to Celsius.
Args:
kelvin (float): The temperature in Kelvin.
Returns:
float: The temperature in Celsius.
"""
return kelvin - 273.15
def check_temperature_validity(temperature, unit):
"""
Checks if a temperature is valid for a given unit.
Args:
temperature (float): The temperature to check.
unit (str): The unit of the temperature. Must be "C", "F", or "K".
Returns:
bool: True if the temperature is valid, False otherwise.
"""
abs_zero = {"C": -273.15, "F": -459.67, "K": 0}
if temperature < abs_zero[unit]:
return False
return True
def check_unit_validity(unit):
"""
Checks if a unit is valid.
Args:
unit (str): The unit to check. Must be "C", "F", or "K".
Returns:
bool: True if the unit is valid, False otherwise.
"""
if not unit in ["C", "F", "K"]:
return False
return True
def convert_temperature(temperature, unit):
"""
Converts a temperature from one unit to another.
Args:
temperature (float): The temperature to convert.
unit (str): The unit of the temperature. Must be "C", "F", or "K".
Returns:
tuple: A tuple containing the converted temperature in Celsius and Kelvin units.
Raises:
ValueError: If the unit is not "C", "F", or "K".
ValueError: If the temperature is below absolute zero for the given unit.
Examples:
>>> convert_temperature(32, "F")
(0.0, 273.15)
>>> convert_temperature(0, "C")
(32.0, 273.15)
>>> convert_temperature(273.15, "K")
(0.0, -459.67)
"""
if not check_unit_validity(unit):
raise ValueError("Invalid unit")
if not check_temperature_validity(temperature, unit):
raise ValueError("Invalid temperature")
if unit == "F":
celsius = fahrenheit_to_celsius(temperature)
kelvin = celsius_to_kelvin(celsius)
return celsius, kelvin
if unit == "C":
fahrenheit = celsius_to_fahrenheit(temperature)
kelvin = celsius_to_kelvin(temperature)
return fahrenheit, kelvin
if unit == "K":
celsius = kelvin_to_celsius(temperature)
fahrenheit = celsius_to_fahrenheit(celsius)
return celsius, fahrenheit
if __name__ == "__main__":
print(convert_temperature(0, "C"))
print(convert_temperature(0, "F"))
print(convert_temperature(0, "K"))
print(convert_temperature(-500, "K"))
print(convert_temperature(-500, "C"))
print(convert_temperature(-500, "F"))
print(convert_temperature(-500, "B"))PYTHON
class TemperatureConverter:
"""
A class for converting temperatures between Celsius, Fahrenheit, and Kelvin.
"""
def __init__(self):
"""
Initializes the TemperatureConverter object with a dictionary of absolute zero temperatures for each unit.
"""
self.abs_zero = {"C": -273.15, "F": -459.67, "K": 0}
def celsius_to_fahrenheit(self, celsius):
"""
Converts a temperature from Celsius to Fahrenheit.
Args:
celsius (float): The temperature in Celsius.
Returns:
float: The temperature in Fahrenheit.
"""
return (celsius * (9 / 5)) + 32
def fahrenheit_to_celsius(self, fahrenheit):
"""
Converts a temperature from Fahrenheit to Celsius.
Args:
fahrenheit (float): The temperature in Fahrenheit.
Returns:
float: The temperature in Celsius.
"""
return (fahrenheit - 32) * (5 / 9)
def celsius_to_kelvin(self, celsius):
"""
Converts a temperature from Celsius to Kelvin.
Args:
celsius (float): The temperature in Celsius.
Returns:
float: The temperature in Kelvin.
"""
return celsius + 273.15
def kelvin_to_celsius(self, kelvin):
"""
Converts a temperature from Kelvin to Celsius.
Args:
kelvin (float): The temperature in Kelvin.
Returns:
float: The temperature in Celsius.
"""
return kelvin - 273.15
def check_temperature_validity(self, temperature, unit):
"""
Checks if a given temperature is valid for a given unit.
Args:
temperature (float): The temperature to check.
unit (str): The unit to check the temperature against.
Returns:
bool: True if the temperature is valid for the unit, False otherwise.
"""
if temperature < self.abs_zero[unit]:
return False
return True
def check_unit_validity(self, unit):
"""
Checks if a given unit is valid.
Args:
unit (str): The unit to check.
Returns:
bool: True if the unit is valid, False otherwise.
"""
if unit not in ["C", "F", "K"]:
return False
return True
def convert_temperature(self, temperature, unit):
"""
Converts a temperature from one unit to another.
Args:
temperature (float): The temperature to convert.
unit (str): The unit of the temperature.
Returns:
tuple: A tuple containing the converted temperature in the other two units.
"""
if not self.check_unit_validity(unit):
raise ValueError("Invalid unit")
if not self.check_temperature_validity(temperature, unit):
raise ValueError("Invalid temperature")
if unit == "F":
celsius = self.fahrenheit_to_celsius(temperature)
kelvin = self.celsius_to_kelvin(celsius)
return celsius, kelvin
if unit == "C":
fahrenheit = self.celsius_to_fahrenheit(temperature)
kelvin = self.celsius_to_kelvin(temperature)
return fahrenheit, kelvin
if unit == "K":
celsius = self.kelvin_to_celsius(temperature)
fahrenheit = self.celsius_to_fahrenheit(celsius)
return celsius, fahrenheit
if __name__ == "__main__":
converter = TemperatureConverter()
print(converter.convert_temperature(0, "C"))
print(converter.convert_temperature(0, "F"))
print(converter.convert_temperature(0, "K"))
print(converter.convert_temperature(-500, "K"))
print(convert_temperature(-500, "C"))
print(convert_temperature(-500, "F"))
print(convert_temperature(0, "X"))(Optional): Writing good functions in R
Challenge 1
Write a function called kelvin_to_celsius() that takes a
temperature in Kelvin and returns that temperature in Celsius.
Hint: To convert from Kelvin to Celsius you subtract 273.15
Write a function called kelvin_to_celsius that takes a
temperature in Kelvin and returns that temperature in Celsius
R
kelvin_to_celsius <- function(temp) {
celsius <- temp - 273.15
return(celsius)
}
Combining functions
The real power of functions comes from mixing, matching and combining them into ever-larger chunks to get the effect we want.
Let’s define two functions that will convert temperature from Fahrenheit to Kelvin, and Kelvin to Celsius:
R
fahr_to_kelvin <- function(temp) {
  kelvin <- ((temp - 32) * (5 / 9)) + 273.15
  return(kelvin)
}
kelvin_to_celsius <- function(temp) {
 celsius <- temp - 273.15
 return(celsius)
}
Challenge 2
Define the function to convert directly from Fahrenheit to Celsius, by reusing the two functions above (or using your own functions if you prefer).
Define the function to convert directly from Fahrenheit to Celsius, by reusing these two functions above
R
fahr_to_celsius <- function(temp) {
  temp_k <- fahr_to_kelvin(temp)
  result <- kelvin_to_celsius(temp_k)
  return(result)
}
The Modular coding section is based on the following sources:
- Modular Code Development from Good practices in research software development
- Functions explained from R for Reproducible Scientific Analysis Software Carpentry lesson
- Functions chapter from R for Data Science (2e)
Key Points
- Coding conventions help you create more readable code that is easier to reuse and contribute to.
- Consistently formatted code including descriptive variable and function names is easier to read and write
- Software is built from smaller, self-contained elements, each handling specific tasks.
- Modular code enhances robustness, readability, and ease of maintenance.
- Modules can be reused across projects, promoting efficiency.
- Good modules perform limited, defined tasks and have descriptive names.
Content from Further improvements to your project
Last updated on 2024-12-03 | Edit this page
Overview
Questions
- What other improvements can I make to make my project more reproducible?
Objectives
- Add a license to your project
- Add
howfairisbadge to your README file - Add information about how to cite your project
- Link your project to Zenodo
- Add data to your project
In this part we will add some further improvements to making your project more reproducible.
Try to prioritize what you think will be most beneficial to your project.
Add a license to your project
Pick a license and add it to the repository. Use https://choosealicense.com/ to find a license for your project. Or if you do not know, you can use Apache License 2.0, a common permissive open-source license.
Add howfairis badge to your
README file
Add the howfairis badge to your README file. Follow the
instructions on the howfairis GitHub repo
How FAIR is your project and what do you need to do to improve it? Read more about FAIR software at https://fair-software.nl/
Add information about how to cite your project.
Use cff-initializer to create a CITATION.cff file for your project.
Link your project to Zenodo.
- Create an account at Zenodo
- Link your GitHub repository to Zenodo. Follow the instructions on the page.
By publishing your repository on Zenodo, it will receive a persistent identifier. This will help to avoid link rot, and make your project more FAIR.
Add data to your project.
Make sure you are allowed to publish the data (most importantly, it should be de-identified in the case of human participants).
Publish the data in a data repository and include the link to your data set in your GitHub repository. Data repositories offer organized and structured storage and access of data, ensuring that data sets abide by the FAIR principles , allowing data are findable, accessible, interoperable, and reusable (FAIR) as much as possible.
Alternatively, you can include a data file in your GitHub repository. In case you are unable to share the data, include dummy data in the project.
Make sure all data files are saved in a sustainable file format such as .csv, and that the files and variables are properly named and clearly described.
Key Points
- There are various ways to improve the reproducibility of your project.
Content from Reusability check
Last updated on 2024-12-03 | Edit this page
Overview
Questions
- How reproducible and reusable is your project?
Objectives
- Have your project checked for reproducibility and reusability.
- Check a project for reproducibility and reusability.
Challenge: How reproducible and reusable is your project?
In this challenge you are going to check the reproducibility of each other’s repository.
Review the reproducibility of someone else’s project
Review the reproducibility of the project of one of your peers. Open a new GitHub issue in the project you are reviewing in which you answer these questions:
- Is the code clearly documented and can you reproduce and reuse the
code?
- Are you able to rerun the analysis independently?
- Note: in case of computationally intensive projects, it might be better to partially rerun the analysis (or with fewer repetitions or permutations if needed)
- Which improvements do you suggest to make the code as clear as possible?
If you want your project to be more thoroughly checked for (computational) reproducibility, you can consider submitting your data and code to Reprohack or CODECHECK. Even if you don’t, it would be helpful to take into account their guidelines: both initiatives emphasize that documentation of your code is key!
Key Points
- A check by another pair of eyes is the best way to learn how reproducible and reusable your code is

